How to Create a Newsletter and Send Email Campaigns with Mailpost.io
An email newsletter is a powerful tool that enables a website owner to share material and valuable information with their network of prospects, subscribers, and customers. Aside from engagement based on triggers and actions, it can automatically provide communication between your website and customers by delivering access to product promotions or engaging content.
If your website doesn’t utilize an email newsletter, you should consider starting one. With proper email marketing methods, email newsletters and campaigns can provide a stable return on investment (ROI) as well as other value-add benefits.
There are platforms available online that can help you add and manage your email newsletters on your website without doing it manually in a couple of clicks.
In today’s tutorial, I am going to show you how you can use Mailpost.io and Postcards to easily add a newsletter to your website, manage campaigns and subscribers as well as take control of your email template design in a few simple steps.
Set Up Mailpost.io Account
Mailpost simplifies the email marketing process by providing an easy-to-use platform to create and manage campaigns and subscribers highlighting marketing achievements and giving smart suggestions with a dashboard of insights.
Mailpost helps you collect email subscribers and manage campaigns with an embedded version of the newsletter form to your website.
With Postcards Email Builder you can create and edit email templates online without any coding skills! Includes more than 100 components to help you create custom emails templates faster than ever before.
Free Email BuilderFree Email TemplatesLet’s see this in action.
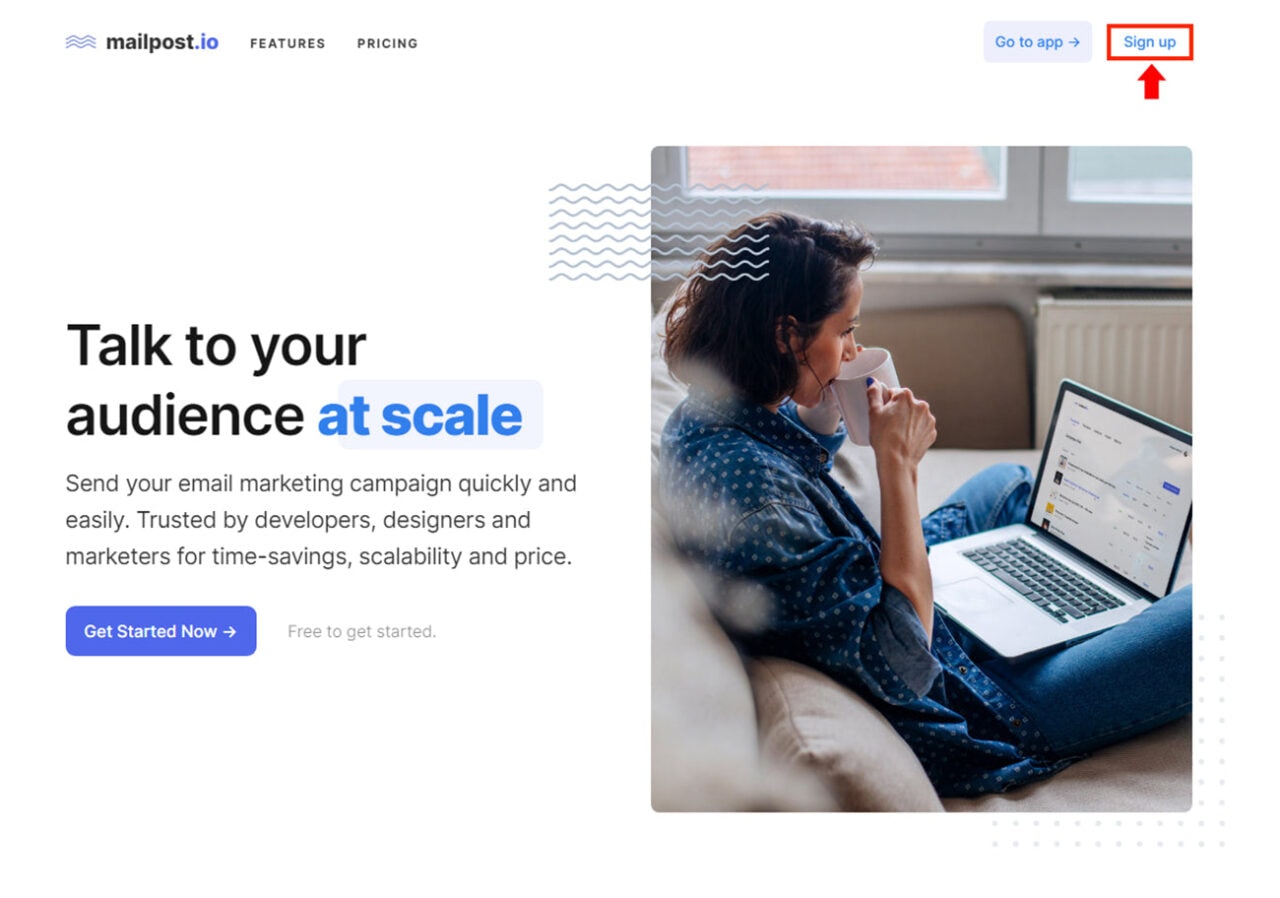
To get started, simply head on to Mailpost.io and register for an account by clicking on the “Signup” button on the upper right corner of the screen.
From here, we’ll need to fill out some basic contact information to get access to Mailpost’s full set of features.
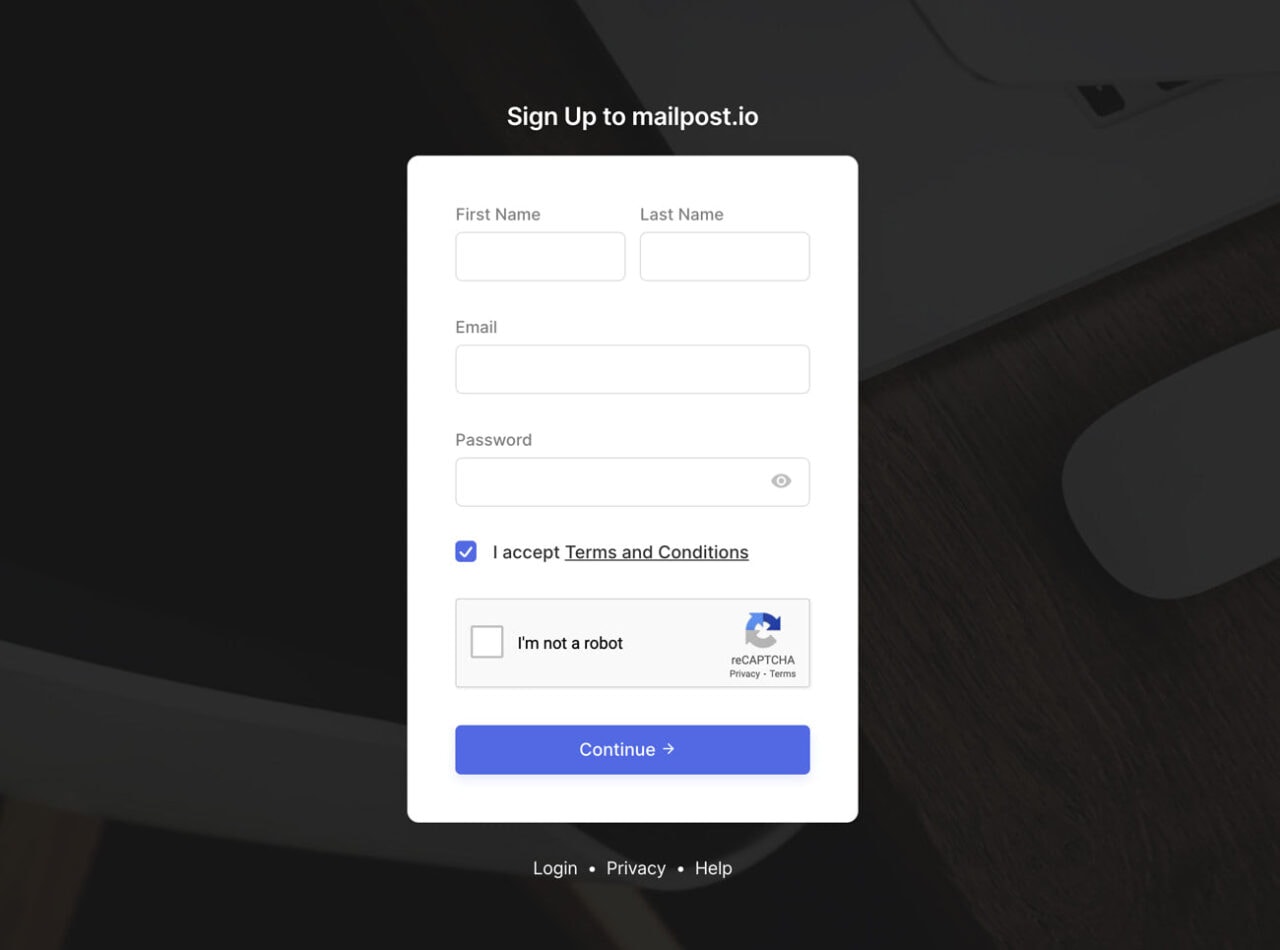
Note: Mailpost doesn’t allow generic email addresses such as Gmail or Yahoo Mail email addresses. To proceed with the signup process, you need to use an email from your own domain (ex. info@example.com).
Once we fill out the entire form, we can wrap up the signup process and get access to the Mailpost.io dashboard as seen in the image below.

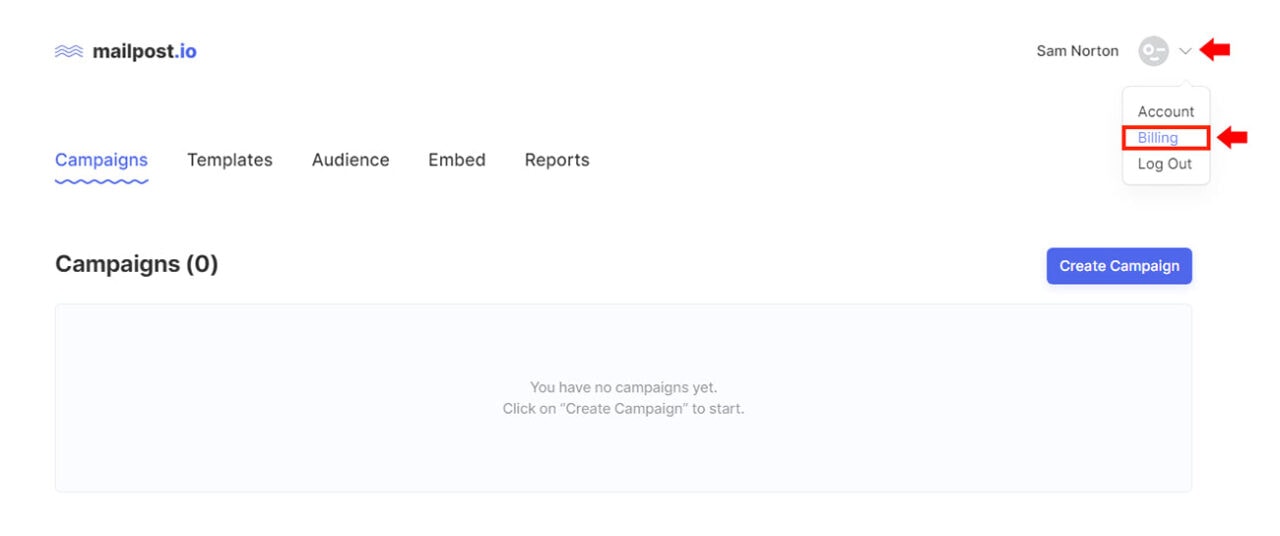
To unlock the free features of Mailpost, we need to visit the billing page first. To do this, simply click on the arrow icon on the upper right corner of the screen right beside our user’s avatar and click on the “Billing” link.
Mailpost offers three plans: Free, Monthly, and Annually. If you wish to upgrade your free trial account to a paid plan, simply select the plan of your choice and click on the “Update Billing Plan” button. To learn more about the pricing plan head on to the pricing section here.
For this tutorial, we’re going to proceed with the free trial account. Let’s select the “Free” plan option and click on the “Update Billing Plan.”
With Startup App and Slides App you can build unlimited websites using the online website editor which includes ready-made designed and coded elements, templates and themes.
Try Startup App Try Slides AppOther Products
At this point, we’re going to be redirected to the front page. To proceed, simply click on the “Get Started” button on the right column.
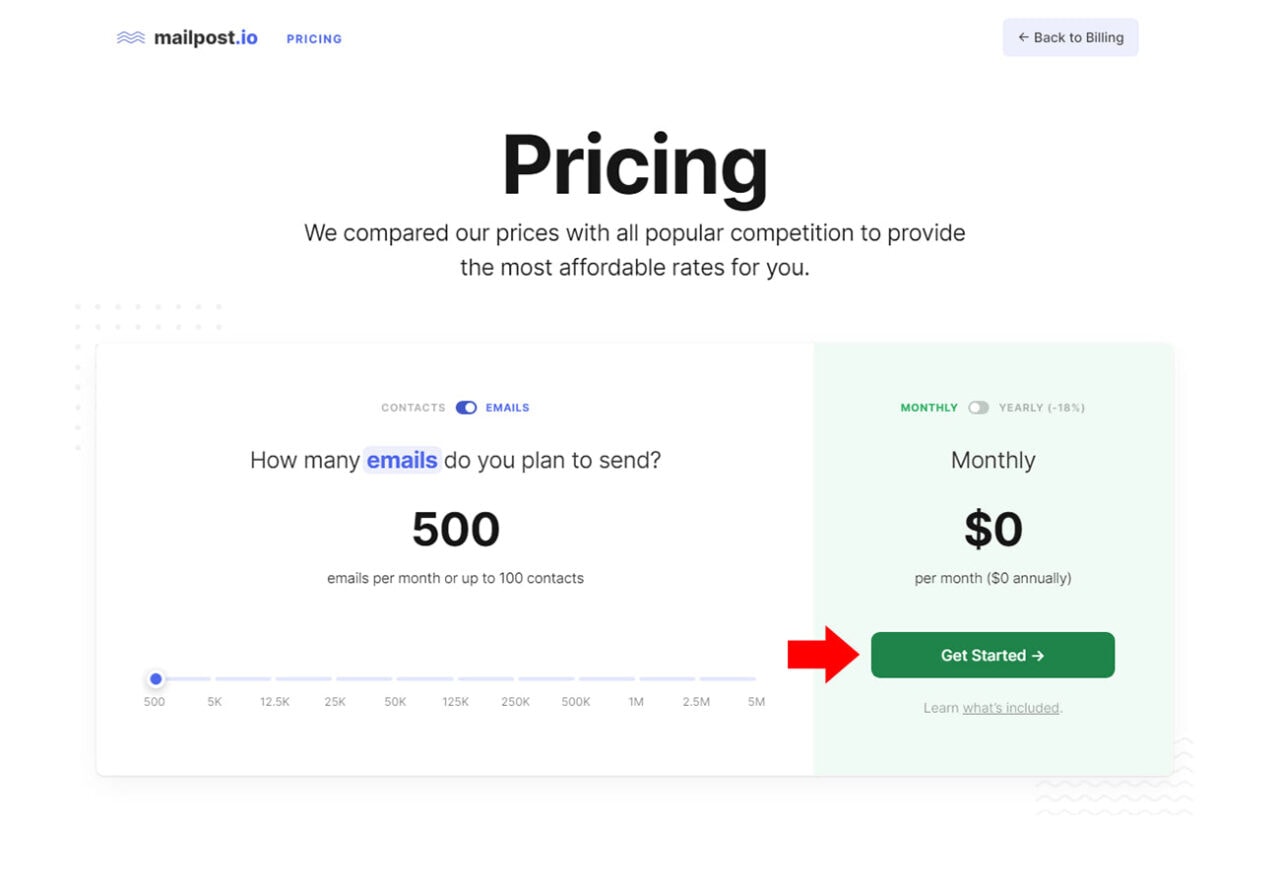
Note: By default, a free account can only send 500 emails per month or up to 100 contacts. If you wish to learn more about the amount you need to pay for a specific number of emails and contacts per month simply drag on the pricing calculator on the left column.
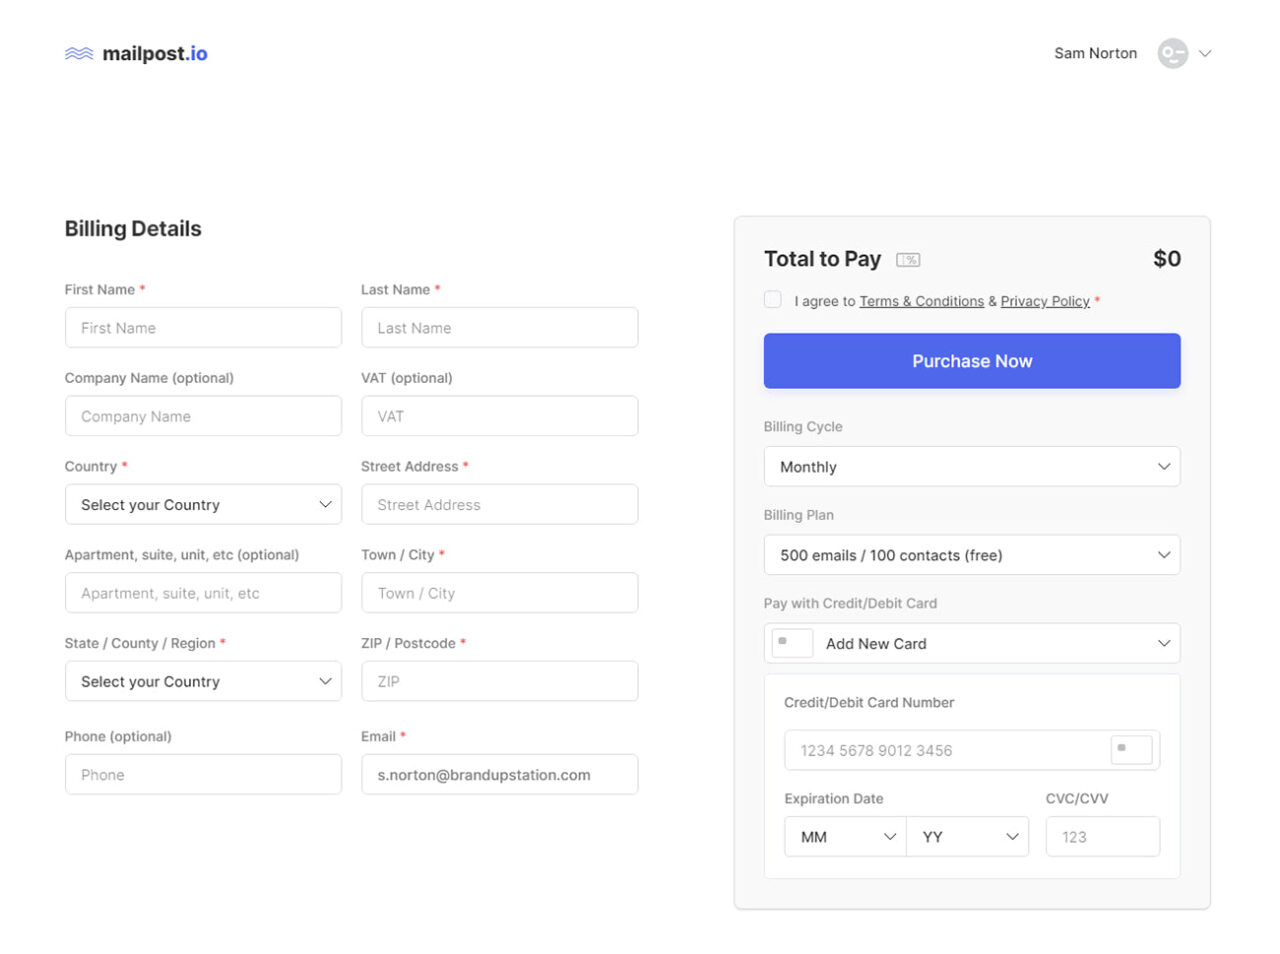
Next, we need to fill up the form with our billing information along with our credit card information to proceed. Once done, check the “I agree to Terms & Conditions & Privacy Policy” checkbox and click on the “Purchase Now” button.
At this point, our free account is now fully verified.
Configuring DKIM Record Settings
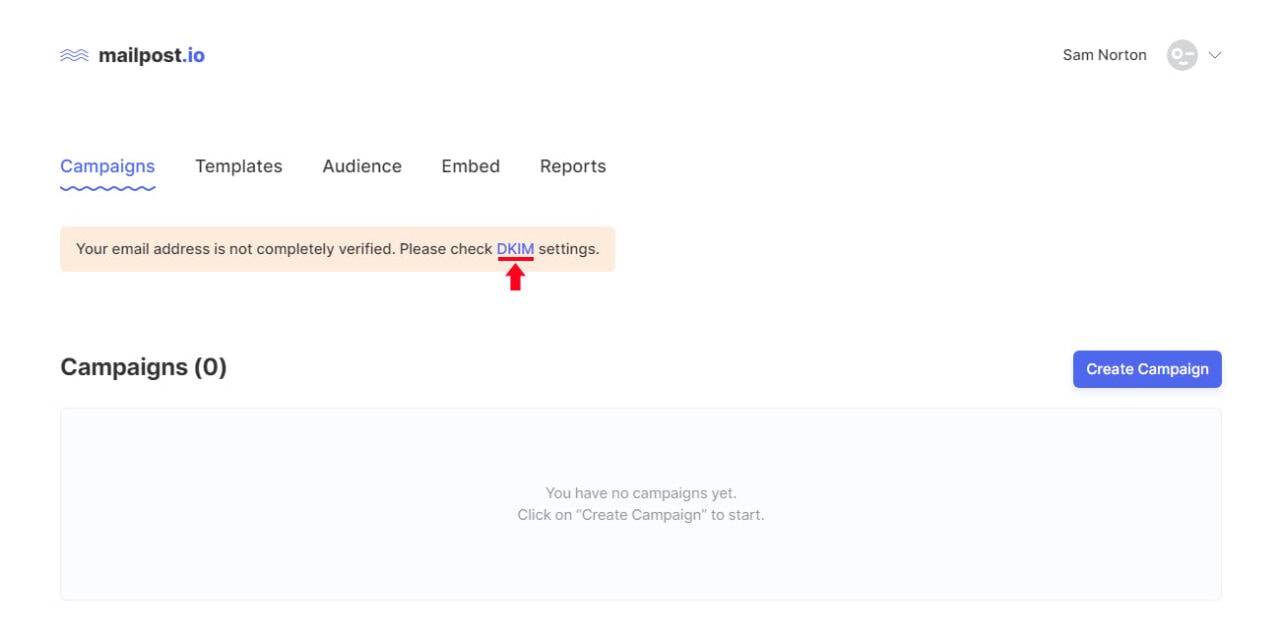
Next, to fully verify our account’s email address, we need to configure the DKIM settings. DomainKeys Identified Mail or DKIM is a standard procedure to help prevent spoofing on outgoing messages sent from our domain as it adds an encrypted signature to the header of all outgoing messages.
In order to do this, click the DKIM link on the dashboard and it will redirect us to the Domain Verification and DKIM record settings.
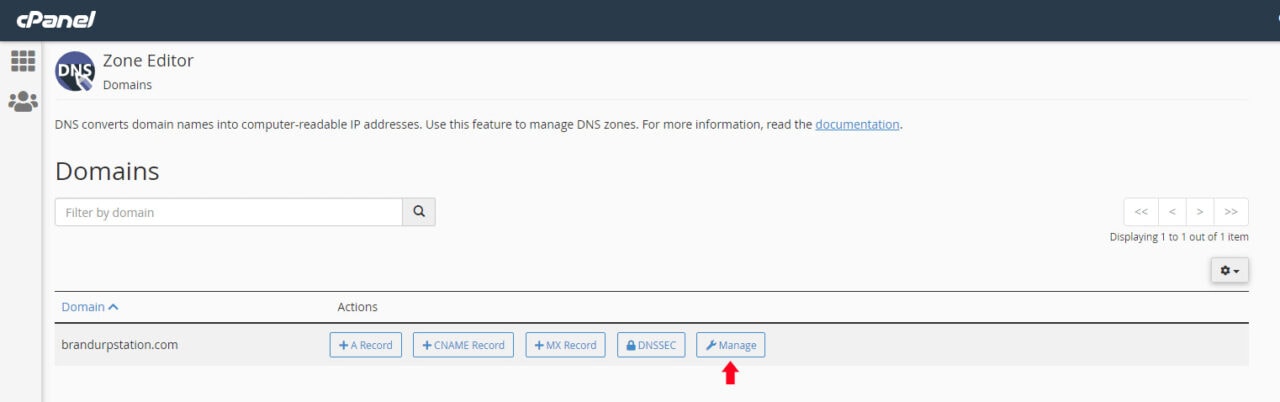
We need to login to our Cpanel account (or in your domain name registrarr) and search for “Zone Editor.” This will redirect us to the Zone Editor page. To proceed, simply click on the “Manage” button next to the domain we are working on.

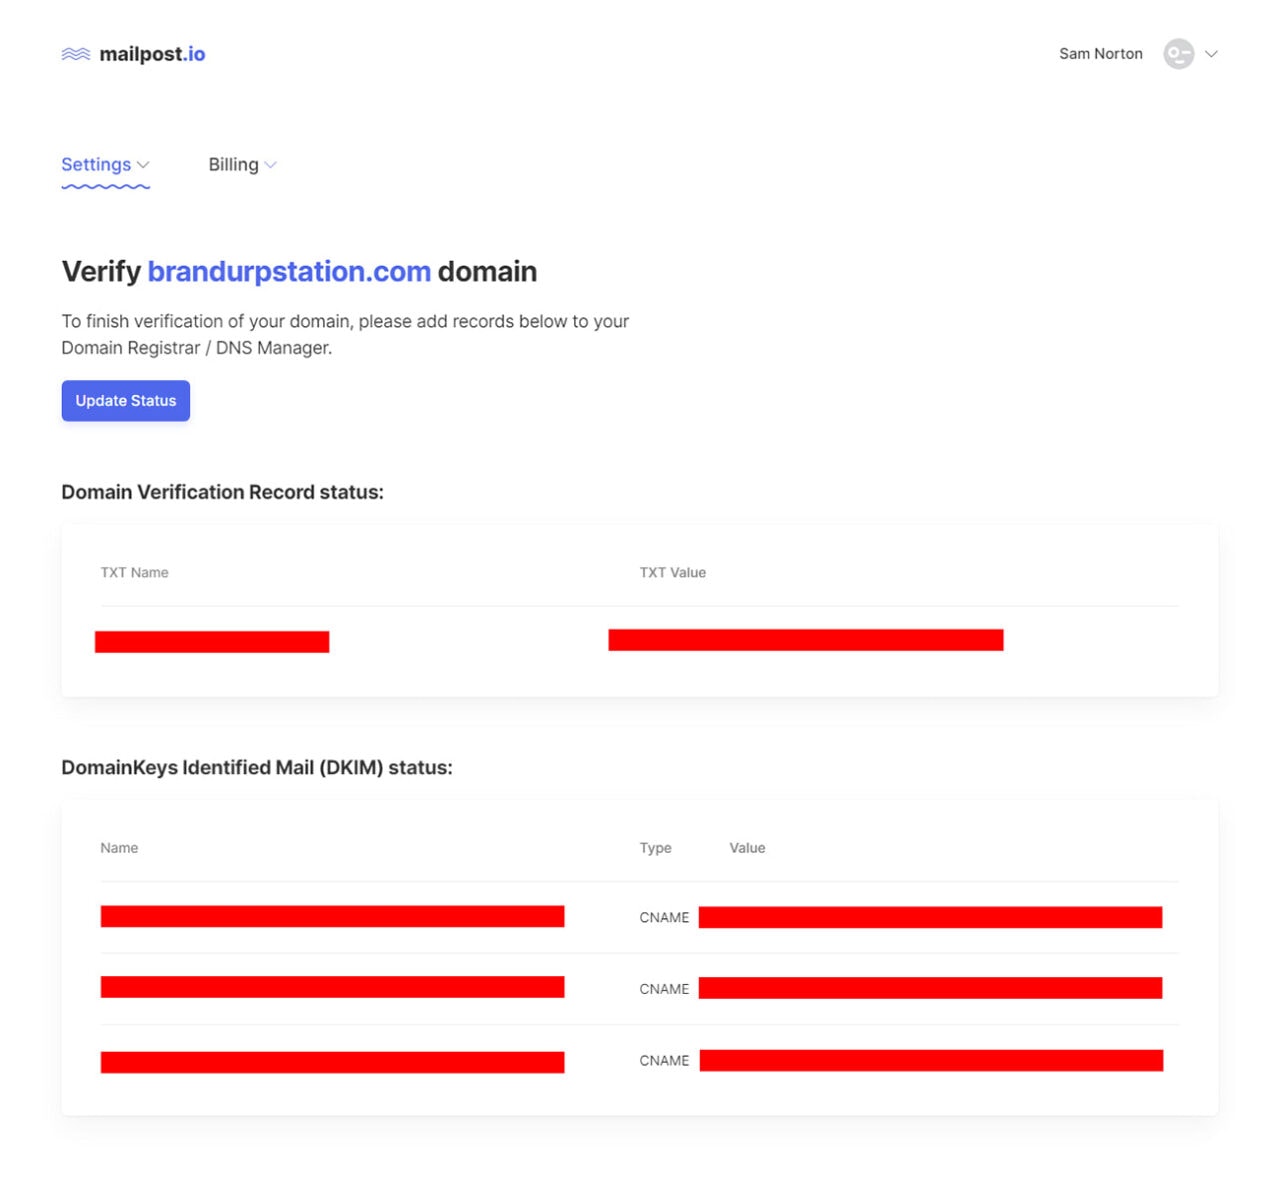
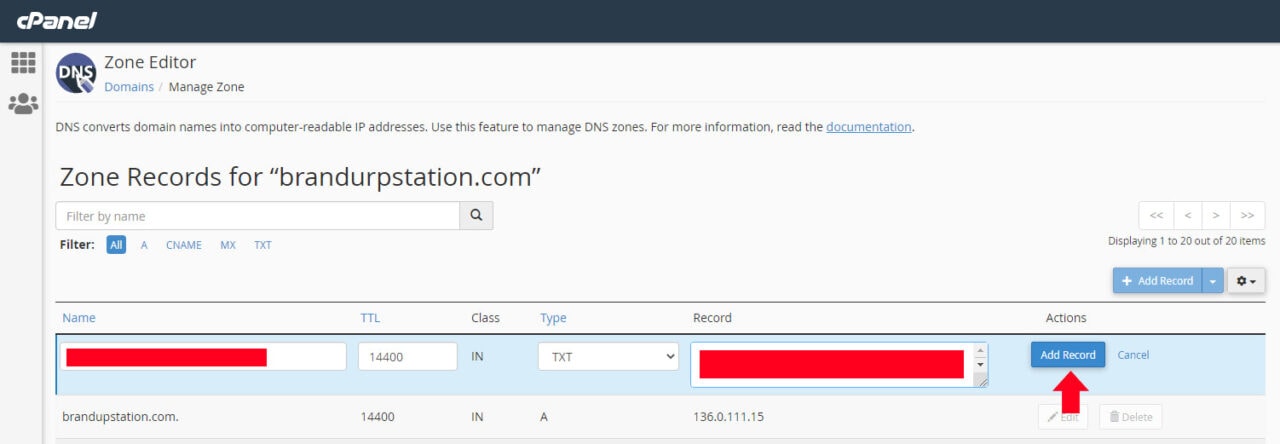
At this point, we will see all Zone Records under the domain we are trying to configure. From here, simply click on the “Add Record” and under “Type” select “TXT.” On the name value, copy the Domain Verification Record from the Mailpost’s Domain Verification and DKIM record settings page and paste it here. Click on the “Add Record” button to save.
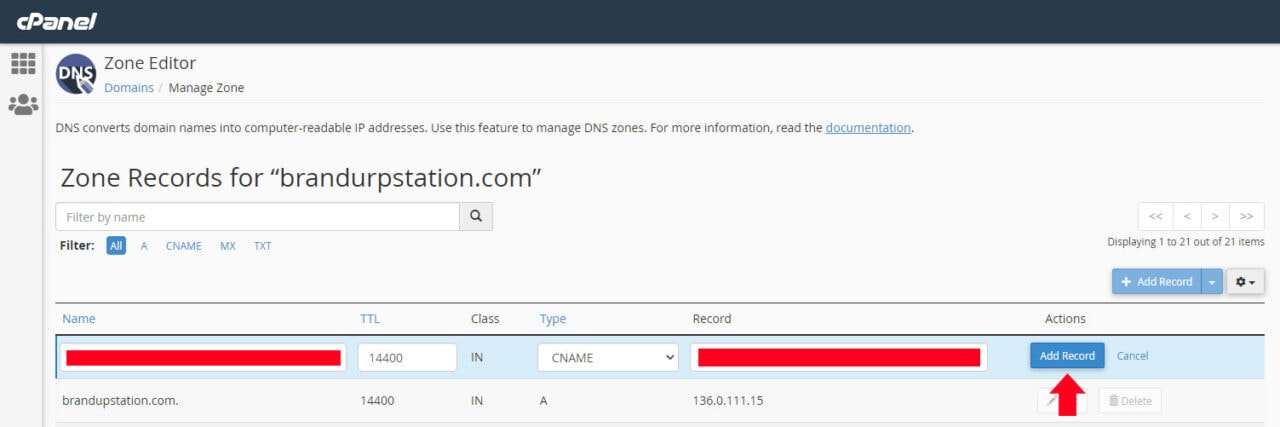
Next, we need a new record similar to the process we did for the Domain Verification Record but this time instead of “TXT” on the “Type,” we will select “CNAME.” We will do it three times twice since there are three DKIM records that we need to add. Copy the three DKIM records under the “Name” field and click on the “Add Record” to save each DKIM record.
Afterward, we need to go back to the Domain Verification and DKIM record settings page and click on the “Update Status” button to update Mailpost settings.
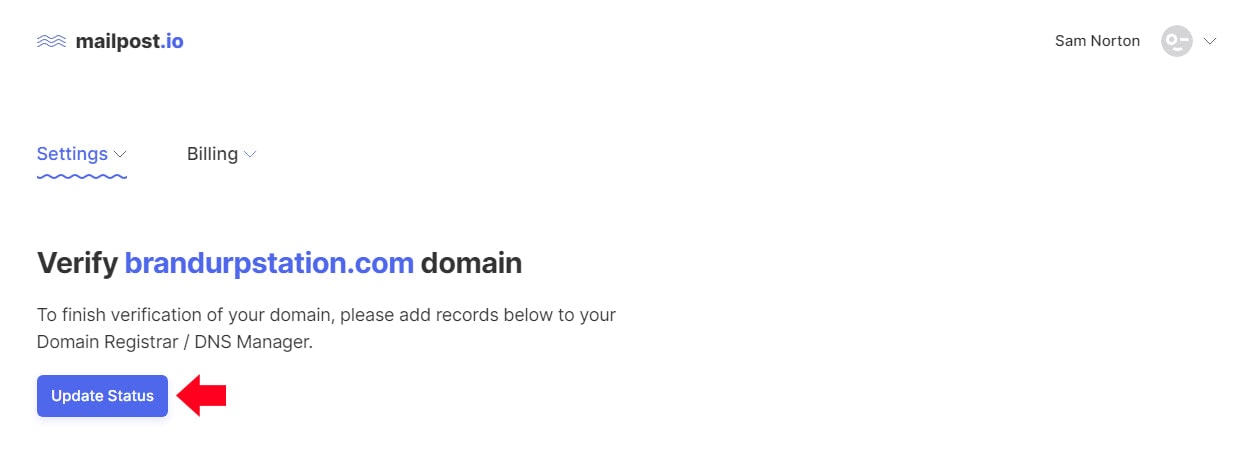
Once we see the “Success” message on the Domain Verification Record and DomainKeys Identified Mail (DKIM) status, that means that our email address and domain are fully verified.
Creating an Audience Group in Mailpost.io
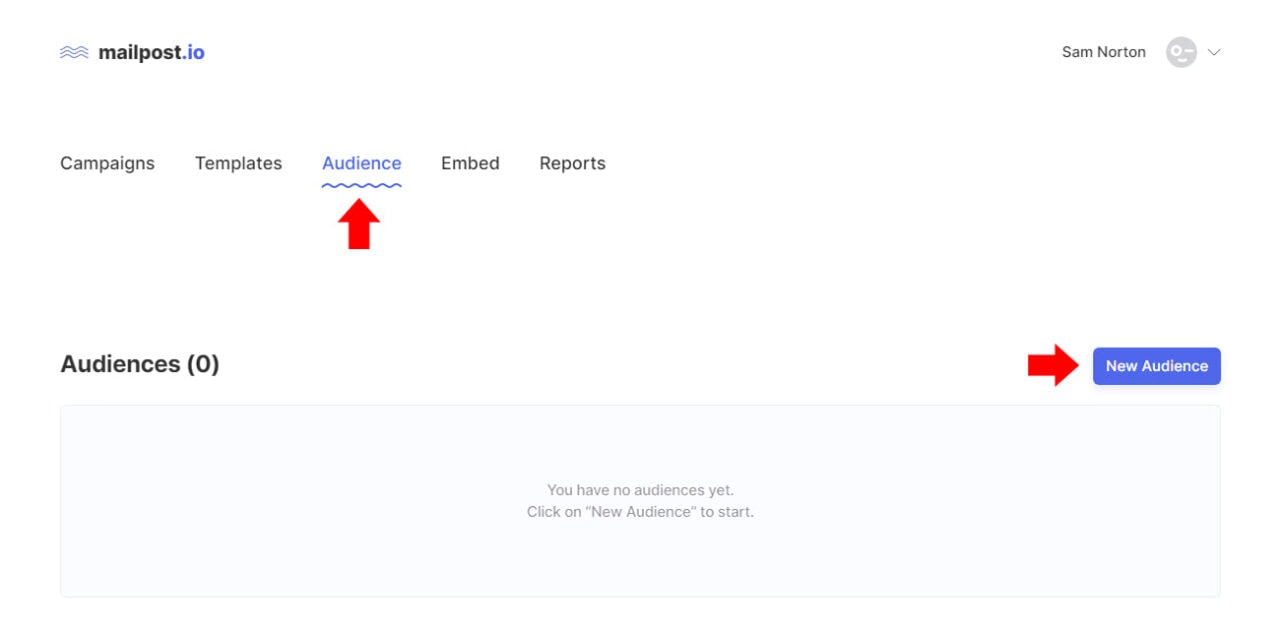
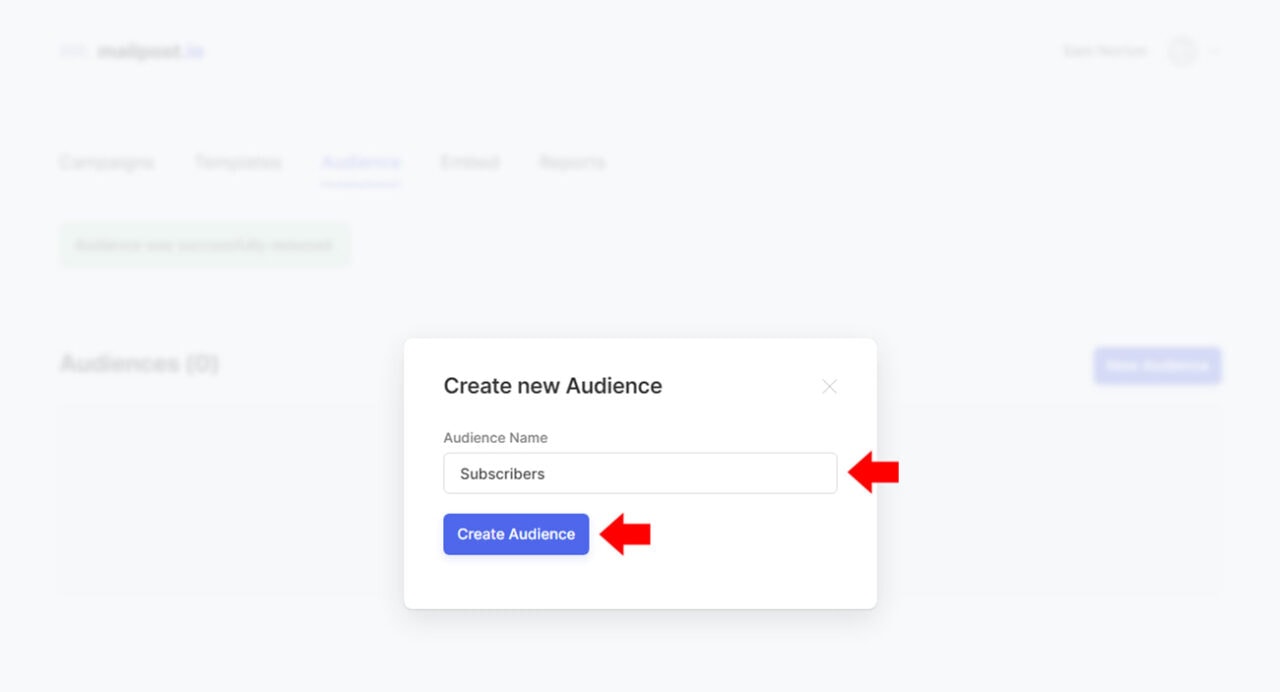
Before we create a new campaign, we need to create a new audience where we will put the subscriber list later on.
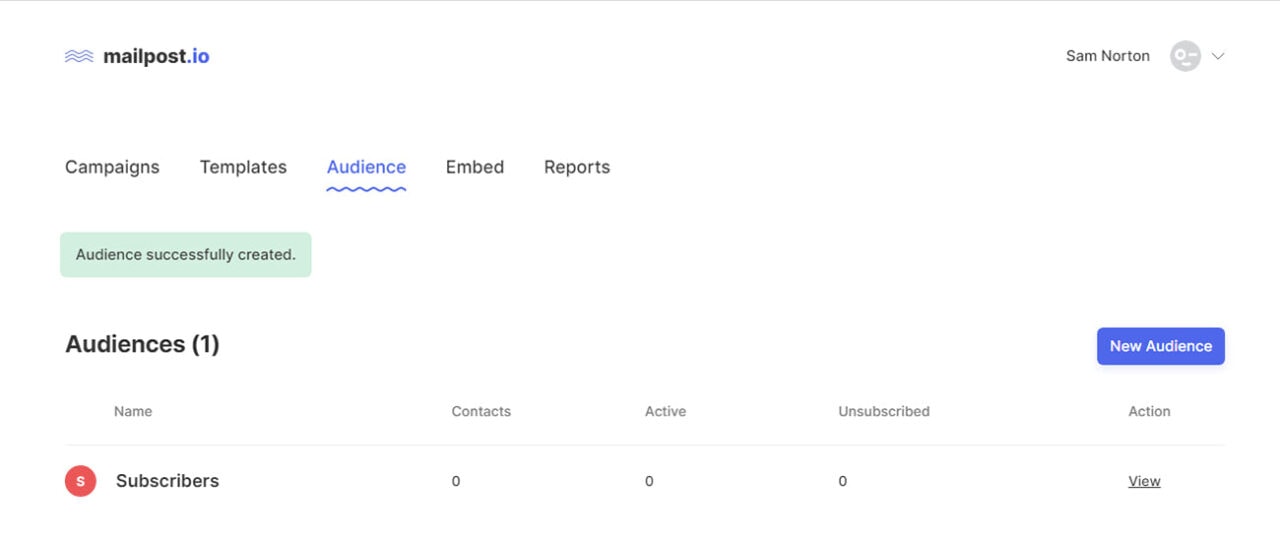
Click on the Audience link and then the “New Audience” button. This will display a modal window where we can put the name of our audience. Since this is a subscribers list, let’s name it “Subscribers” and then click on the “Create Audience” button. Once created, we will see a success message notification confirming the creation of the “Subscribers” audience.
At this point, our “Subscribers” audience is listed on the audience list page.
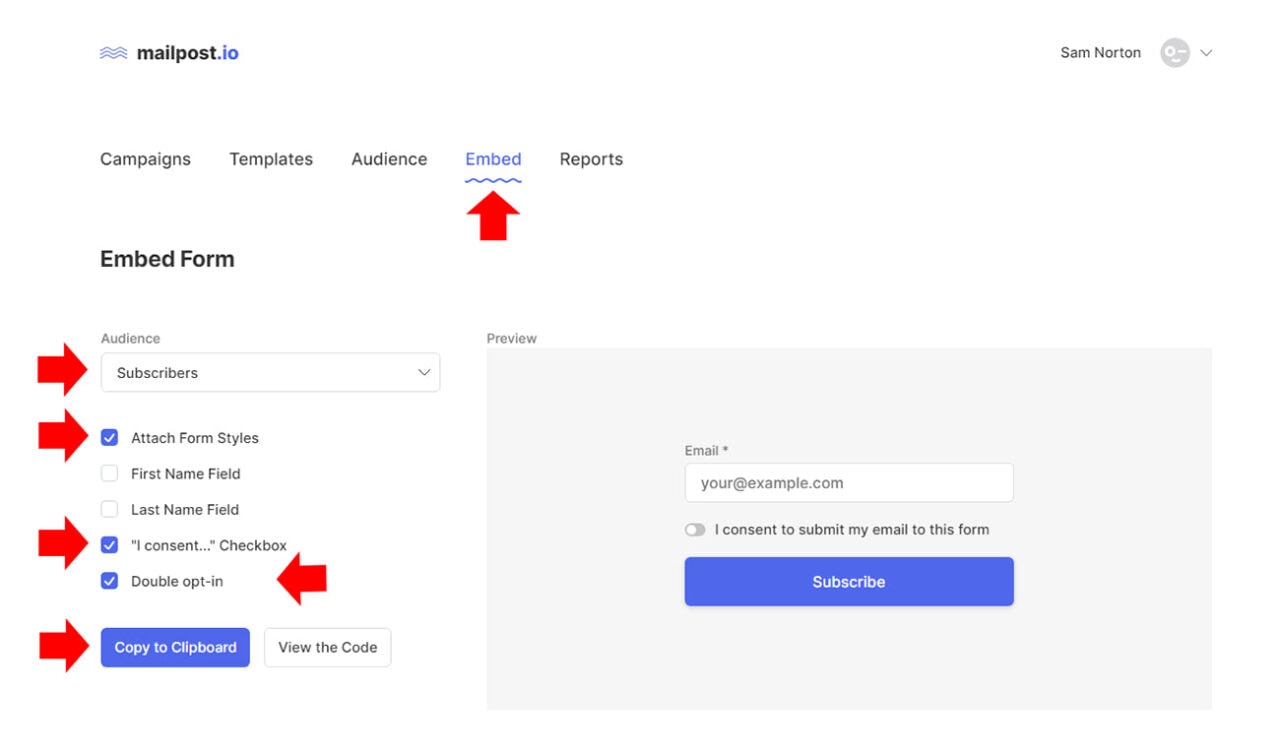
Next, we need to embed our Mailpost newsletter to our website. To do this, click on the “Embed” link on the main menu. This will redirect us to the Embed Form settings page.
On this page, we need to select the audience group where we want our contact list to go once the user subscribes to the form. Additionally, we can exclude and include some fields on the form including the styles if we want to use them for our newsletter design.
Finally, we also have the option to either view the code of the form or copy it to the clipboard. For this example, I will attach the default form styles provided by Mailpost but only the email field, consent checkbox, and double opt-in will be checked or included on the form as seen in the image below. Keep in mind that we can also customize the default styles of the newsletter form.
From here, we need to copy and paste the form code on any part of our website where we would like to display the newsletter form as seen in the image below.
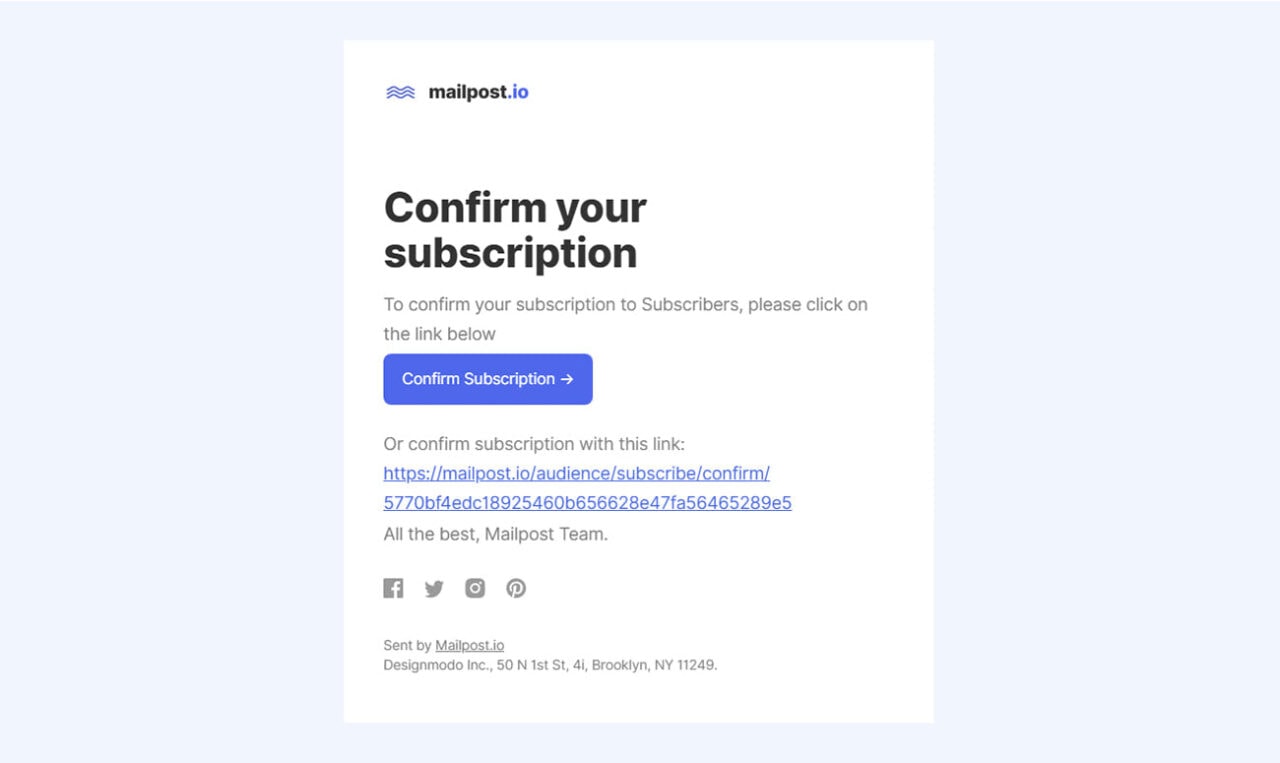
To test this, simply put a test email address on the email field and click on the “Subscribe” button. Once submitted we will receive an email confirmation from Mailpost validating our subscription. Clicking on the “Confirm Subscription” button will fully validate our subscription and will add our email address under the “Subscribers” audience list.

Create an Email Template with Postcards
Postcards is an intuitive email builder for teams and individuals which amps up email marketing ideas. It’s a feature-rich drag and drop email editor with pre-built responsive and customizable blocks. With Postcards, it’s easy to create your own look and feel email design using a modular-based system with built-in, retina-ready content, structural email blocks, and elements. The best part of this application is that it can export your email design template to a list of popular email marketing providers such as HubSpot and Mailchimp but also offers a feature to download the raw HTML/CSS in just one click.
To get started, simply head on to Postcards and signup for a free account by clicking on the “Try For Free” button.

Next, we need to fill in the sign up form with our basic information which will also require us to verify our email after submission.
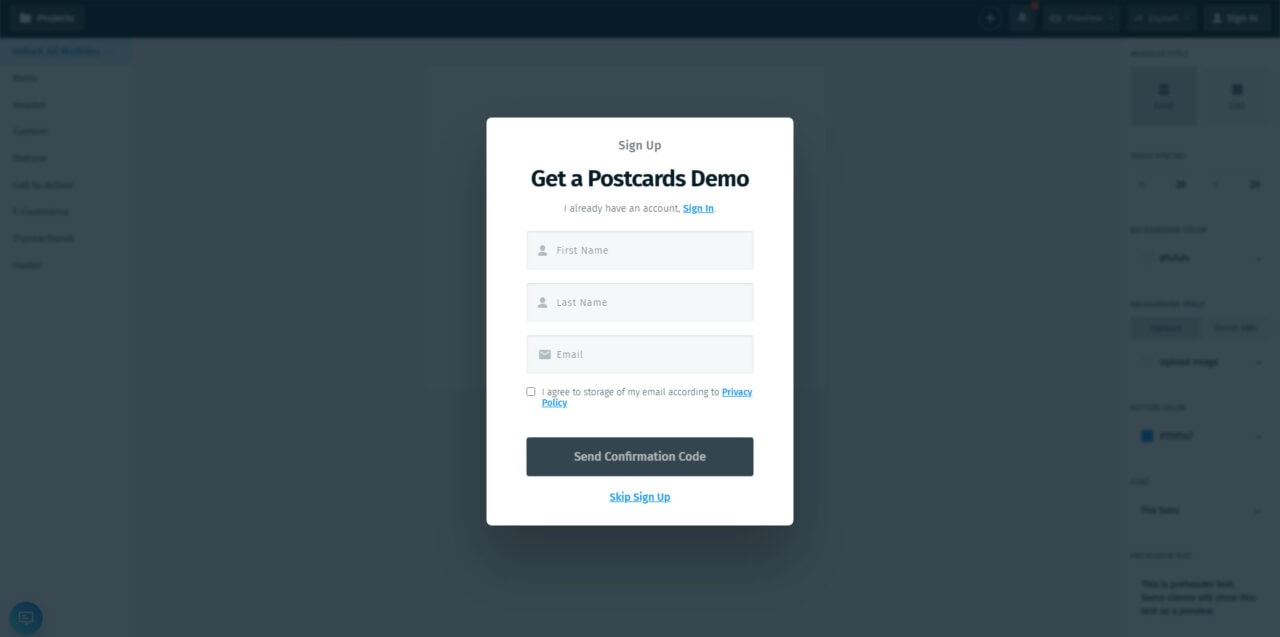
Once verified, we can now login to our account and we will be redirected to the Postcards editor.
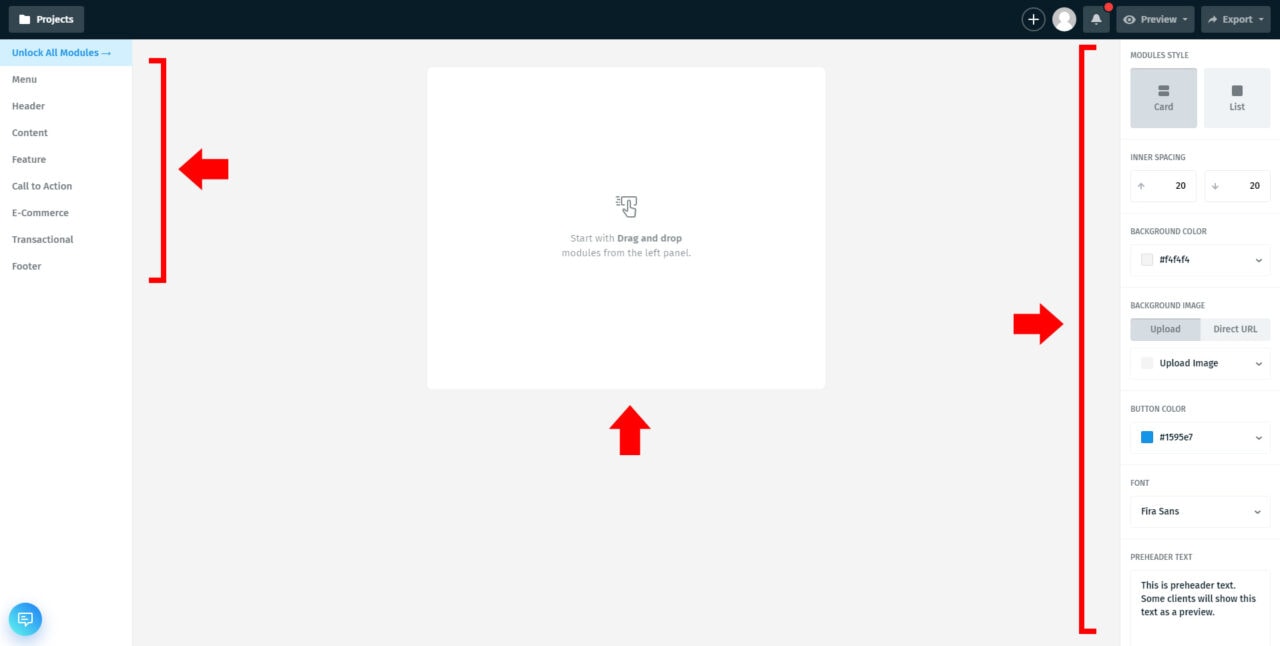
From the editor, we can start dragging and dropping free content blocks from the left panel to the canvas (which is the square box in the middle) to start designing our email template. If we want to customize the module styles such as the inner spacing, background image, button color and font, simply navigate to the right panel of the dashboard and modify the settings.
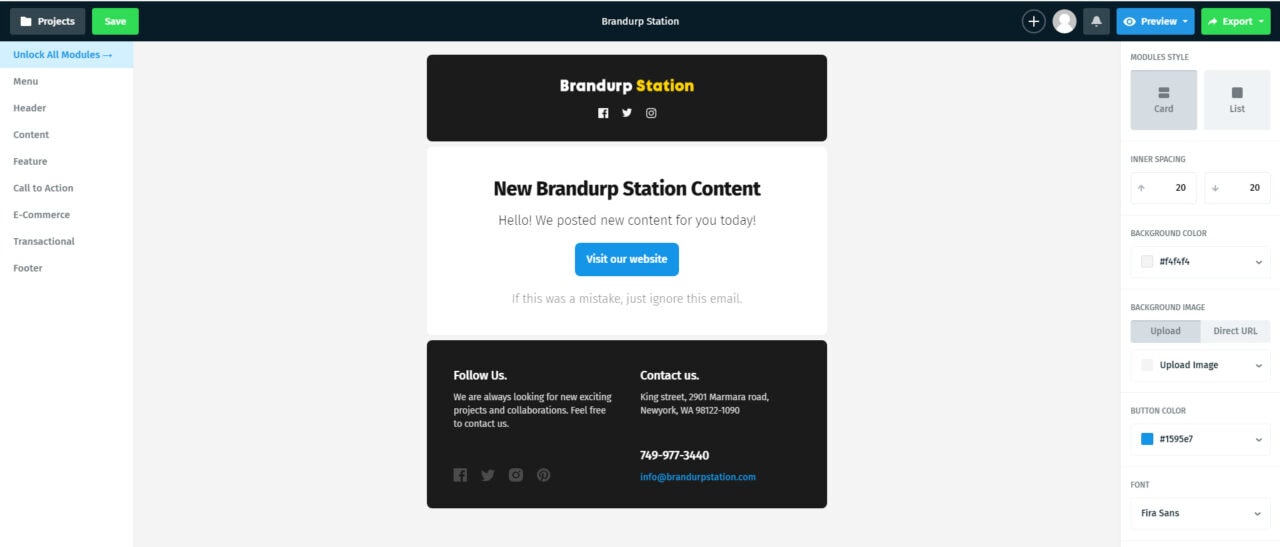
We won’t list all of the steps in detail on how we design the email newsletter here but after taking some time and modifying the email template, we will have a similar result like the image below.
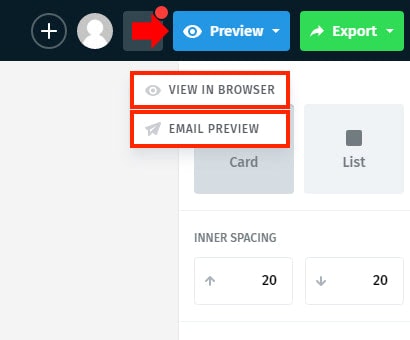
To preview our email template either on the browser or via email before exporting it by clicking on the “Preview” button as seen in the image below.
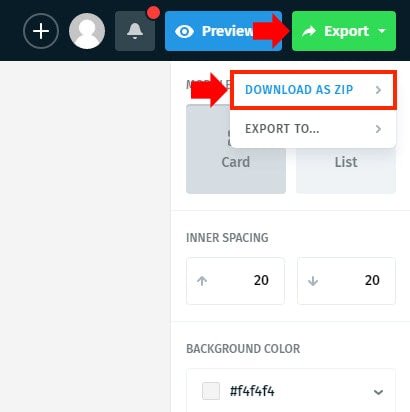
Next, export the email template and download it as zip. To do this, simply click on the “Export” button on the upper right corner of the screen and click on “DOWNLOAD AS ZIP” on the dropdown link. This will download the source code in zip format on our browser.
Note: Hosting images online is only available for users with Agency Plan. See pricing and features for more details.
Once the email template was downloaded on our computer, head on to Mailpost.io for the next step.
Upload an Email Template on Mailpost.io
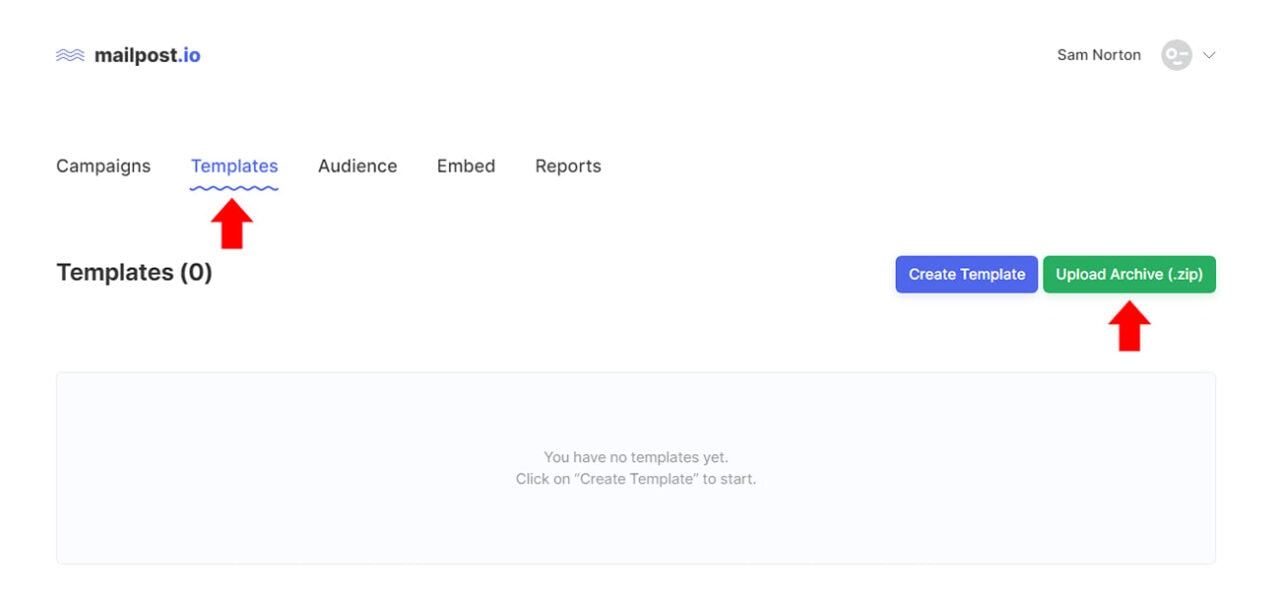
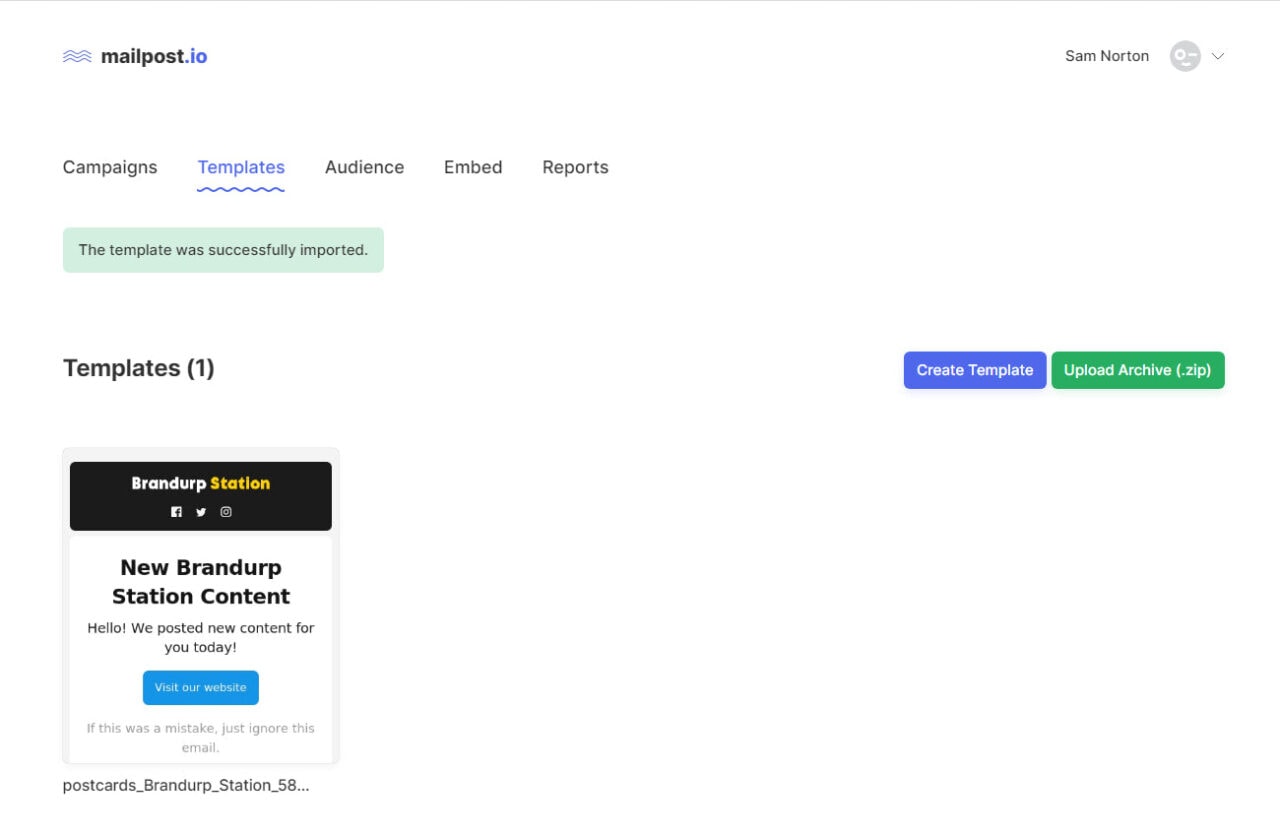
Now, we need to upload our downloaded email template to Mailpost. To do this, head on to Mailpost dashboard and click on the “Templates” link. Then, click on the “Upload Archive (.zip)” button and browse to the downloaded email template zip file on your computer. At this point it will process and upload the email template and once done we will be redirected to the templates list page with a success message.
If we want to edit the code of our email template, simply click on the template box and Mailpost will open a code editor where we can see our editable source code or use the built-in visual editor provided by the platform as seen in the images below.

Create a New Campaign in Mailpost.io
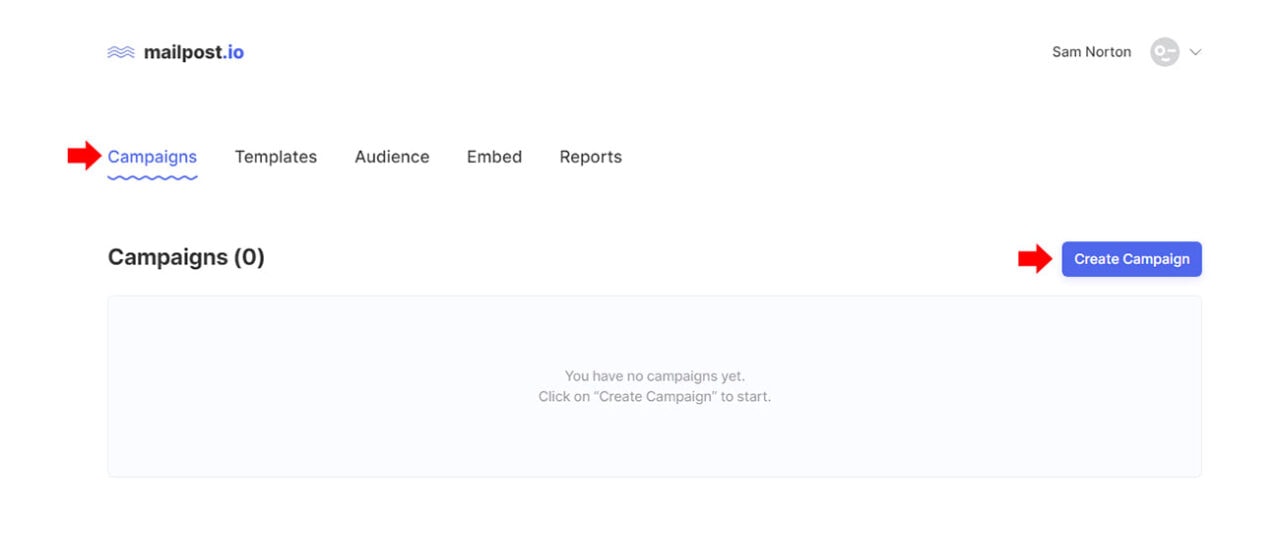
After uploading our email template, let’s create a new campaign where we will send out our email template to all email lists under the “Subscribers” audience.
Click on the “Campaigns” link in the main menu and then click on the “Create Campaign” button on the right corner of the main menu.
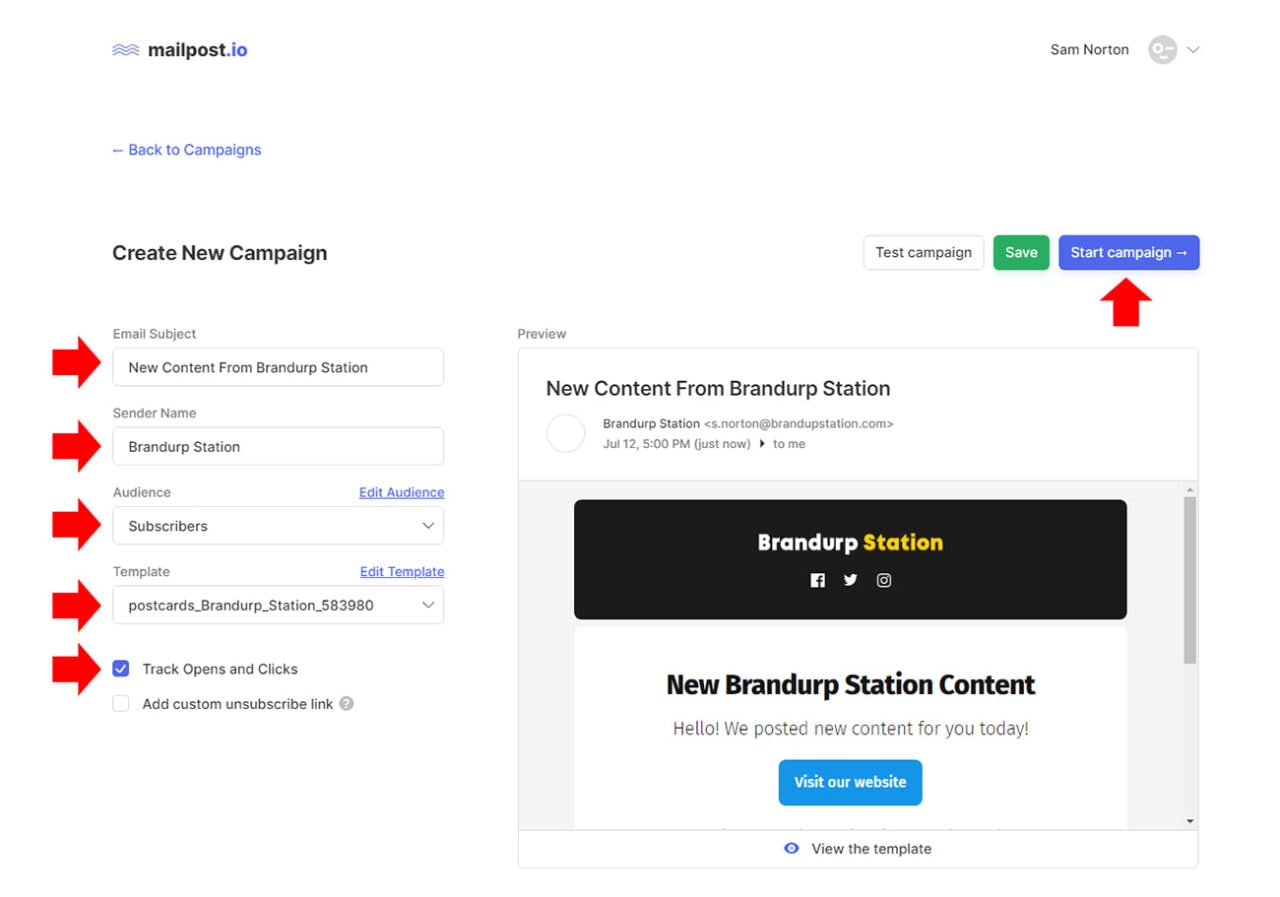
This will redirect us to a new page where we need to provide the details about the new campaign such as the Email Subject, Sender Name, Audience, and Template as seen in the image below.
Once done we can either preview, save or start the campaign immediately by clicking on the “Preview“, “Save” and “Start campaign” button. At this point, we want to start running the campaign so click on the “Start campaign” button to get started automatically.
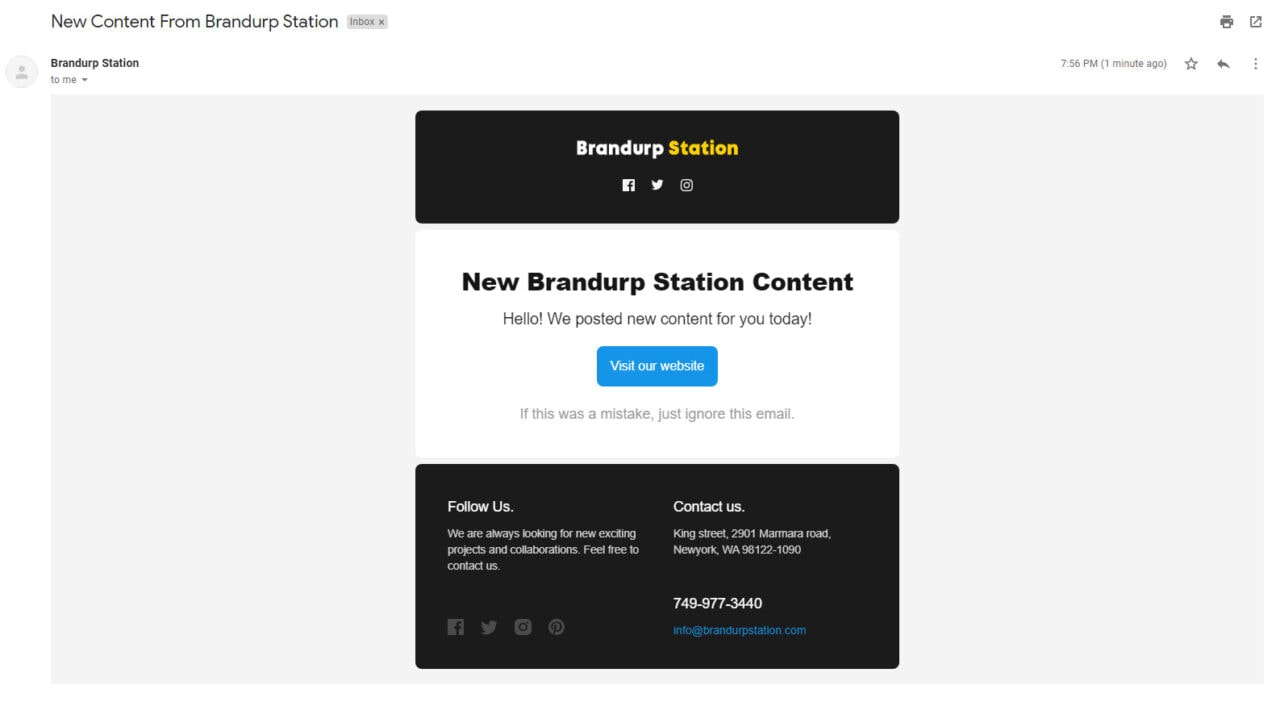
This will start sending email newsletters to all email lists that we have under the “Subscribers” audience as seen in the images below.
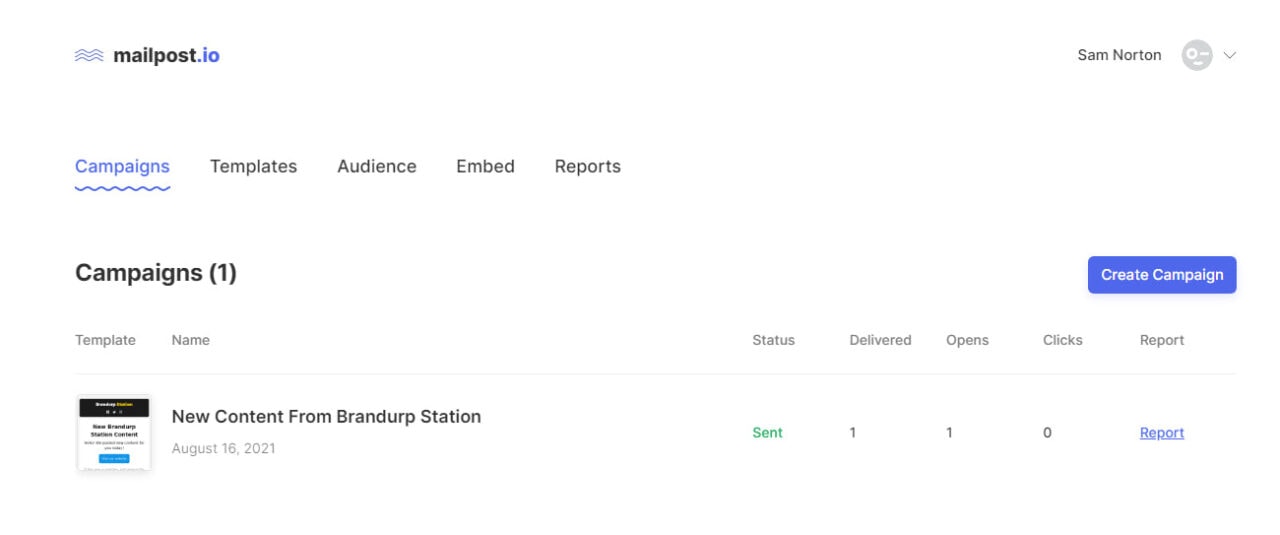
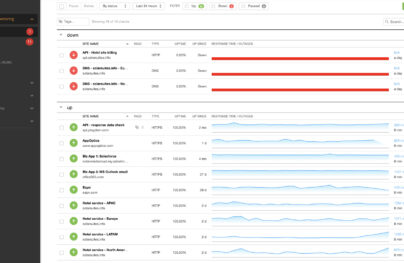
Additionally, Mailpost also offers a reporting feature wherein we can check the details about our campaigns such as how many emails were sent, delivered, opened, clicked, bounced, and unsubscribed.
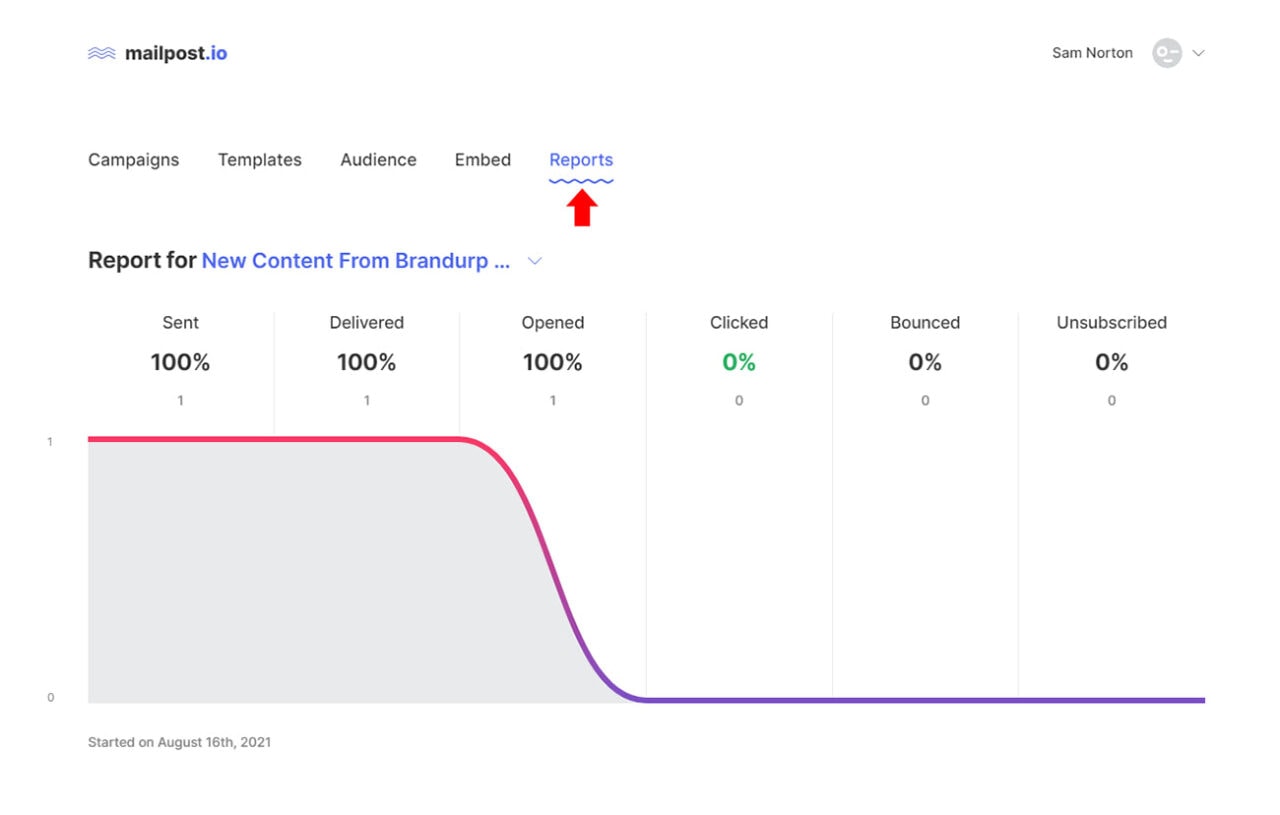
To check on our campaign’s report, simply click on the “Reports” link on the main menu and it will redirect us to the reports page
Conclusion
Whether you’re a blogger, designer, small business or store owner, or even a marketer, using Mailpost and Postcards makes it easier for you to integrate an email newsletter into your website.
With Mailpost, you can easily manage all of your campaigns and audiences with detailed reports about your email marketing efforts. On the other hand, Postcards simplify the creation of responsive email newsletters right out of the box.
Taking advantage of email newsletters can give you incredible benefits when it comes to conversion if done properly. Take action today!