Adobe Lightroom for Beginners
When we start working as photographers all we want to do is become better and better in order to enter that amazing status of being a “star photographer” or in a few words, make your photography brand known worldwide. But what do we need in order to achieve that?
Equipment is obviously a must, and with equipment we also mean software. Adobe Lightroom was born almost a decade ago as a spin-off version of Adobe Photoshop with the aim of providing users a neat, comfortable and friendly interface where you can manage your pictures and develop them in short notice.
Now that we can easily get our hands on Adobe Lightroom thanks to a user-meant subscription system, let’s go to the key features of Adobe Lightroom.
Where did my plugins go? – Adobe Lightroom’s preset system
If you were worried about your preset collection previously used in Photoshop let me tell you beforehand that Lightroom doesn’t like plugins at all. It is not native for its interface, meaning that only very few plugins are available for really specific task such as sharpening or removing film grain.
Lightroom works with Presets, and we all love them. Presets can really turn a simply image in a beautiful work of art in only a few clicks, so don’t worry about how much skilled in Lightroom you actually are or if it is the first time you open it: learn where there are installed and use your presets like if you were a professional user; we can guarantee you will also fall in love with them.
Designer’s sites like Sleeklens work hard for bringing a good resource of presets available for Lightroom users. You only need to learn how to catalog your images regarding their topic: Food, Architecture, Landscape, etc. and Sleeklens will make its way onto creating fantastic content.
With Postcards Email Builder you can create and edit email templates online without any coding skills! Includes more than 100 components to help you create custom emails templates faster than ever before.
Free Email BuilderFree Email TemplatesGet to know Adobe Lightroom!
This versatile software interface is split into modules and panels. The whole idea is to be able to switch between interfaces for each stage of the job being processed, with a meant workflow regarding that point.
We start by importing the pictures with the Library module. Options for catalog, metadata and accessing to previous import are always available. Also consider that if you have a good preset library you can make a use of it with the Quick Develop option, although I would recommend to use this option only with custom made presets as it is quite tedious to go through the whole preset library and you won’t be able to see your adjustments as clearly as with the Develop module.
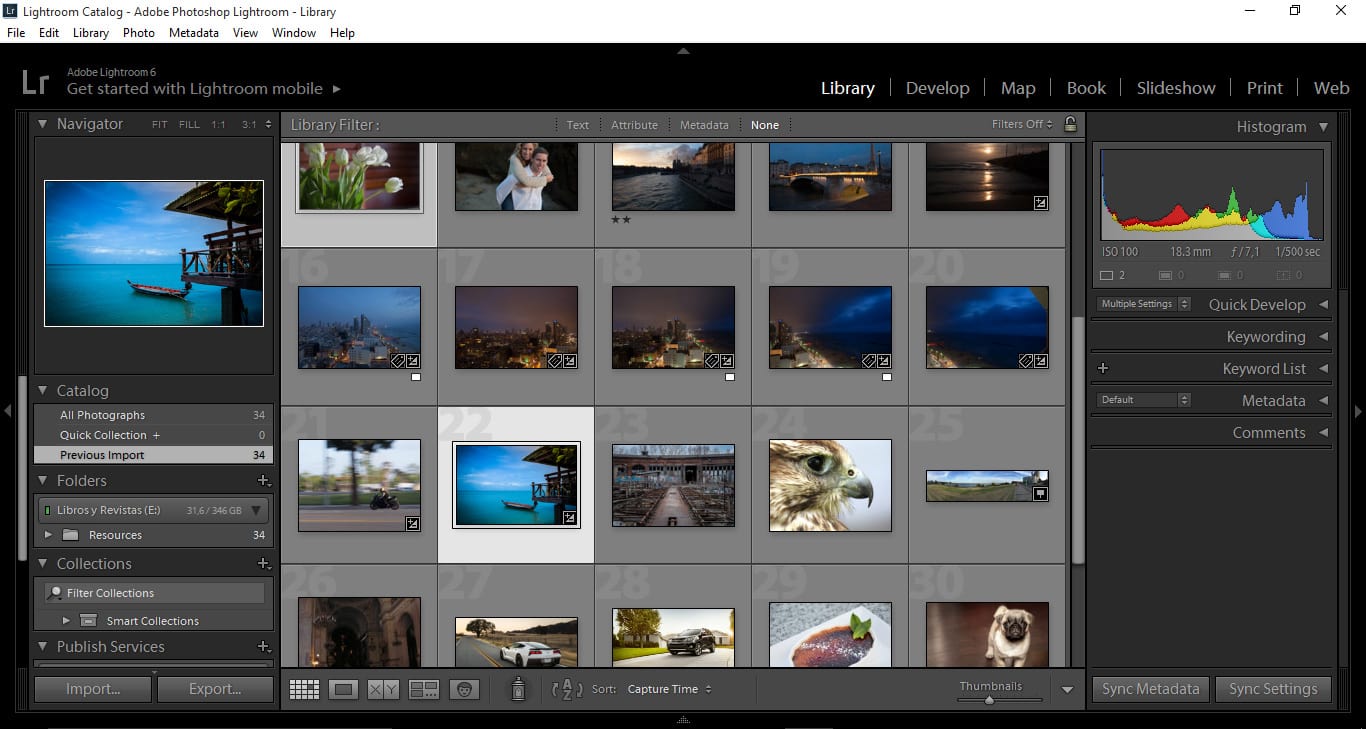
Now after we select a picture we are interested in, we can switch to the Develop module. In here we can visualize three main areas:
- On the left: Preview area, Presets Library and Catalogue options
- Center: The image of course, as it is the main actor of this module. Also some options for Before/After are available at this section
- On the right: Histogram, Lightroom tools and tabs for adjustments.
Quite clear, right?.
After you develop your picture you are meant to switch to any of these options:
Book Module
If your aim is to digital publish your work or create a portfolio you can’t go wrong with this. Book module will quickly allow you to create a book with a drag-and-drop system for moving your pictures to it, only requiring simple setting like size of your book, publishing options (in there you can choose for a common PDF file or to digital publish it with Blurb, which will require an extra fee).
Pages can be added in just a few clicks and you can also specify parameters such as bookbinding options, paper quality (if the book is meant to be printed later on) and even text to be added.
With Startup App and Slides App you can build unlimited websites using the online website editor which includes ready-made designed and coded elements, templates and themes.
Try Startup App Try Slides AppOther ProductsSlideshow Module
Works under a similar fashion to the book module, meant for presentations. Imagine this as a not so flashy Power Point where you can’t use effects for transitions but you can gather your images for good slides.
Although it may seem a bit useless, in parties and project presentations it may have its purpose for showing a good bunch of pictures. In either case, keep this module in mind for later on work.
Print Module
What is going to become your mostly used module besides the Library and Develop ones. Print module is just perfect for photographers: everything needed for the printing process is just there, only a few clicks away.
Photoshop was hard to know for new users, especially when handling advanced features such as color management to match printer properties. In here we have everything split in tabs, with a good management area for Layout and Margins were you can visualize in real time the adjustments made.
Web Module
This module is meant for creating media galleries in websites. Not too much fancy but it serves its purpose. It provides several templates for web galleries as well as embedding watermark for your images.
As you can see, these possible outputs are meant to fit almost every kind of user needs without having to use third-party apps. We can say this is a wise approach considering the cost of most common image editors license and the amount of tools provided with Adobe Lightroom.
Map module only works as a reference for your geotagged images, meaning that you can visualize in a world map like Google Earth the location of the pictures you have taken.
Lightroom Workflow for postproduction
Start by importing your pictures inside Lightroom. For doing this all you need to click at the Import button inside the Library Module for opening your pictures.
This will open a dialog window for the importing option, which is the very same window that will show up whenever you add a portable media to your PC unless you turn off the feature at the Preference menu.
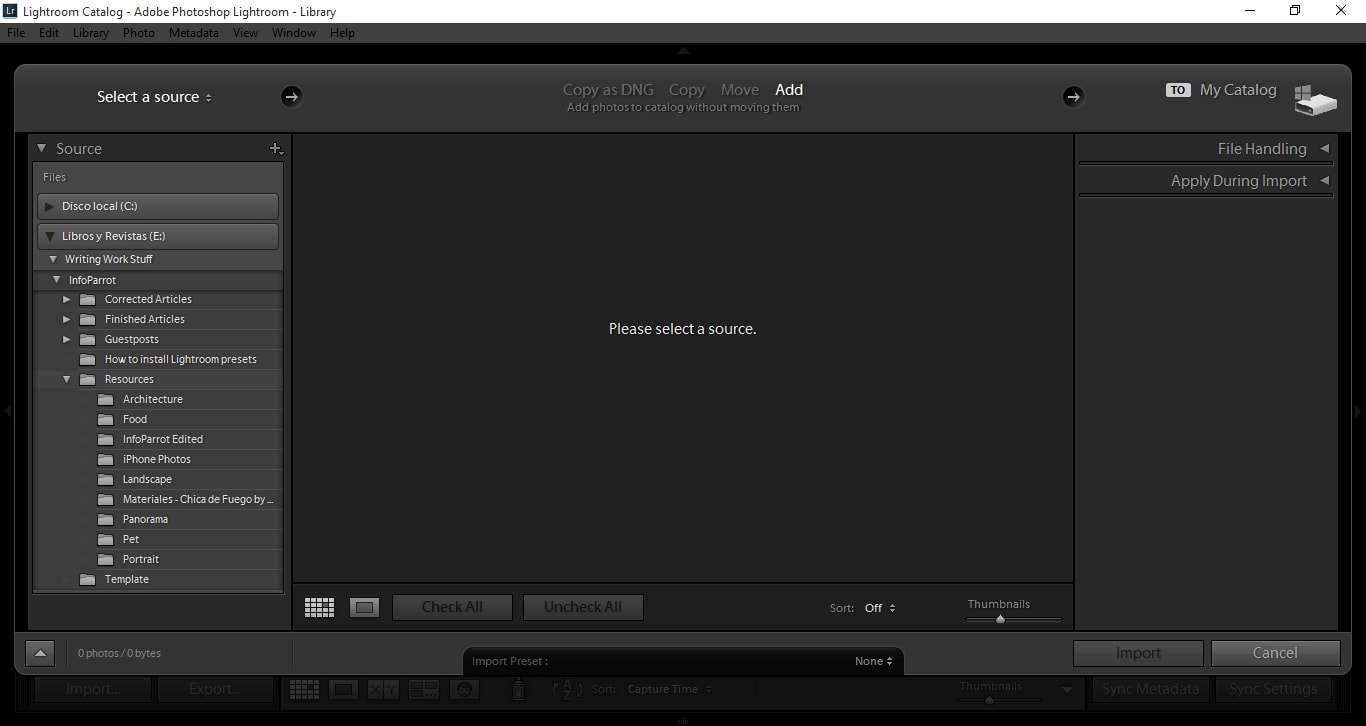
After importing the picture, switch to the Develop module.
At this module, first we need to analyze the picture in order to determinate your future workflow.
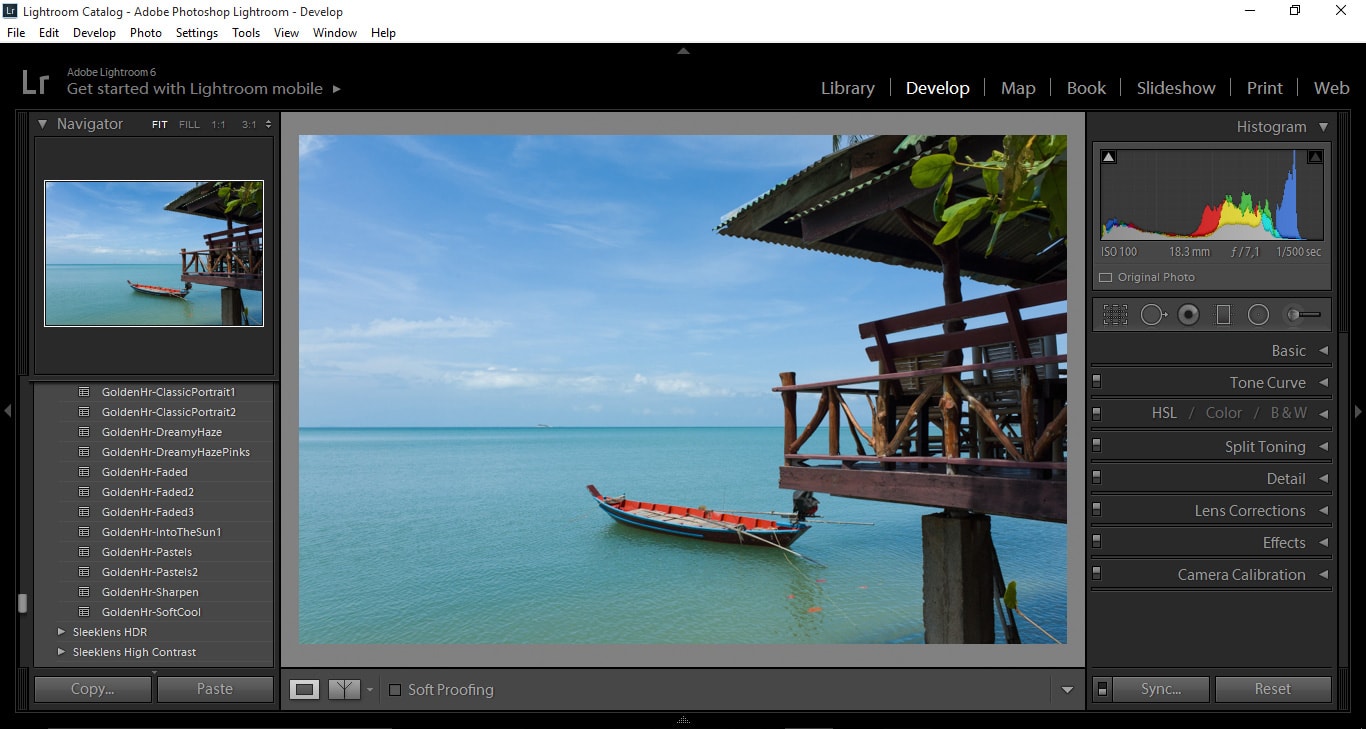
My common method of work involves a combination of Lightroom’s native tools with third party Presets. For this very picture, let’s go through some developments.
Below the Histogram, Lightroom’s “tools” are displayed. From left to right, these are the tools available:
- Crop tool: For cropping (trimming) your picture.
- Spot removal: Similar to Photoshop’s Spot Heal tool, meant to beauty enhancements or for erasing elements from your picture, although is not as powerful as Photoshop one.
- Red eye removal: For removing red eye defect on pictures
- Graduated filter: Meant for applying certain adjustments at specific areas of your picture.
- Radial filter: Works on the same fashion as Graduated filter, only applying adjustment related to a radius.
- Adjustment brush: For applying changes like the Graduated and Radial Filters but on very specific points of your image.
These tools will suit your workflow in cases of advanced adjustments; for most cases with the sliders is more than plenty.
Start your workflow by adjusting White Balance as it will affect the whole picture hues. You can do this adjustment either by using the Dropper tool (sampling at an area with equal, or pretty similar, R, G, B values which is exactly the value of a neutral gray) or using the Tint/Temp sliders.
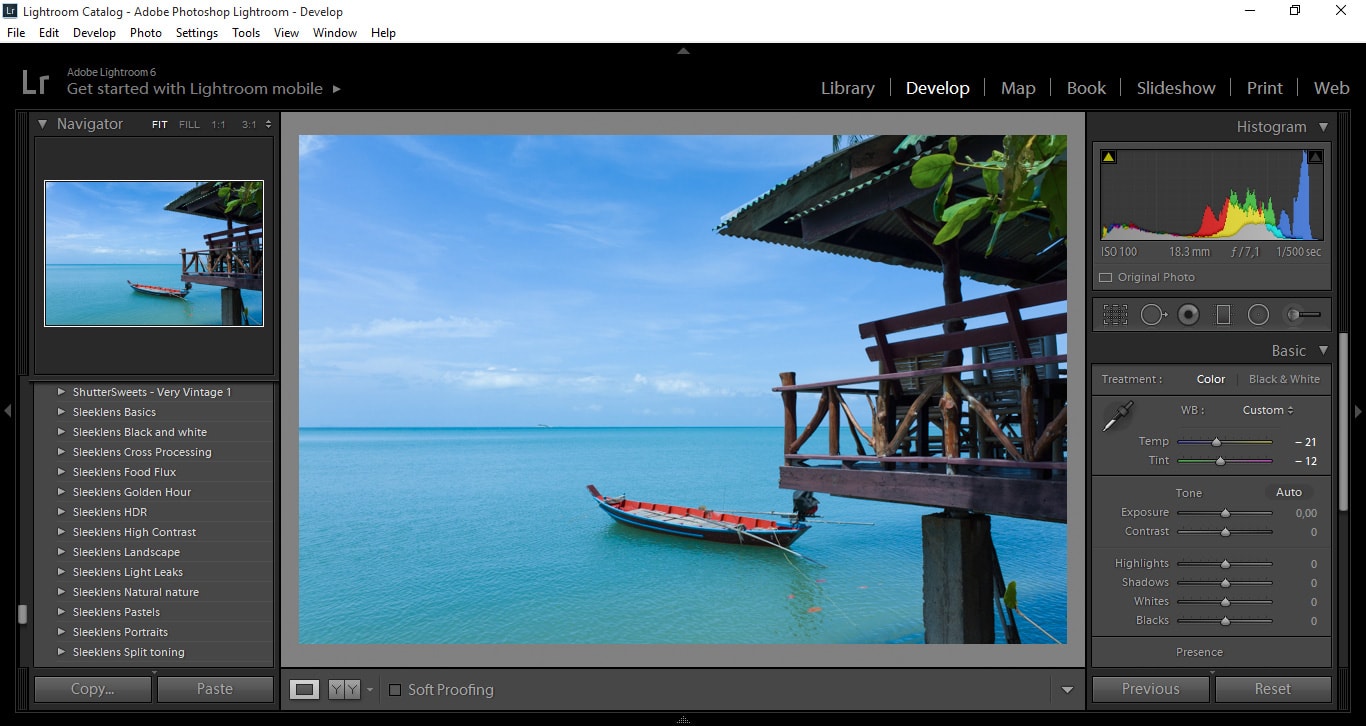
In my opinion the Exposure for this picture is okay, so I won’t touch the Exposure slider. Keep in mind that when you correct exposure that way you are prone to lose detail or burn some areas; it is best to work with the Sliders of the Basic Adjustment panel than to perform great enhancements with the Exposure slider.
Increase the Contrast to make the picture look more vivid.
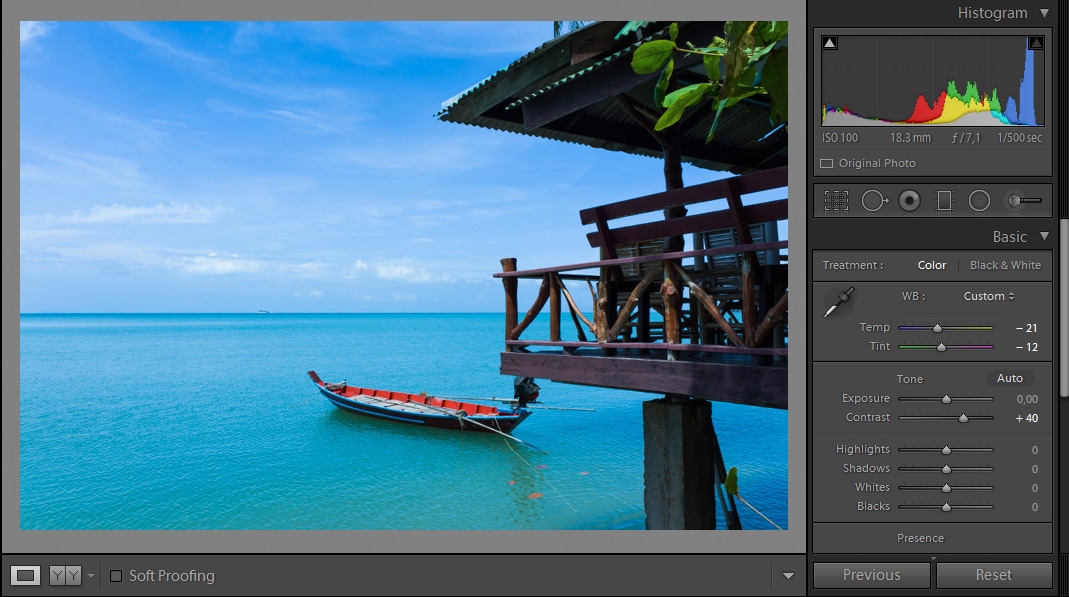
Since the scene has too strong sky illumination, reduce the Highlights in order to avoid annoying reflections that won’t help our composition.
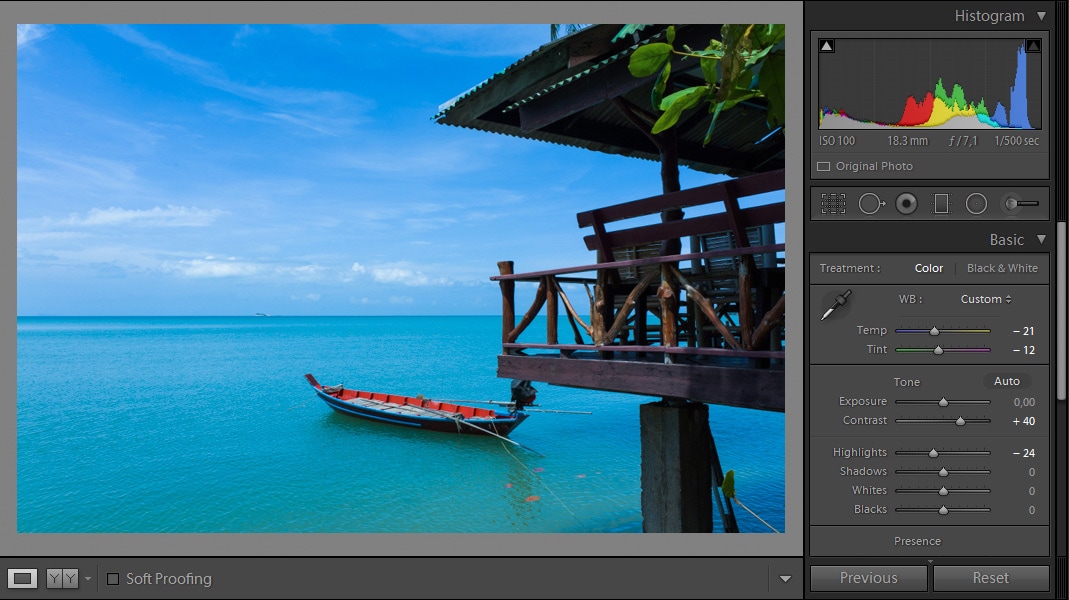
Increase Shadows only a little bit by moving the Shadows slider towards negative values.
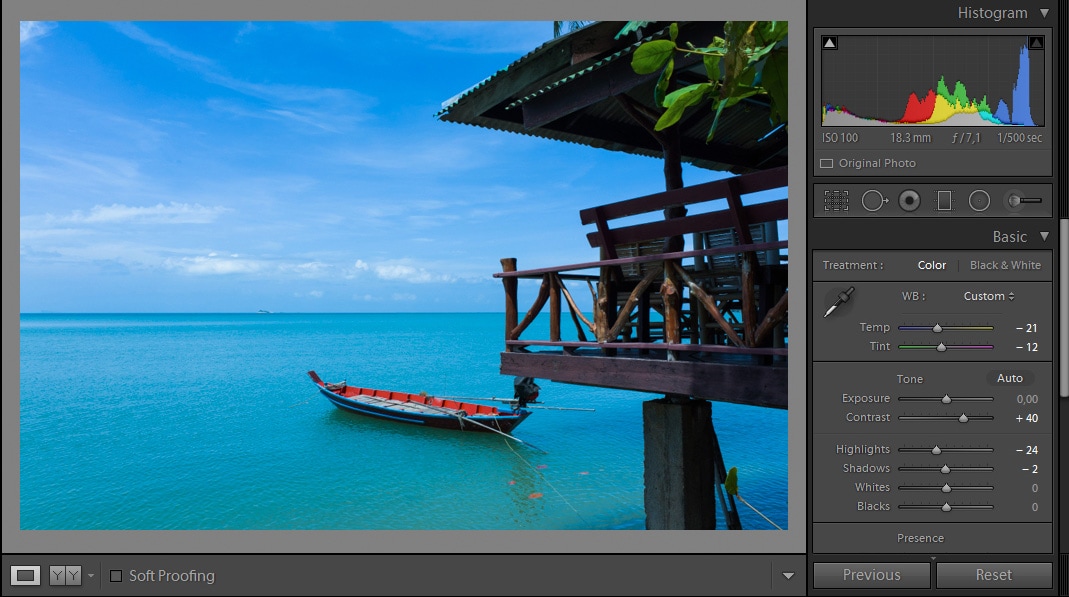
Whites have to be a bit on positive values for avoiding a too dark scene.

Finally enhance Blacks a tiny amount and that would be all for the basic adjustments.
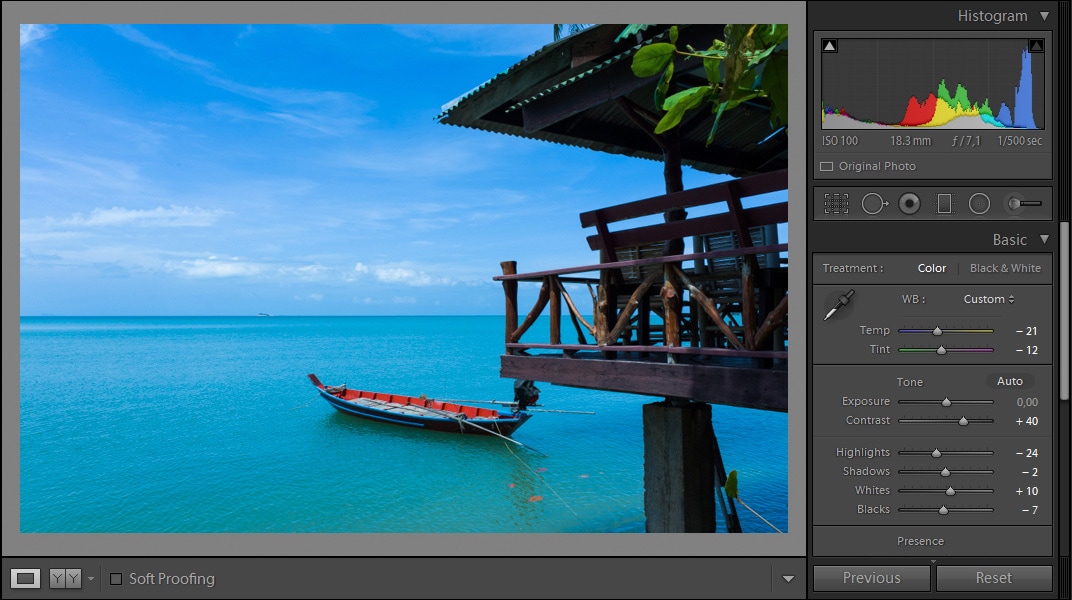
The following area of sliders contain features such as Clarity, Vibrance and Saturation. Clarity will bring more detail to the image as well as a bit more illumination, Vibrance will enhance softer tints of the image to more colorful values and Saturation determines the amount of hue present on the picture. For this adjustment purposes, since the image looks well tinted I am only going to adjust the Clarity slider towards positive values, with caution of not going over +60 as it will start looking like an HDR, which is not my aim.
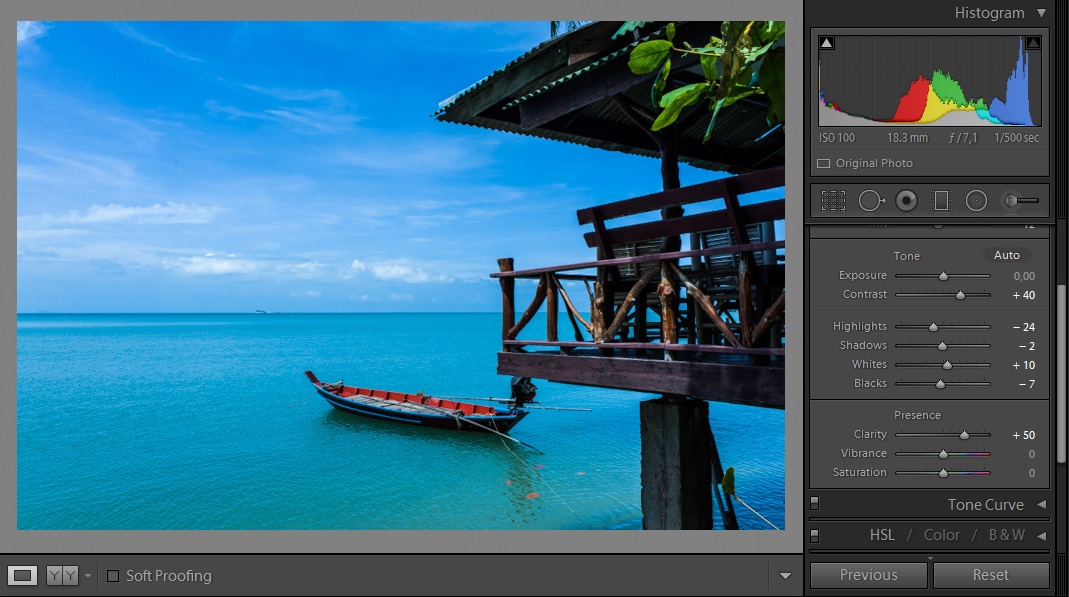
From this point, every kind of adjustment you make is actually an extra effect. For example, if I use Split Toning I would be getting a really interesting image if my aim is to actually change the tonality of the image; same if I worked with the HSL panel.
Every picture needs to have a basic adjustment like we did before and then the intent of the photographer, as well as its creativity, will determine the final effect of it.
For this image I am going to stick to Presets, working with the Golder Hour preset bundle from Sleeklens.
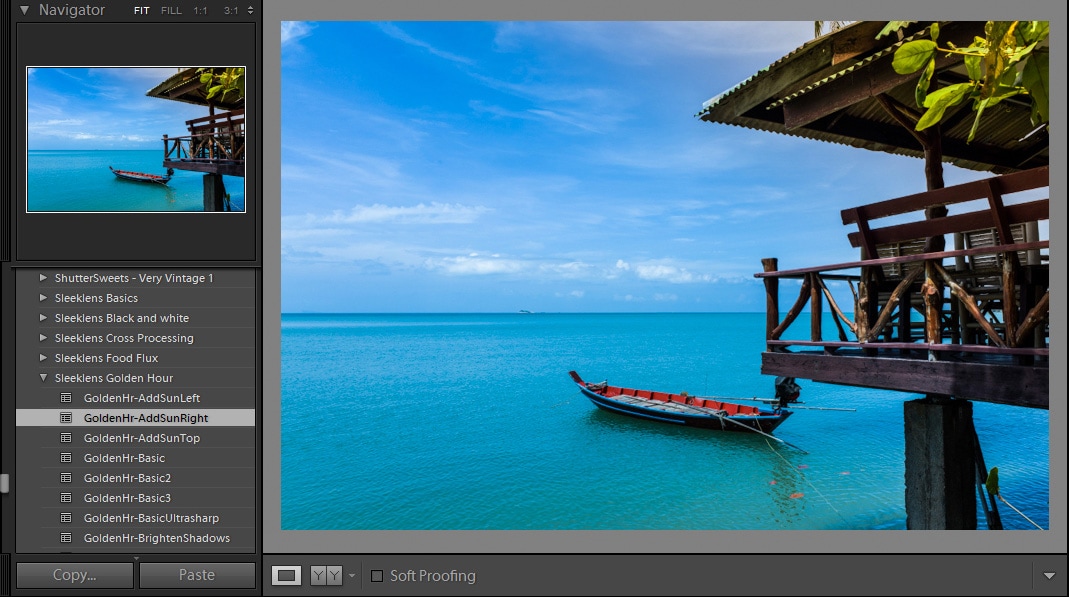
As you can see, I selected the AddSunRight preset from the bundle and the result I got is having an extra attention towards the leaves on the cottage, like simulating the effect of sunlight on it.
A great amount of effect can be achieved only in a few clicks, changing the complete feeling of the image. If by chance I used the Pastels2 effect, my image will start looking like this.
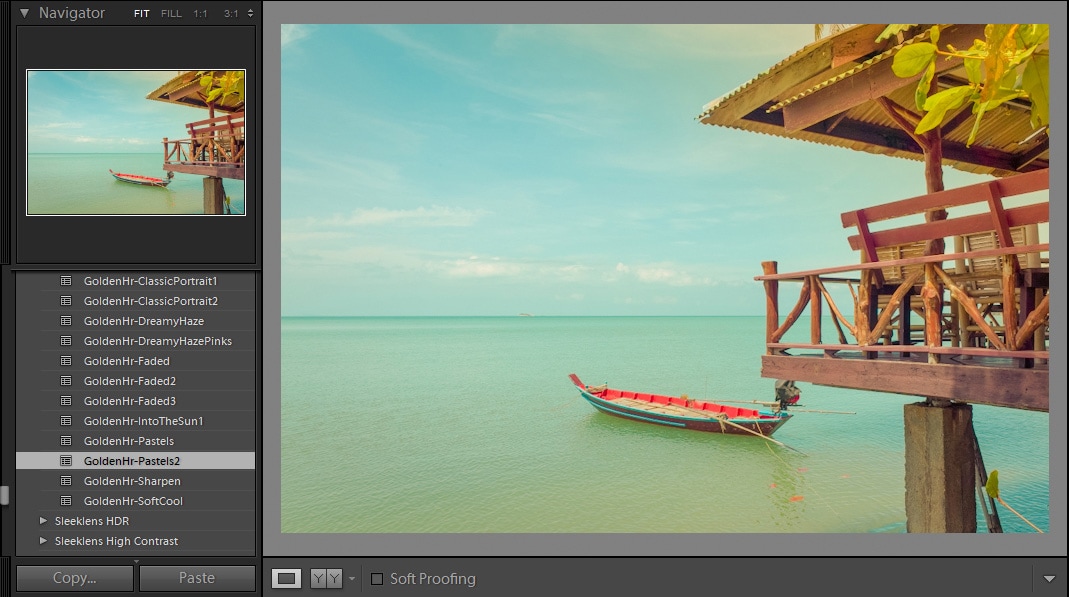
In a few words, presets are really powerful and meant for every kind of users. What is important regarding this point is to keep in mind what you want to do and having a good preset library to let the magic flow.
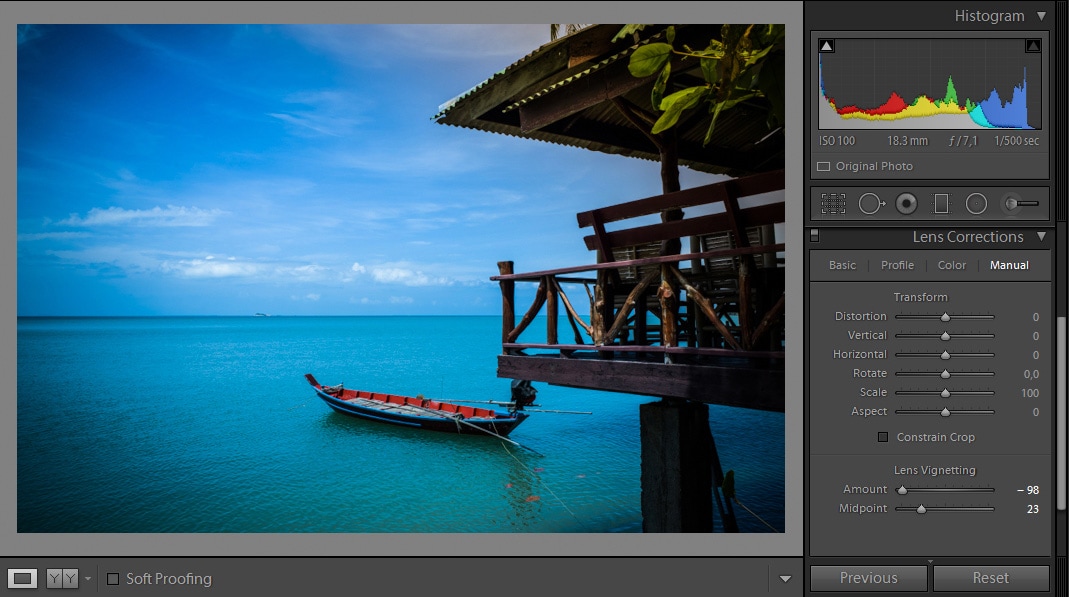
Now I got prior to the usage of Pastels2 effect and I am going to apply an always appealing effect that is Vignetting. You can find this effect either at the Lens Correction panel, which comes quite handy when processing RAW files as you can also compensate the lens aberrations on the very same process, or you can find post-crop vignetting at the Effects panel along with Film Grain.
Let’s do a Before/After shot in order to compare the adjustments made.
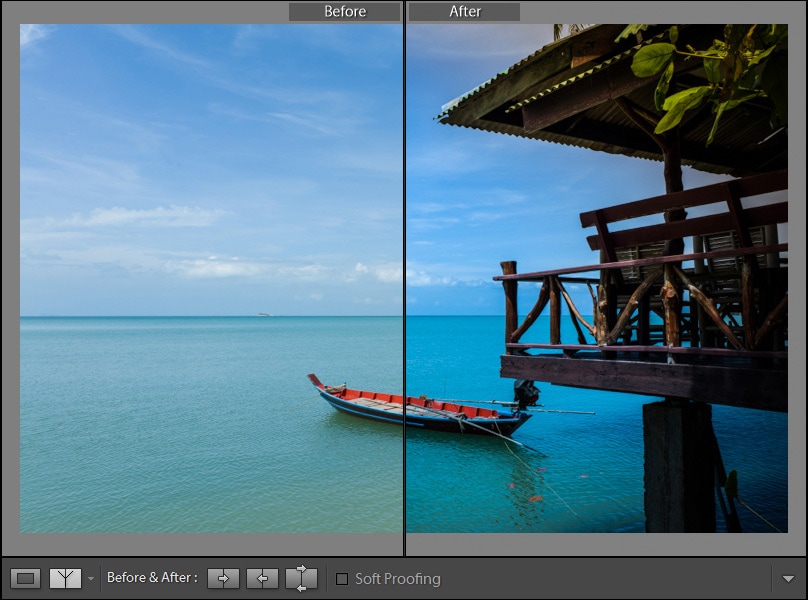
The result is quite notorious since the picture used to look flat into what regards to tint. Now it looks more dynamic and transmits a feeling of peace and relax. Even if you may say it’s not necessary to use the Before/After feature in Lightroom you will become surprised on how much a picture can change with only a few adjustments made.
Just as always, you can ace Adobe Lightroom if you put enough effort into learning its way and practicing a lot. There are no hidden features, no silly tricks, only knowledge and it is waiting for you to decide if you want to become a better photographer or not.
Good luck and keep editing!
