How to Create a Vintage Photo Camera icon for App Store in Adobe Illustrator
Difficulty: Intermediate
Estimated completion time: 4 hours
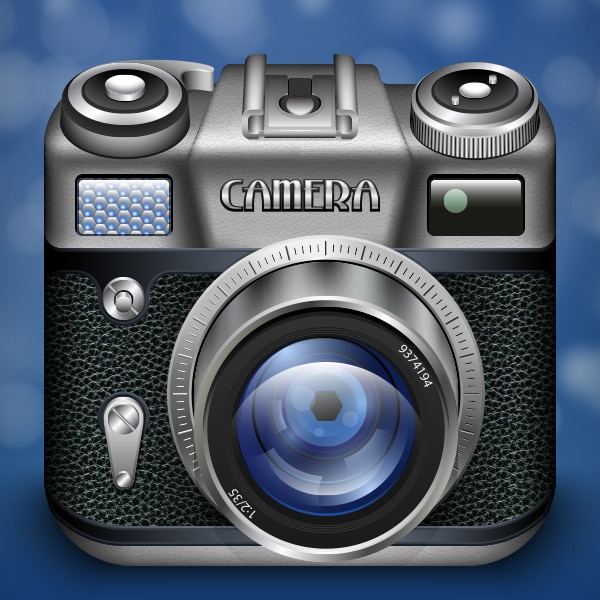
Hello everybody! Today I will tell you how to create a Vintage Photo Camera icon for App Store in Adobe Illustrator.

What we need:
- Adobe Illustrator CS5 or CS6;
- Black leather texture (you can download it from here);
- Free plug-in for working with gradient mesh – Mesh Tormentor;
- And 3 or 4 hours of free time;
So, let’s beginning
Step 1 – Create Camera Body
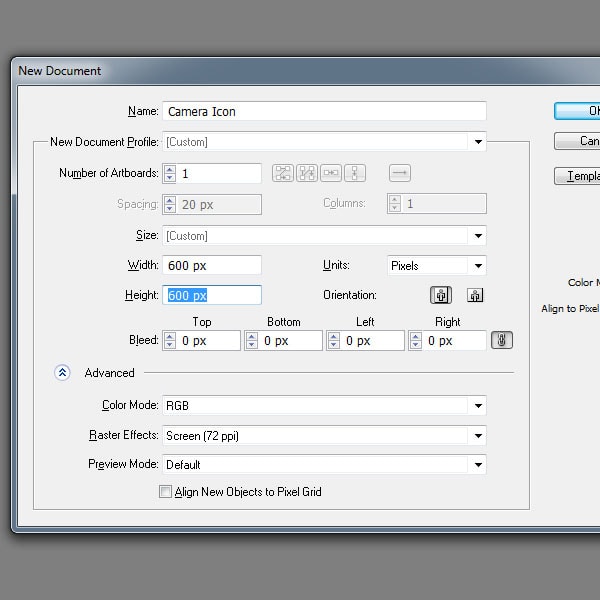
Open Adobe Illustrator and create a new document of 600×600 px size, RGB color mode
With Postcards Email Builder you can create and edit email templates online without any coding skills! Includes more than 100 components to help you create custom emails templates faster than ever before.
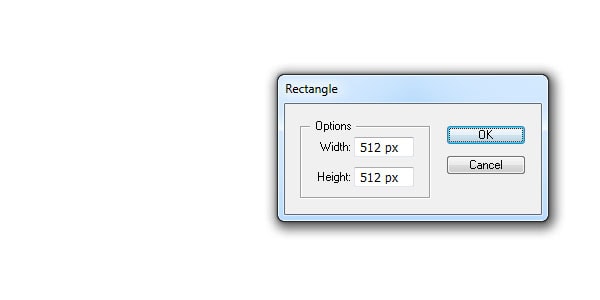
Free Email BuilderFree Email TemplatesAs you can see on this page, icon for App Store must have size 512×512 px and corner radius 90 px. Take Rectangle Tool (M) and create in center of document rectangle with size 512×512 px with red color of stroke and without fill.
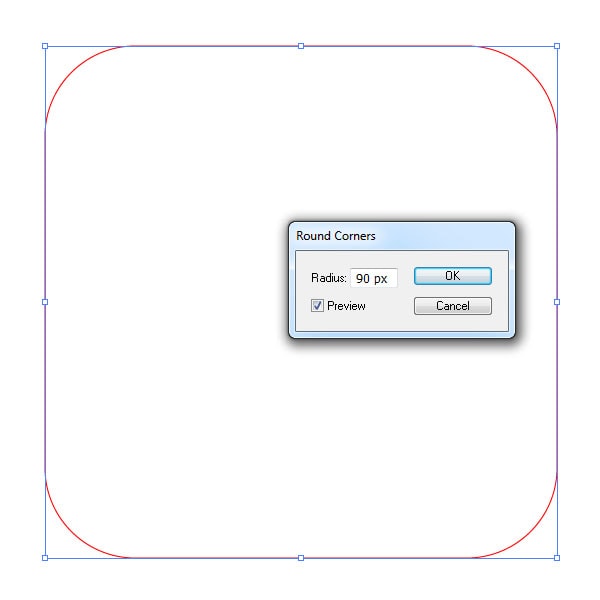
Then go to Effect > Stylize > Round Corners and in the dialog box, put a value of 90 px.
Now, go to Object > Expand Appearance. Copy the created object and paste it in front (Ctrl + C, Ctrl + F), then select he underlying and press the hotkey Ctrl + 5. This will create the guide from the path.
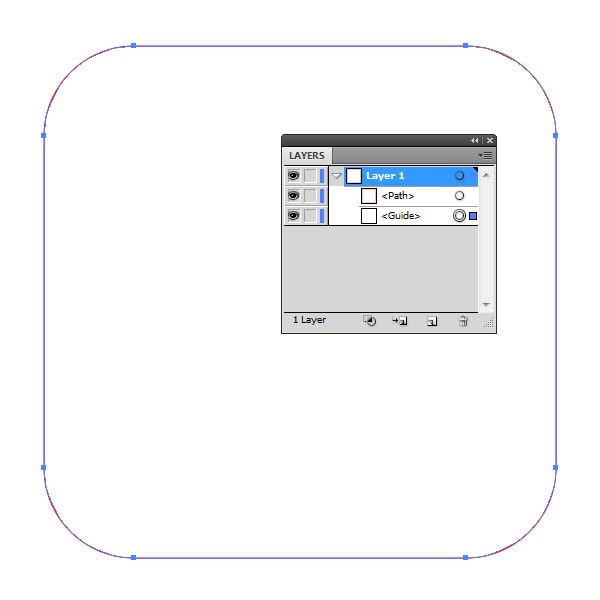
Lock and turn off the visibility of the guide in the Layers panel, and go to the next step.
Step 2
In this step, I’ll show to you a technique, that will be used for constructing different parts of the camera, so, duplicate this shape again, and move it to 20px up, then increase its width to 540px.
With Startup App and Slides App you can build unlimited websites using the online website editor which includes ready-made designed and coded elements, templates and themes.
Try Startup App Try Slides AppOther Products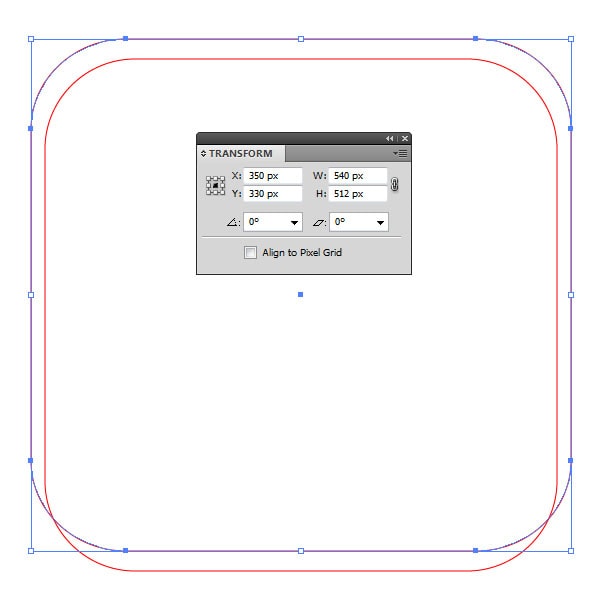
Select both objects, then take the Shape Builder Tool (Shift + M), hold down the Alt key, and delete the unwanted part of the top shape, as shown in the screenshot below.
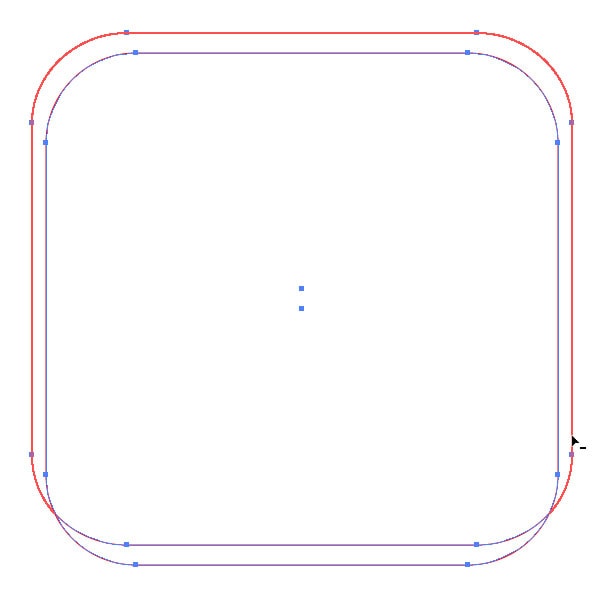
Now we need create the closed path at the bottom of the camera body, therefore, keep all paths selected, click the same tool within it.
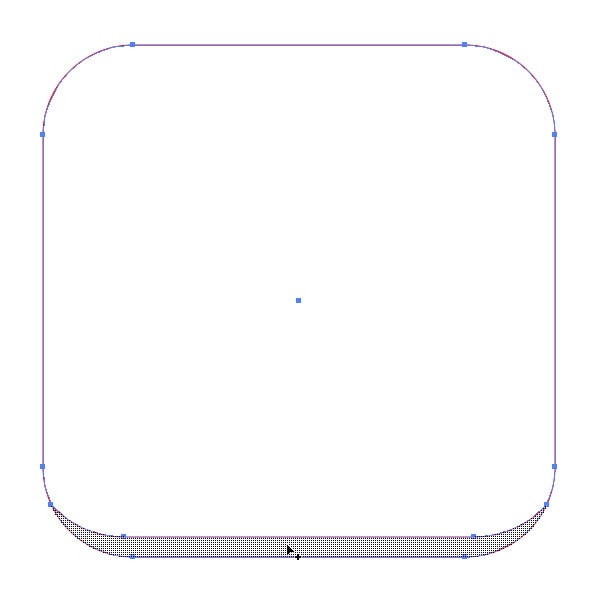
As the result, we’ve got two objects ideally adjacent to each other.
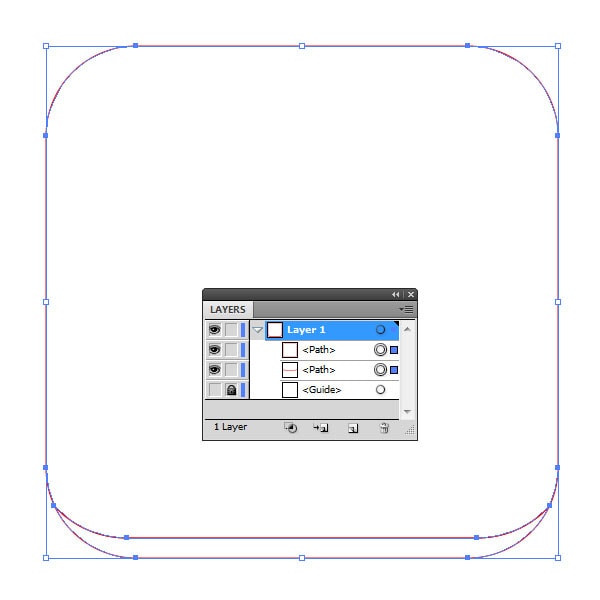
Thus, from the primitive shapes, we can easily model any shape, that we need.
Step 3
There is no sense to describe everything the steps to create the camera body, as in the previous step, we use of simple shapes and Shape Builder Tool (Shift + M).

Gradually add new elements to our illustration. On the figure below have been added some elements on the front of the camera.
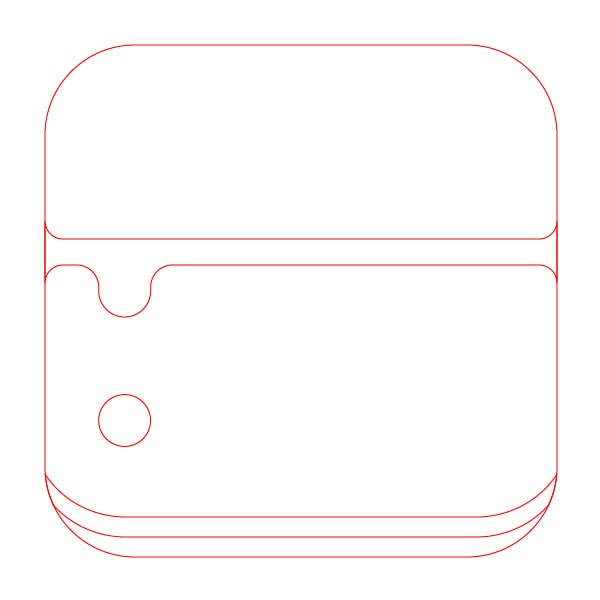
Next, create the top panel, which will have a “hot shoe”, shutter button and control ring; and the front panel, to be placed on her viewfinder, exposure meter and logo.
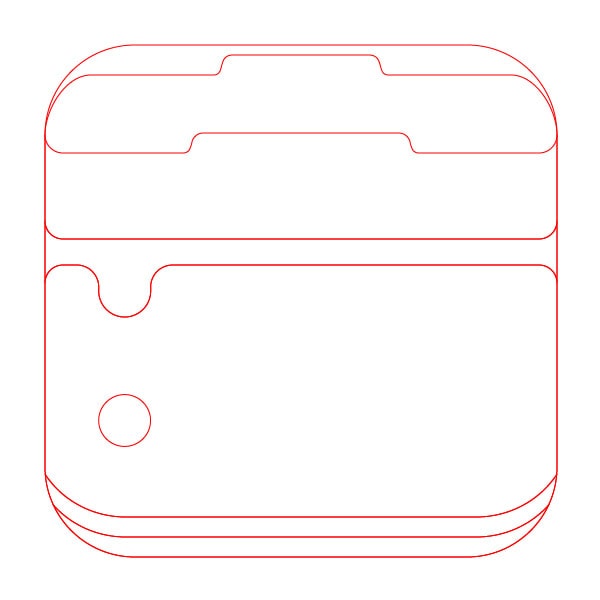
At the end of this step, our illustration must be look like the screenshot below
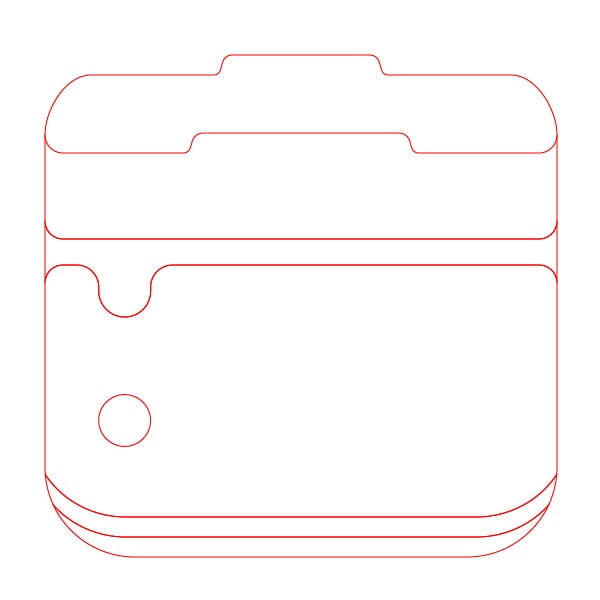
Step 4
At this stage, we are ready to paint the camera body, select the bottom shape, remove the stroke and fill it with a linear gradient of gray colors
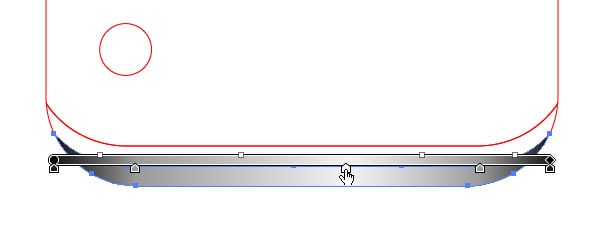
Now duplicate it, change the gradient fill, and change Blending mode from Normal to Multiply.
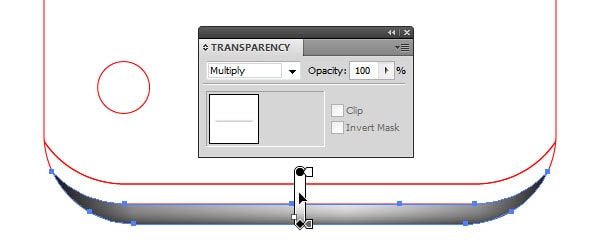
Next, while holding the Shift key, select shapes, as shown in figure below.
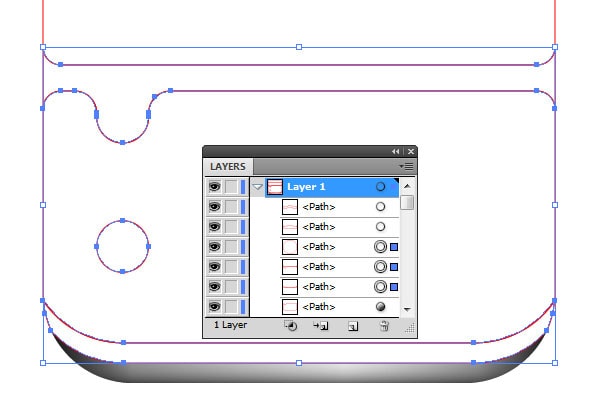
Combine them into a single composite path shortcut Ctrl + 8, or from the menu Object> Compound Path> Make
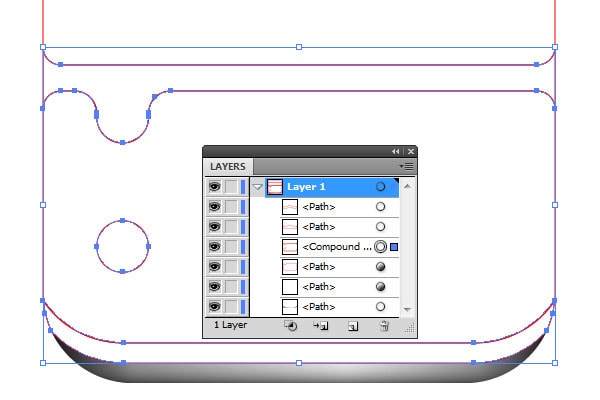
Step 5
Keep the path, which was created in the previous step selected, remove from it a stroke and fill it linear gradient in dark-blue colors.
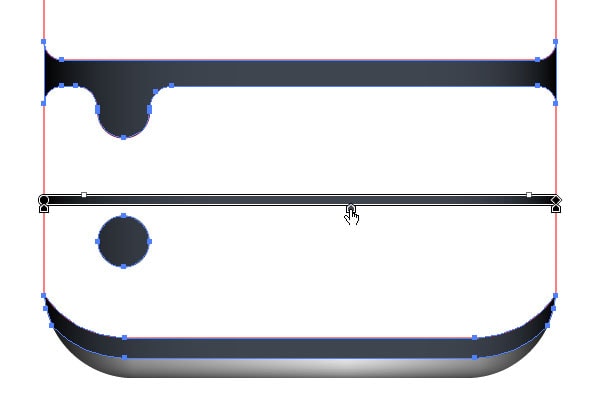
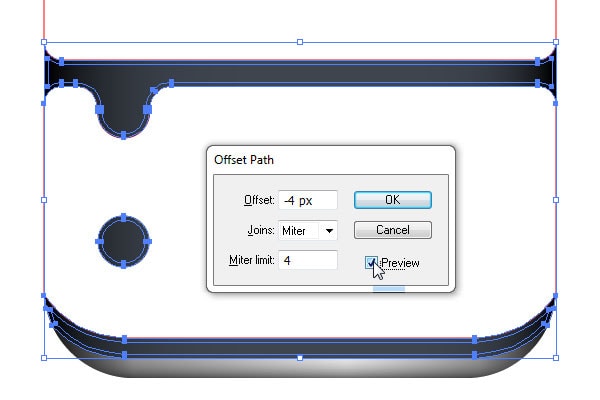
Go to menu Object > Path > Offset Path and set the following parameters, then click OK.
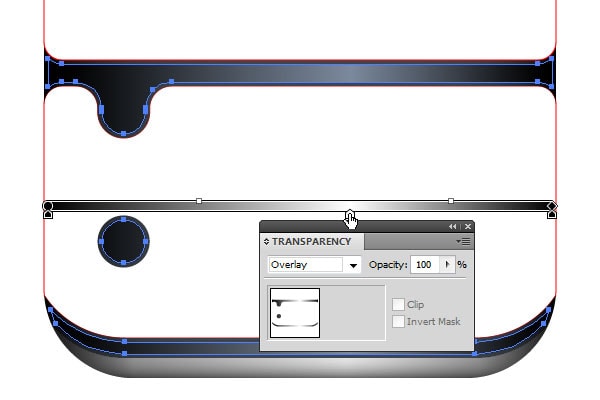
Change Gradient Fill and Blending mode to Overlay.
Step 6
Now select the path, which was created in beginning previous step, duplicate it twice, and move it to 2px up.
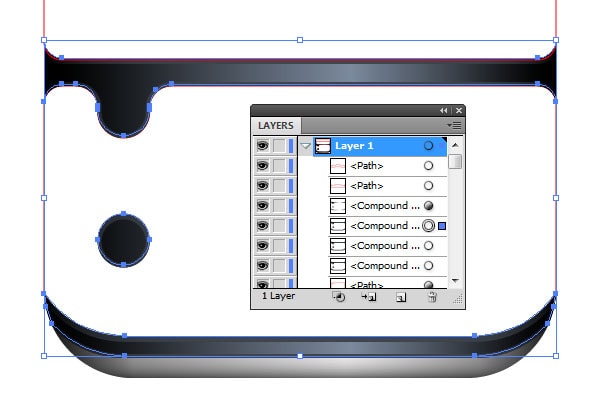
Hold Shift, select the underlying object, and on the Pathfinder panel click on Minus Front.
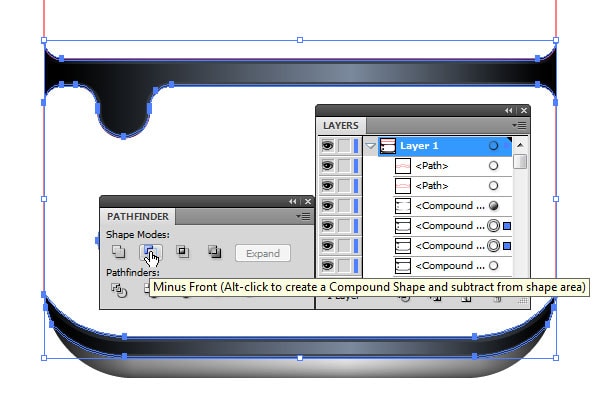
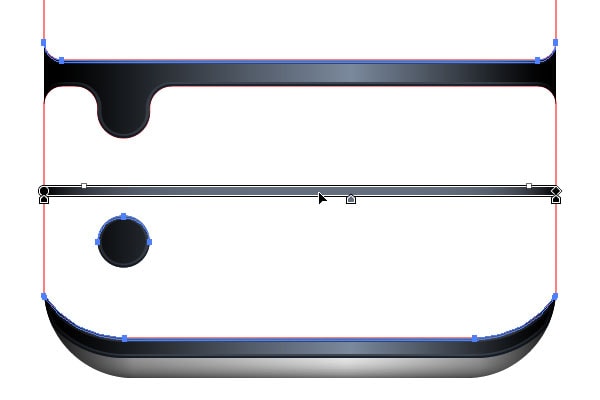
Ungroup the resulting group Ctrl + Shift + G, and add remaining selected paths in the compound path Ctrl + 8, after then change the gradient fill to more dark.
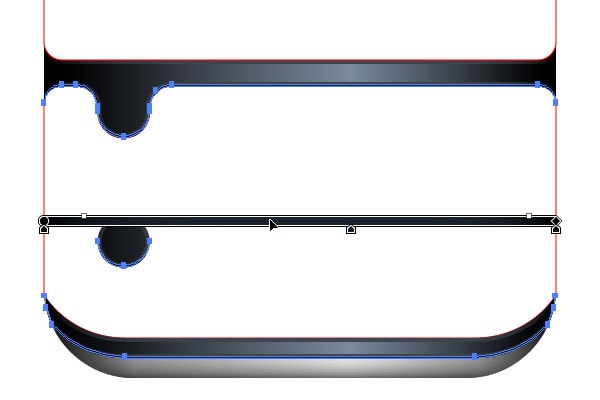
Repeat all the steps from the beginning of this step, but second duplicated object move to 2px down. Change the gradient to a lighter for resulting compound path.
Step 7
In this step we apply a texture to middle of the camera body. So, go to menu File > Place… and add file black_leather_texture.jpg to artboard. This texture have a very large size, so we need reduced width up to 512px.
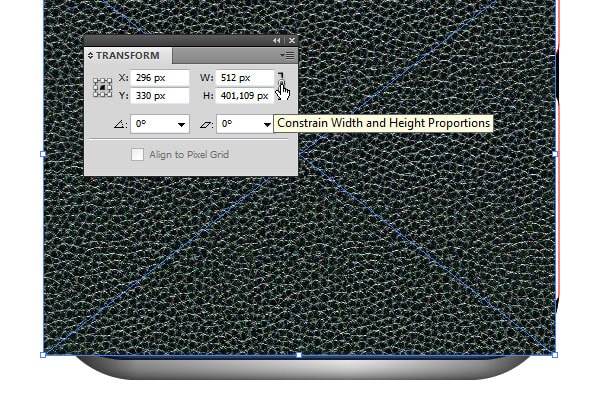
With help of the Layers panel move the texture below the path shown in the screenshot and center the relative thereto.
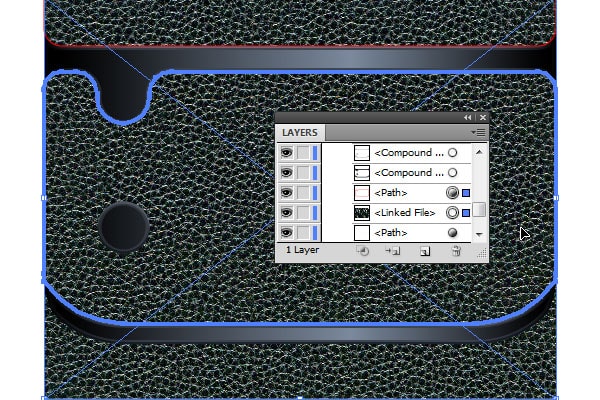
Keep texture and path selected, create a clipping mask Ctrl + 7, or in menu Object > Clipping Mask > Make.
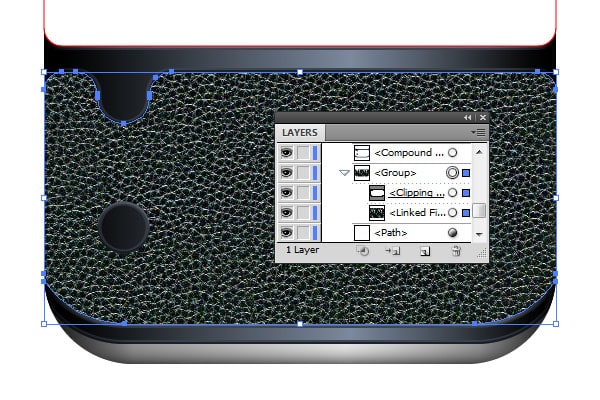
Copy the Clipping Path and paste it in front (Ctrl + C then Ctrl + F).
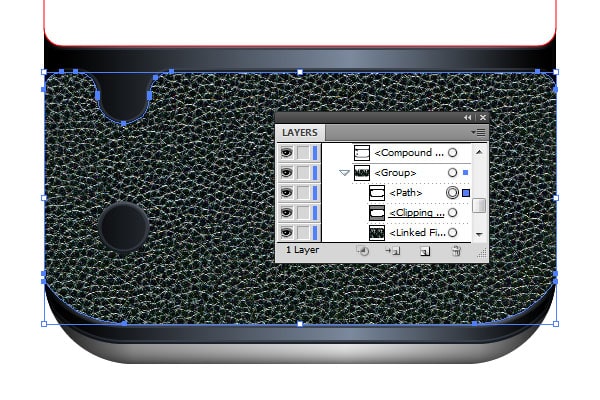
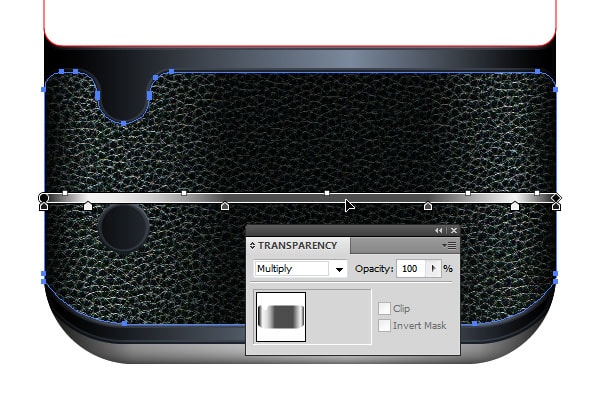
Fill it with a linear gradient in grey tones, as in the screenshot below, and change blending mode to Multiply.
Step 8
We will now proceed to the creation of two very important parts of the camera, the top and front metallic panels. And using one Gradient Mesh. More recently, the creation of the gradient mesh would require honest effort even by professional illustrators, not to mention the novice users.
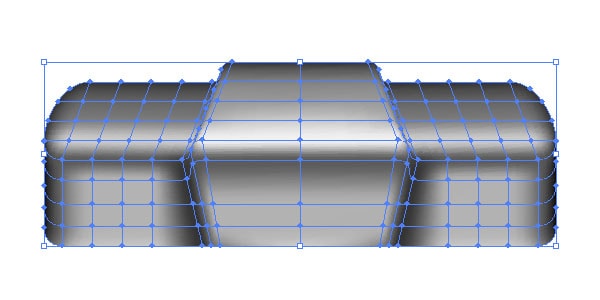
But fortunately, we now available free plugin Mesh Tormentor, which makes working with Gradient Mesh easy and enjoyable. Description of the working with this plugin is beyond the scope of this tutorial, but you can find a comprehensive guide to the plugin on the Iaroslav Lazunov website.
Using the Layers panel turn off the visibility of all the objects that we have created so far, apart from these two.
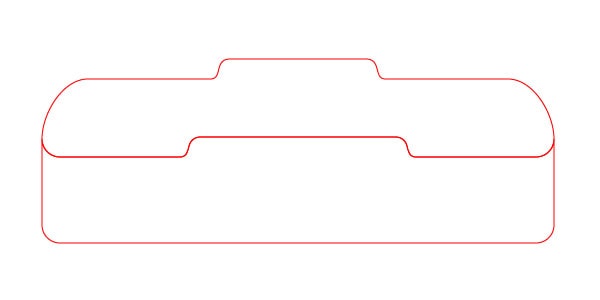
Now, using the technique from the first three steps of the lesson, create a grid with stroke but without filling.
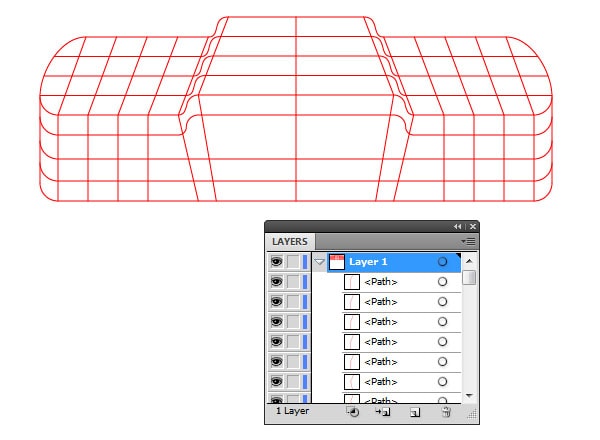
Pay attention to the Layers panel, all objects are open contour. Now select all Ctrl + A, open Pathfinder panel and click Divide.
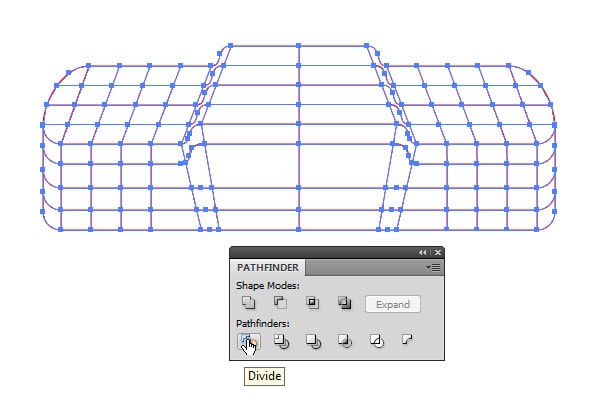
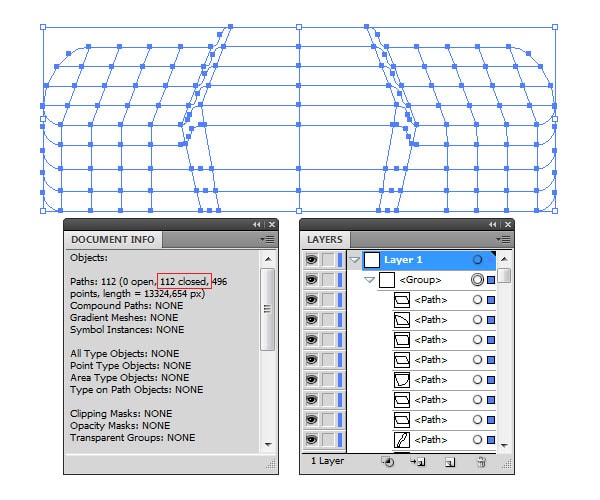
As result we have group from 112 closed paths, of which in the next step we construct the Gradient Mesh using the plugin Mesh Tormentor.
Step 9
Keep the group of contours, obtained at the end of the last step selected, open the Mesh Tormentor plugin, and press the Create One Cell Mesh.
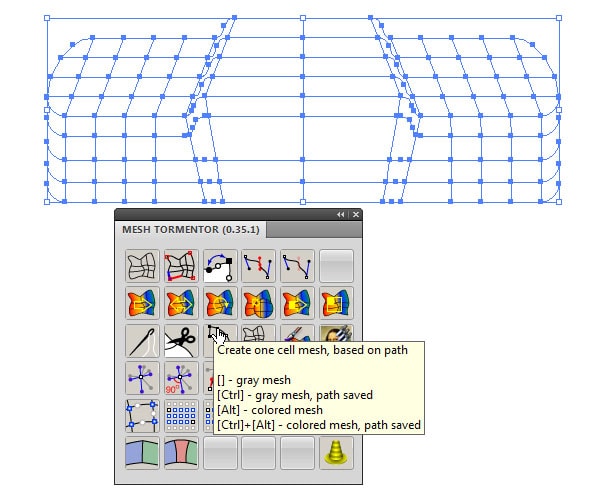
All closed paths are converted to one-cell mesh. If any of the paths to mesh does not convert, then he has only three points, and the minimum required for one-cell mesh – four, in that case, just take the Add Anchor Point Tool (+) and add to this path one more point, and then repeat the path transformation into a mesh. Then select all created meshes, and click the Sew Together.
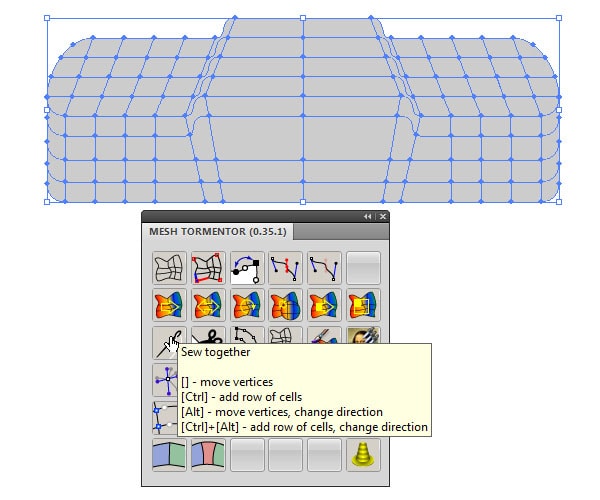
Thus from the group of one-cell meshes, we have created one multicell.
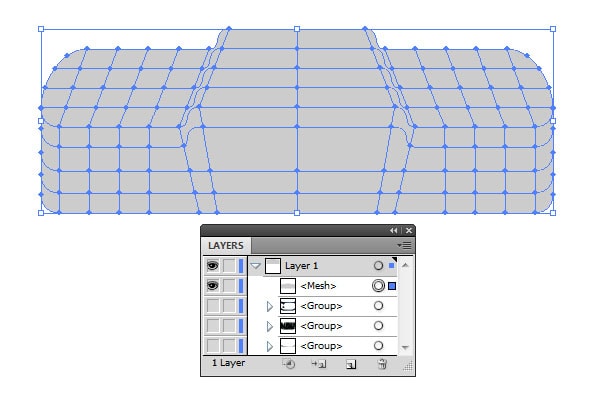
Ungroup this mesh, take the Mesh Tool (U), and add two column of points, as shown in the screenshot darker.
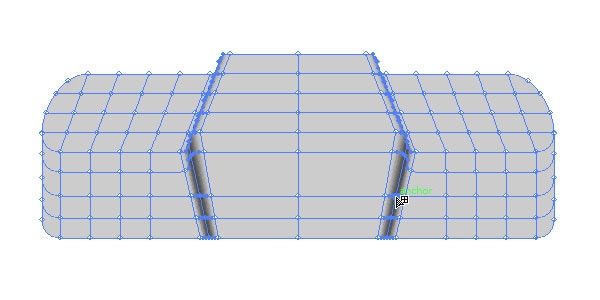
Now, the creation of gradient mesh finished. Using the Direct Selection Tool (A) and Shift, or the Lasso Tool (Q), paint the mesh, as shown in the screenshot below. This screenshot also shows all of our work at this time.
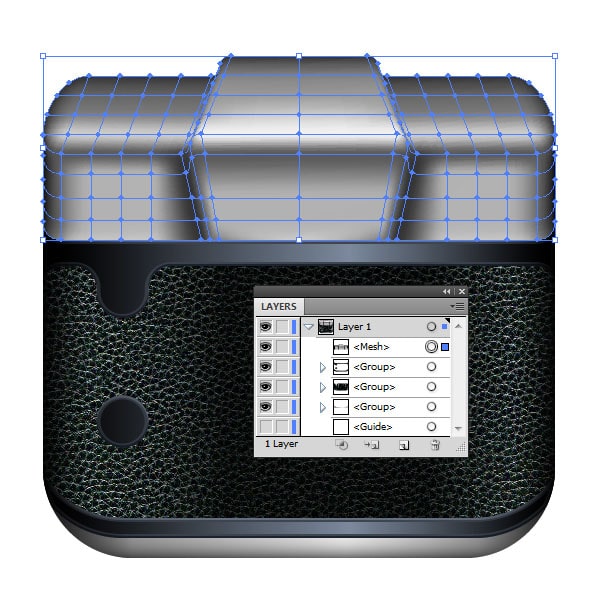
Step 10
Before we go any further, let’s give a complete view of the metal parts of the camera body. Select Gradient Mesh from previous step and go to Object > Path > Offset Path, set the offset 0 px and click OK.
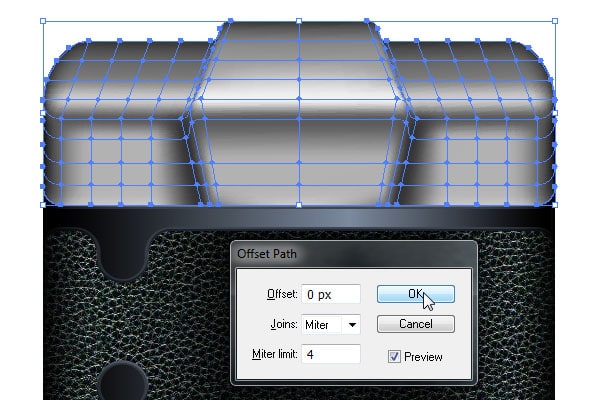
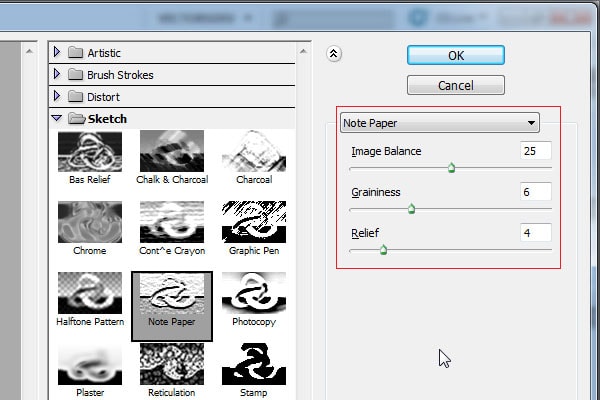
The resulting path in the Layers panel placed above the Gradient Mesh, remove the stroke and assign white color to fill. Keep the path selected and go to Effect > Sketch > Note Paper, set the value as in the screenshot below, and click OK.
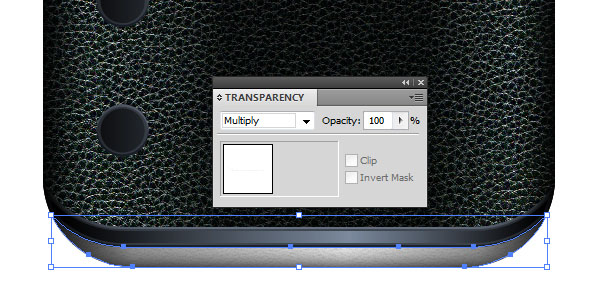
Change blending mode to Multiply, with Opacity 100%.
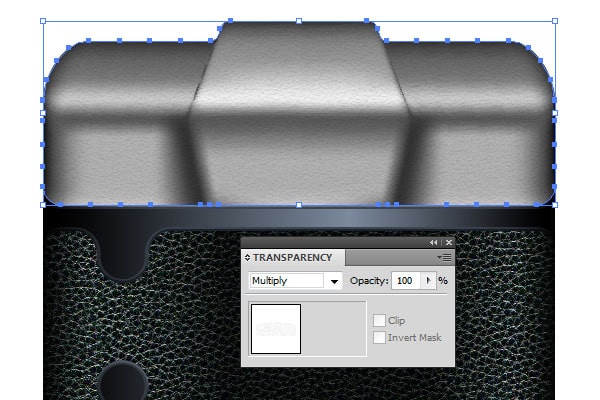
So, we added the texture effect on the metal panel. At the bottom of the camera body, we shall do the same.
Step 11
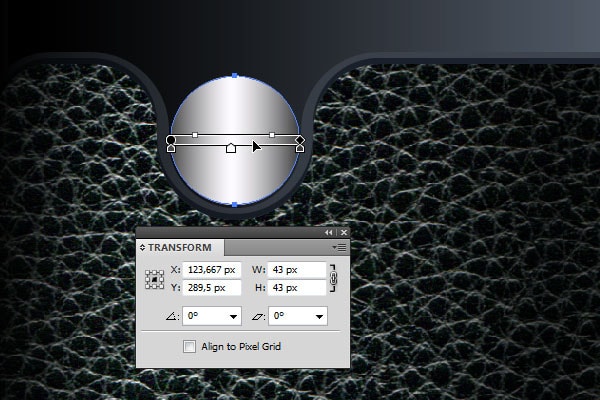
Starting to work on the details of the camera. Take the Ellipse Tool (L) and create ellipse with size 43×43 px, with linear gradient fill in the light-gray tones, and without stroke.
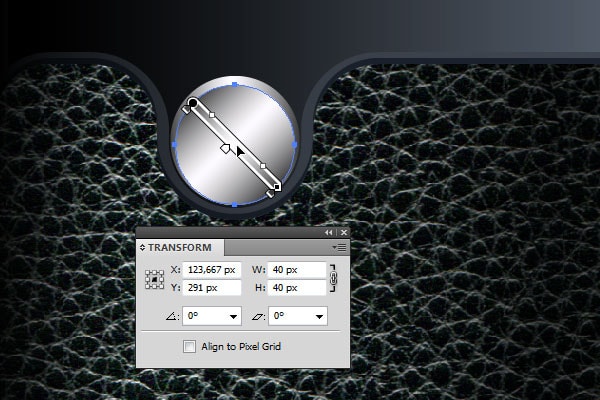
Duplicate it, reduce size up to 40×40 px, then move it down to 1,5 px, and change the gradient angle.
Now create an open path, as shown in the screenshot below, with the weight of the stroke 2px, than take the Width Tool (Shift + W) and reduce to naught the start and end of path.
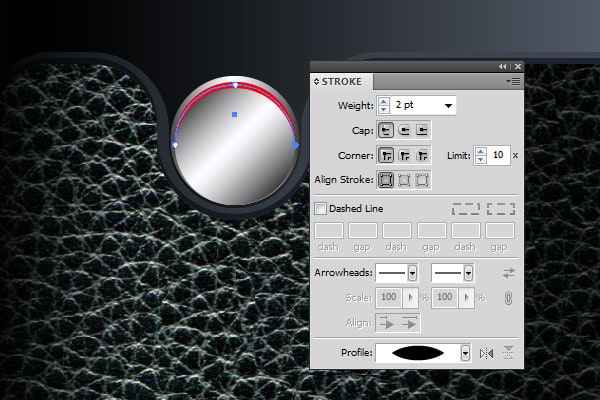
Go to Object > Path > Outline Stroke, then fill this path with a linear gradient from black to white.
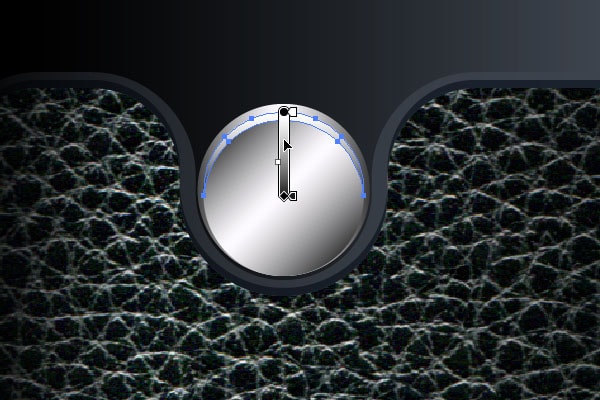
Step 12
We continue to work on the details, create a shape with a gradient as in the screenshot.
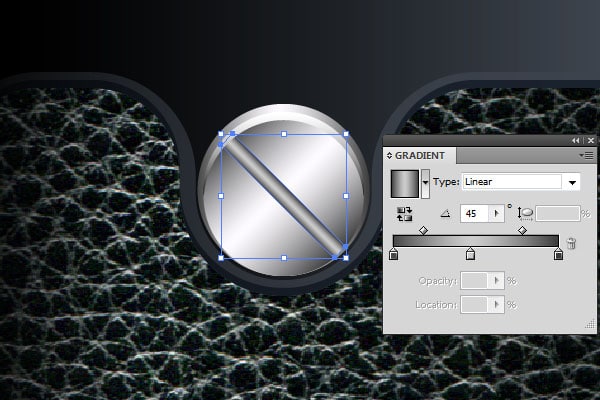
Above previous shape, create ellipse with a radial gradient from black to dark gray.
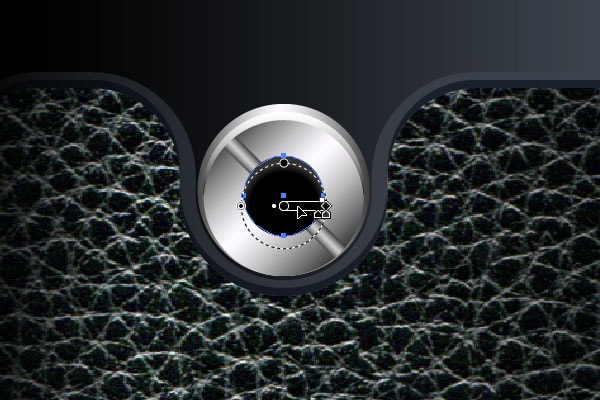
Add one more ellipse with a linear gradient from dark gray to light gray.
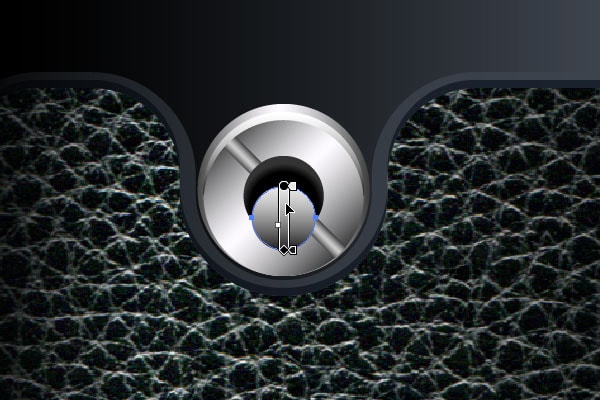
And two more shapes with linear gradients.
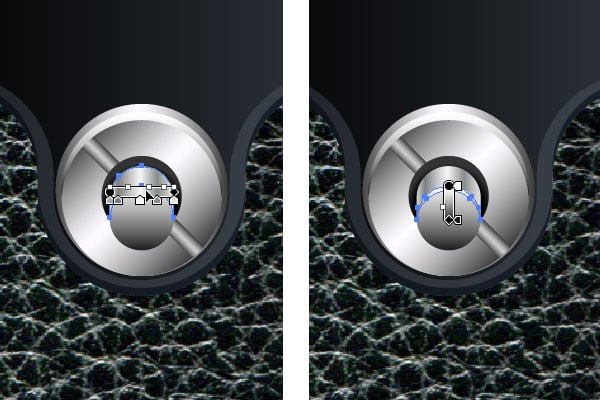
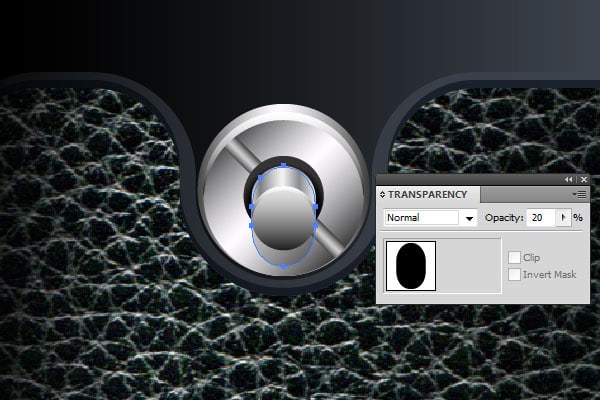
At the completion of work on the button, we must add a shadow under it. It is a form of black color with opacity of 20%.
Step 13
In this step, we will create another mechanical element on the camera body. It makes no sense to describe literally every step, just see the screenshots.
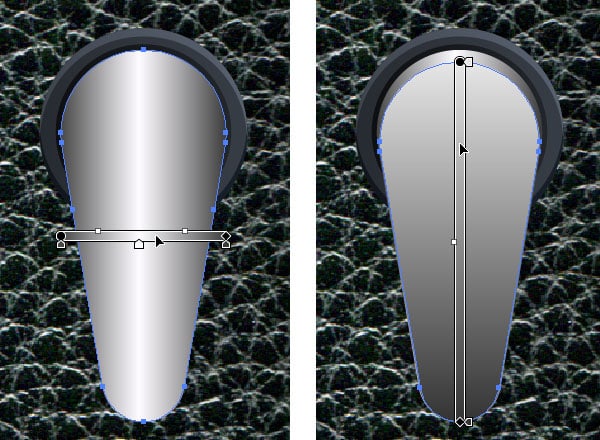
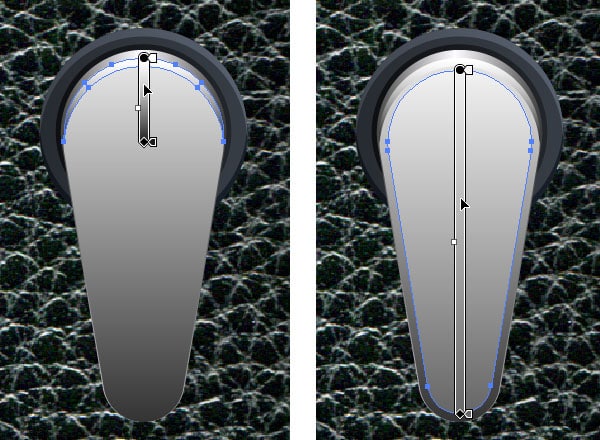
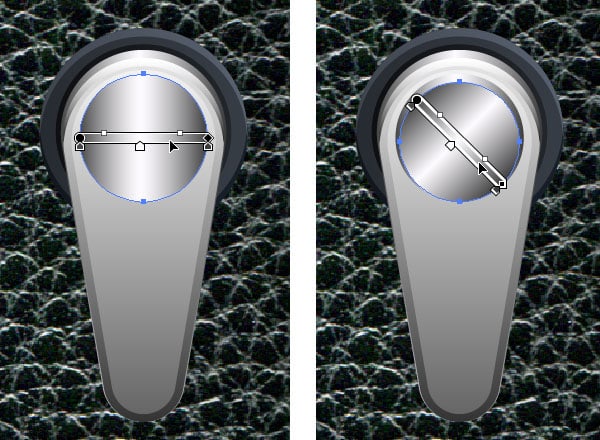
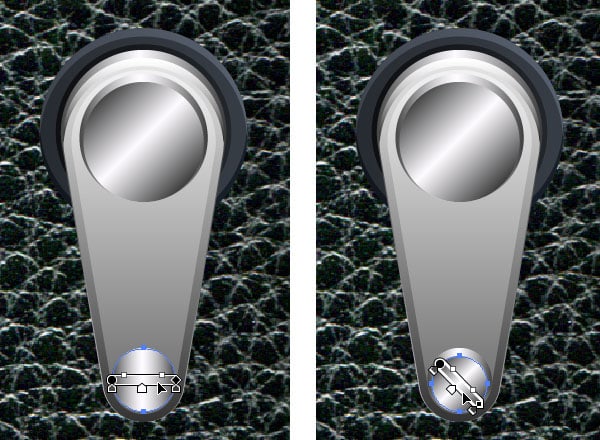
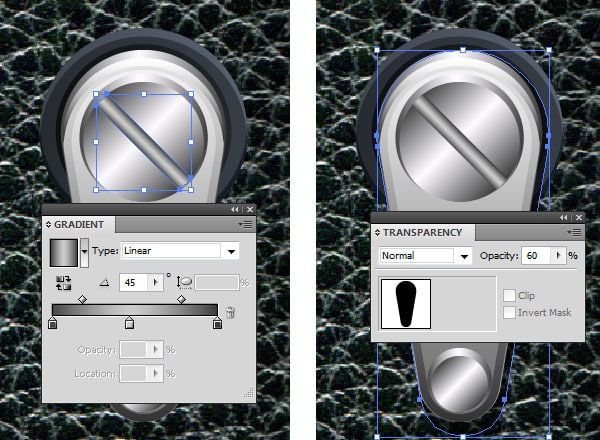
As you can see, nothing complicated. All this we have already done before, now only changed the form of the object.
Step 14
Now let’s create the inscription CAMERA (or any other) as a logo. For this purpose, I used the font Stony Island NF, which was previously downloaded and installed in the operating system. So, after the creation of the inscription we convert text to outlines with the keyboard shortcut Ctrl + Shift + O, or via the menu item Type > Create Outlines, ungroup the resulting group, and combine in a compound path Ctrl +8, then apply a linear gradient to the fill.
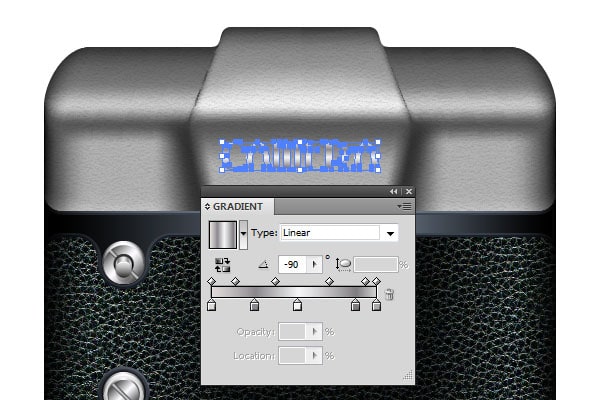
Keep this path selected go to menu Object > Path > Offset Path and in the dialog box, set a value of 2 px.
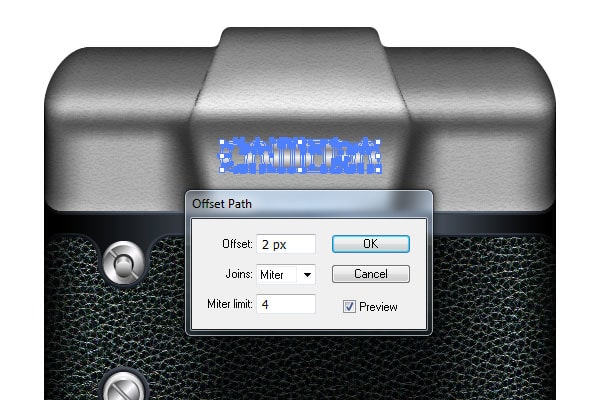
Click OK, the resulting compound path move down to 1 px, and change the gradient.
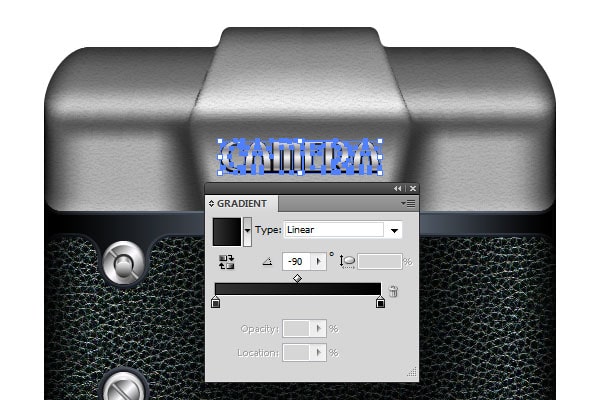
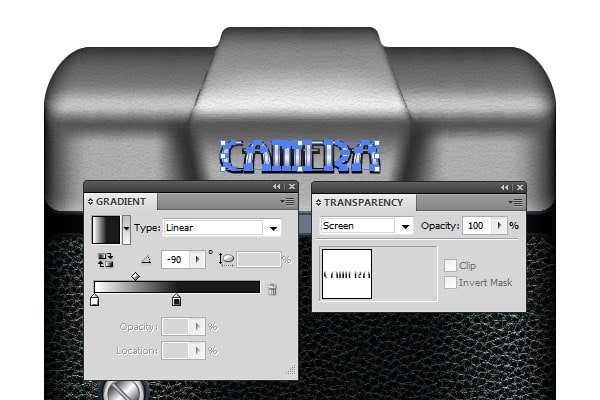
Add highlights to the logo. Select the first path with light gray gradient, go to Object > Path > Offset Path and in the dialog box, put a value of -1 px, then change gradient as in a picture below and Blending mode to a Screen.
Step 15
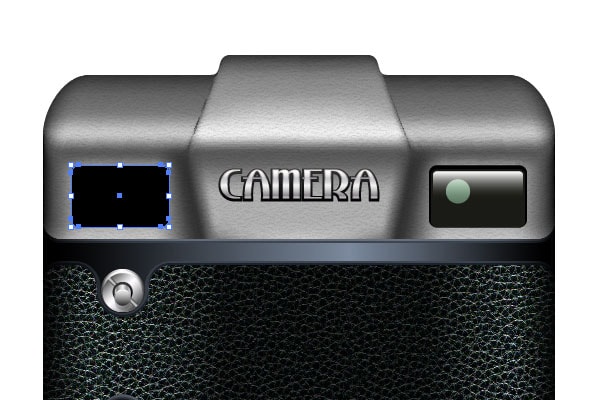
Add a viewfinder for the camera. For this take Rectangle Tool (M), create a black rectangle with size 98×62 px and round the corners with a radius of 8 px.
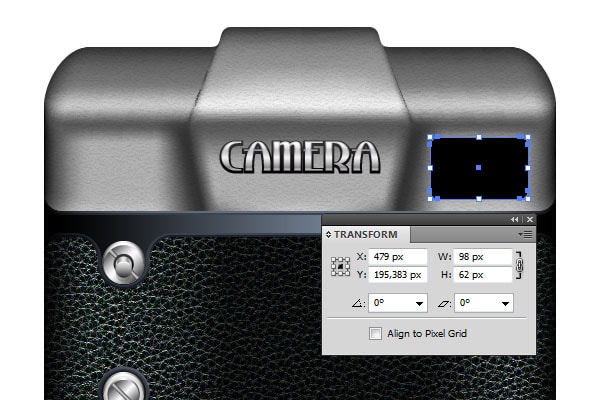
Now create another rectangle of dark gray color with size 94×58 px, and rounded corners with a radius of 6 px, and place it as shown in the screenshot below.
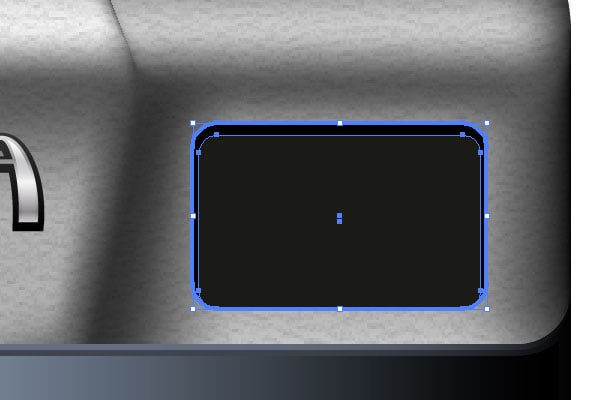
Ok, now add on top 24×24 px ellipse with a simple linear gradient.
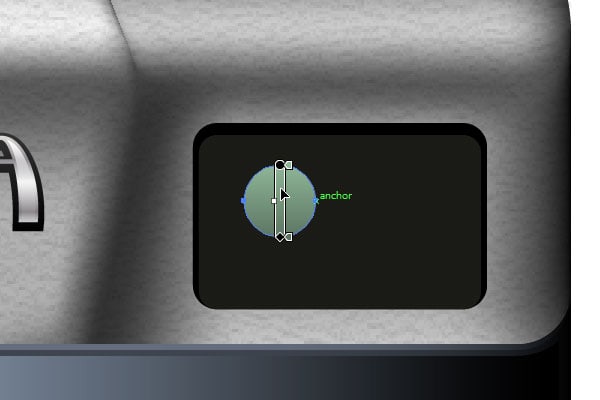
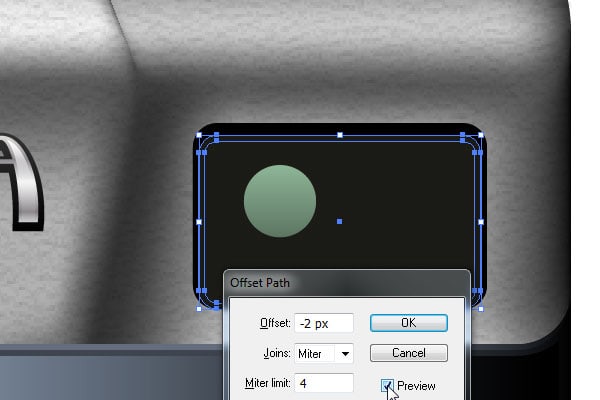
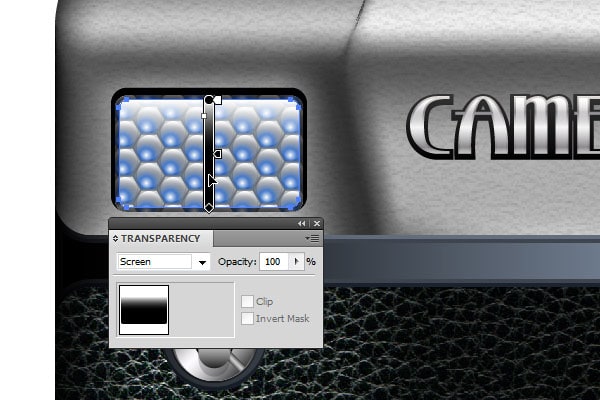
And the finishing touch – a highlight on the glass viewfinder. Select a dark gray rectangle, go to the menu Object> Path> Offset Path, set values -2 px, and click OK.
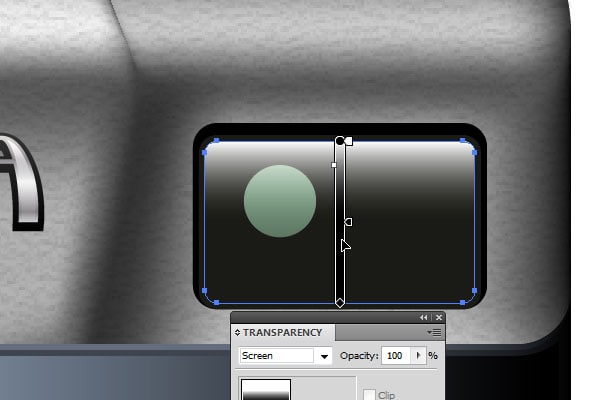
Then in the Layers panel move it above the ellipse, change Blending mode to Screen, and gradient from white to black.
Step 16
In this step, we begin to create camera’s exposure meter. Create a rectangle, similar to what we did in the beginning of the last step, with size 98×62 px and round the corners with a radius of 8 px, but place it in the opposite side of the metal panel.
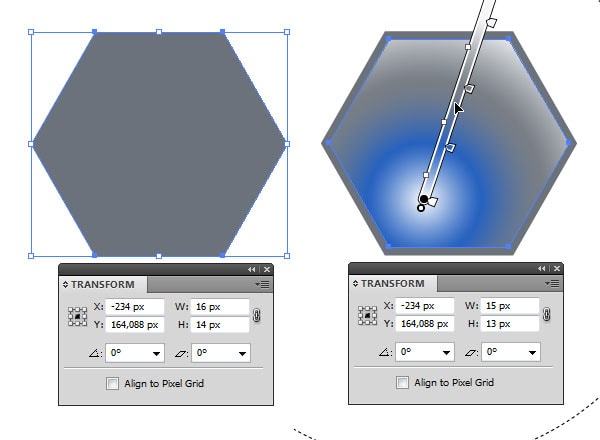
Now, anywhere in the work area create one over the other two hexagons, first with the size of 16×14 px, and solid fill, second with the size of 15×13 px, and radial gradient fill.
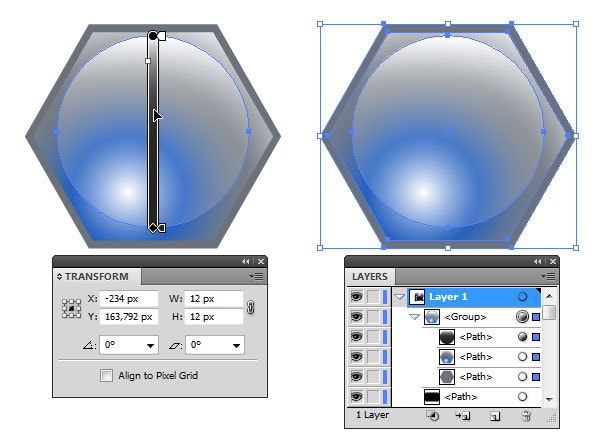
Now, above the last hexagon create a circle the size of 12×12 px, filled with a linear gradient from white to dark gray and blending mode Screen. After that, add to a group all three shapes.
Step 17
Leaving selected group, that was created at the end of the last step, go to the menu Effect> Distort & Transform> Transform, and in the dialog box, set the parameters as in the screenshot, and click OK
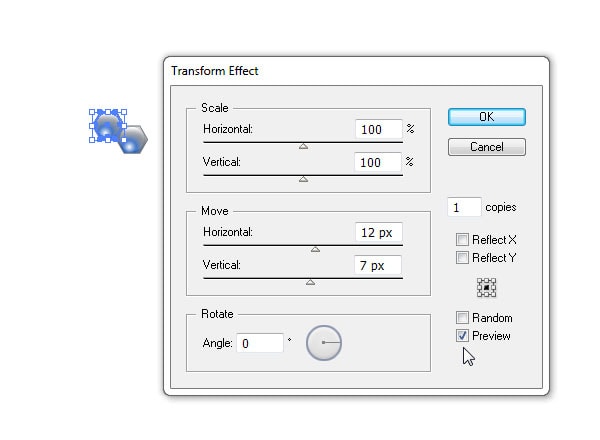
Now go back to the same menu Effect> Distort & Transform> Transform, and in the Transform Effect set other options, click OK. If Adobe Illustrator will give a dialog box asking about whether to apply to the object of a new effect, or edit an existing one, just check the checkbox Don’t Show Again and click Apply New Effect.
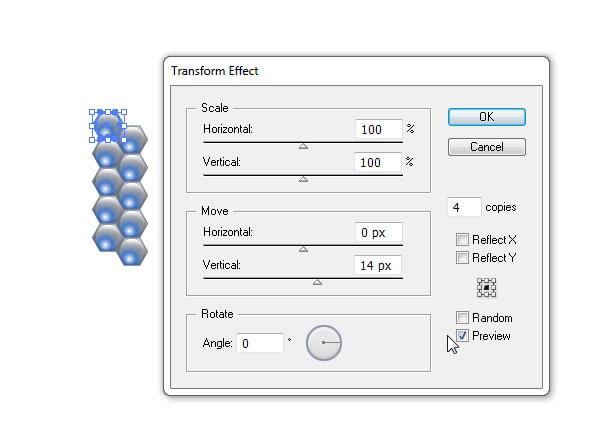
Once again, applied Transform Effect to the group, is the third, and again with another arguments.
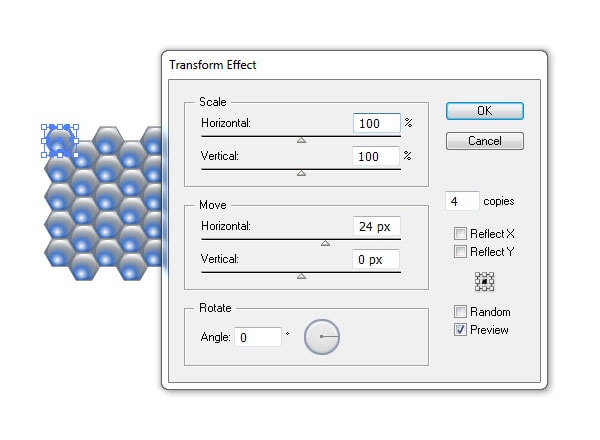
Thus, with the Transform Effects, we have created an array of objects from only one instance.
Step 18
But back to the rectangle, which we did in the beginning of the step 16. Create a new rectangle on top of it with the size 94×58 px, with round of corners radius 6 px, and place it as shown in the screenshot below.
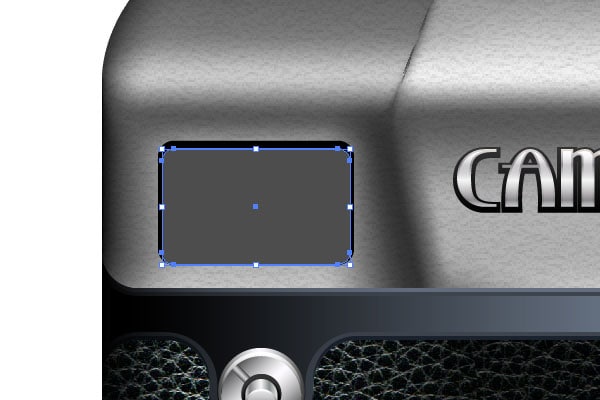
Color in this case it does not matter, because this rectangle will serve as clipping mask for an array of hexagons from last step. Place the hexagons as shown in Figure.
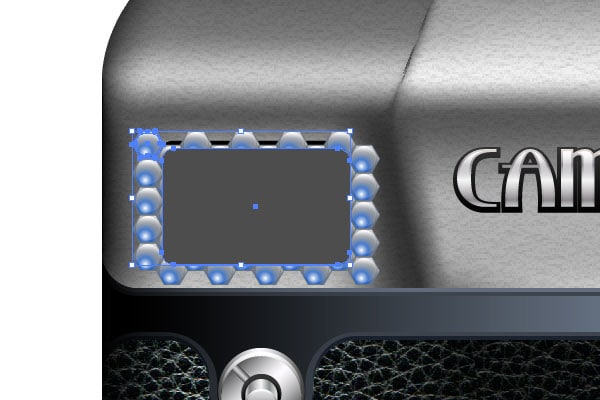
Select the gray rectangle and array of hexagons and press Ctrl + 7, or go to Object > Clipping Mask > Make.
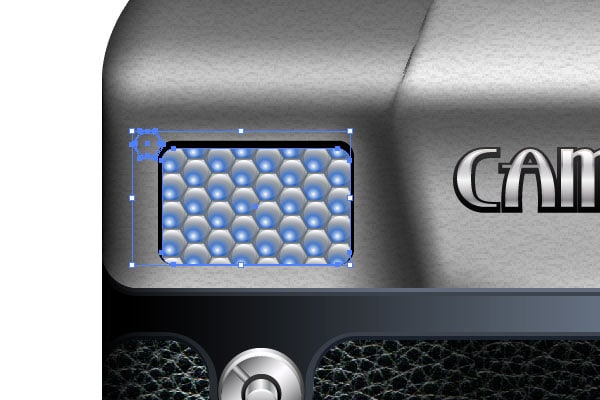
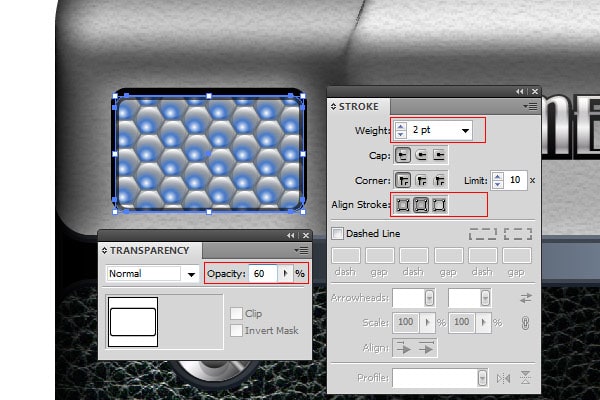
Now leave selected only clipping path, copy it to the clipboard Ctrl + C and Paste in Back Ctrl + B. Set the black stroke with weight 2 pt and opacity 60%.
Add highlight, similar to the highlight on the viewfinder, linear gradient from white to black, Screen Blending mode.
Step 19
In the next few steps, we will create a mount for external flash “hot shoe”, which when finished will look like this.
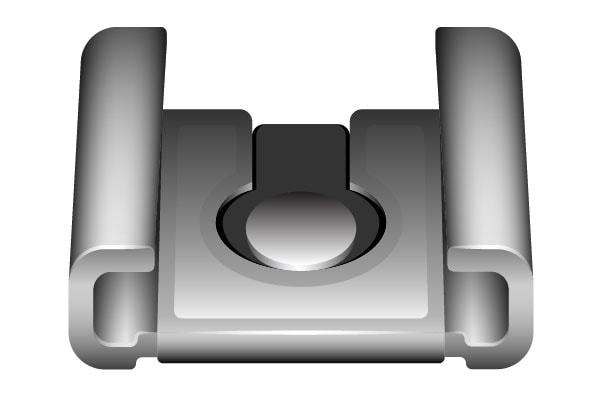
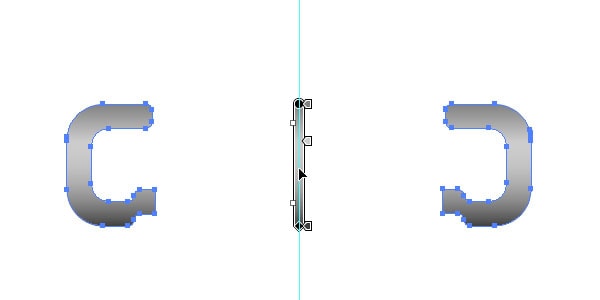
So, let’s start. In the Layers panel turn off the visibility of all objects that we have created to this time, to prevent interference with. Place a vertical guide and use it to create two symmetrical forms.

Combine them into a single compound path Ctrl + 8, and fill it with a linear gradient.
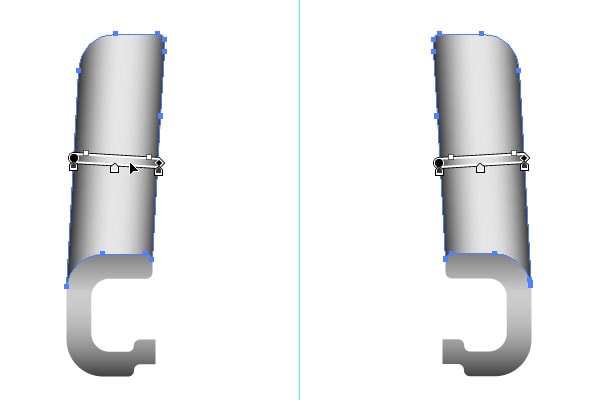
Create two more forms are arranged symmetrically with respect to the guide, and fill their linear gradients in gray tones. The angle of the gradient in the first form is -3°, while the second +3°.
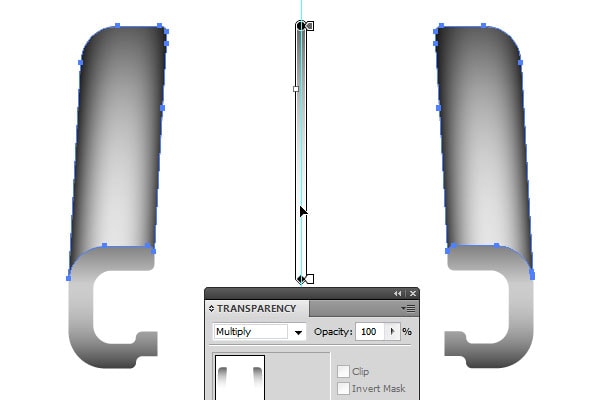
Duplicate these two forms Ctrl + C, Ctrl + F, combine them into a single compound path Ctrl + 8, change the gradient and blending mode to Multiply
Step 20
Add shape – fill with a linear gradient, blending mode Normal.
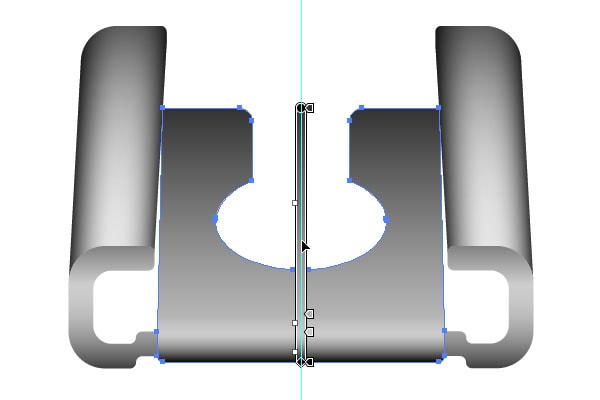
Next, create another form, as shown in the figure below, fill it with a linear gradient and change the blending mode to Screen.
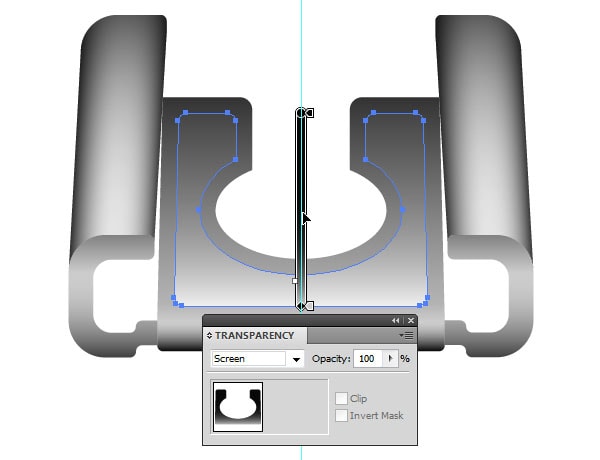
Now fill in the void, which was formed in the “hot shoe”. Create two symmetrical object, as shown in screenshot. The angle of the gradient fill of the first object is -2 °, and the second +2 °.
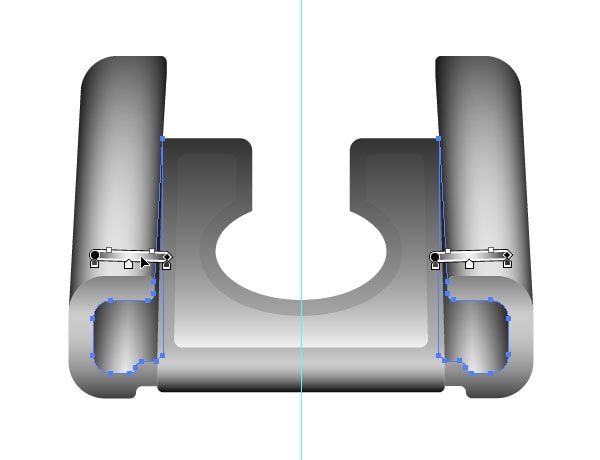
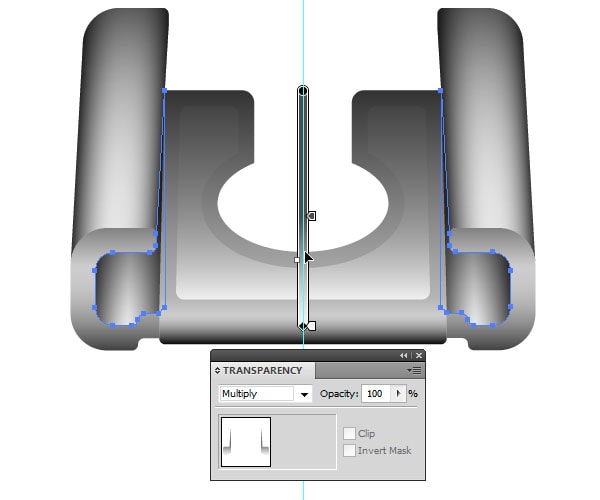
Duplicate both objects Ctrl + C, Ctrl + F, then combine them into a compound path Ctrl + 8, and fill it with a linear gradient from white to dark gray with the Multiply blending mode.
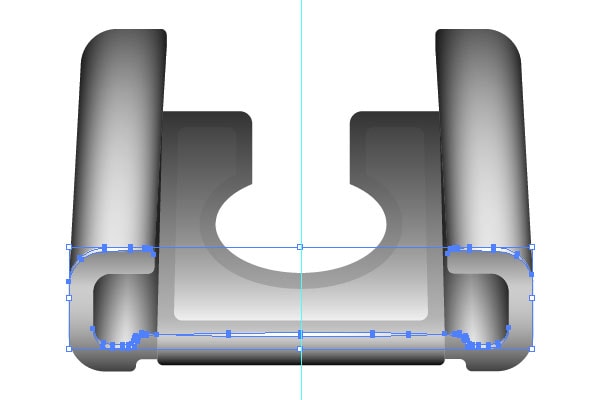
Add a small bevel on the shapes edges – five simple forms of light-colored.
Step 21
In this step we will create the inside of the “hot shoe”. Create a compound path of two parts with a linear gradient fill.
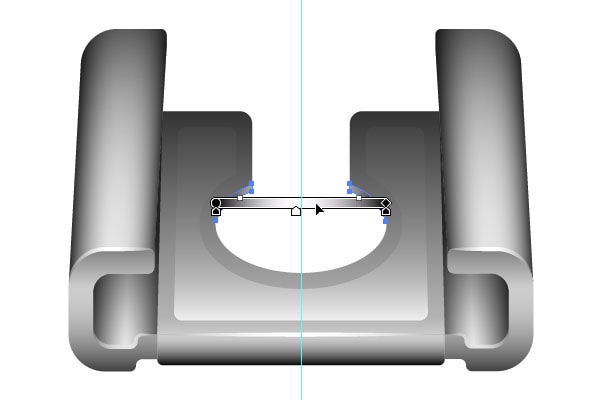
Now in the middle of mounting draw sync contact.
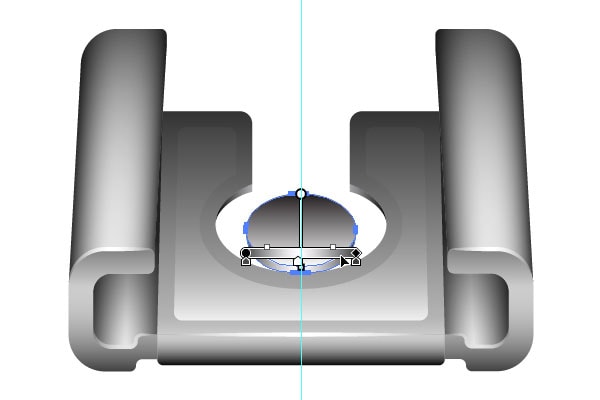
Add shape with black fill.
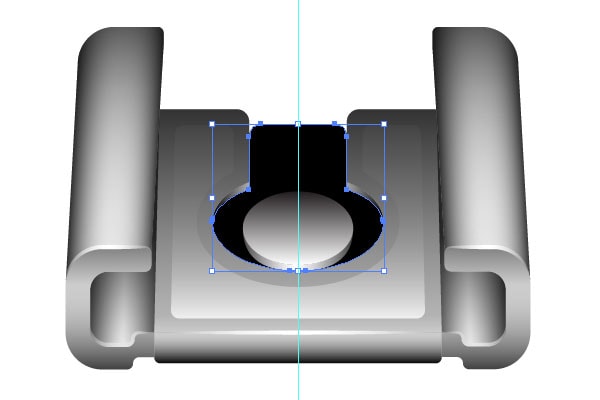
Copy to Clipboard and Paste in Front this shape Ctrl + C, Ctrl + F, then reduce width and fill it gray.
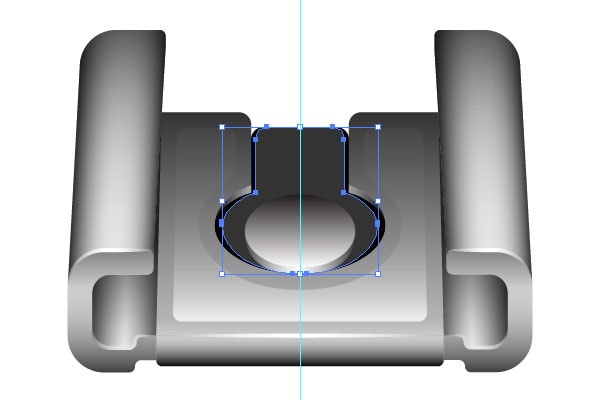
On this mount for external flash is ready. Vertical guide can be removed and all objects grouped together. In the next step, we correctly position “hot shoe” on the camera body, and begin to create other items.
Step 22
At the beginning of the lesson, we created the guide in the form of 512×512 px rectangle with rounded corners, and in the Layers panel hidden its visibility. The size of this guide is properly sized for icons for App Store, this means that no element of this camera should not go beyond the boundaries of the guide.
We use this guide for the exact positioning of the “hot shoe”, and other elements that we will create later.
While holding the Shift key select the guide and mount flash, another click on the guide will assign it a key object, and press on the Align panel consecutively two buttons Horizontal Align Center and Vertical Align Top.
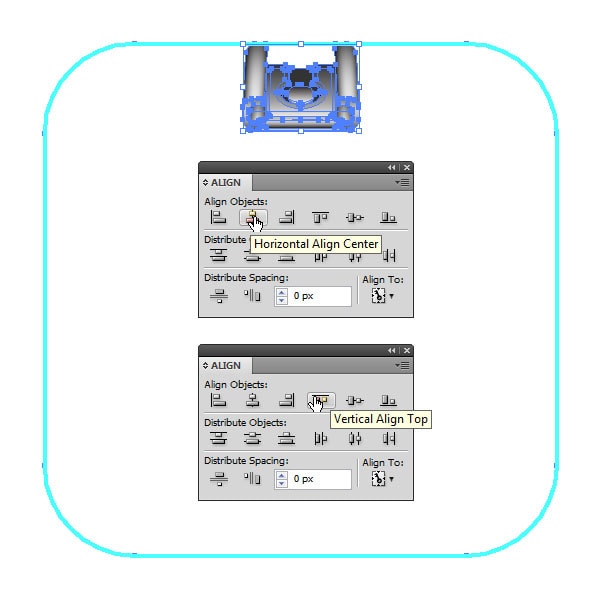
You can now turn on the visibility of all other objects, and make sure that everything is in place.
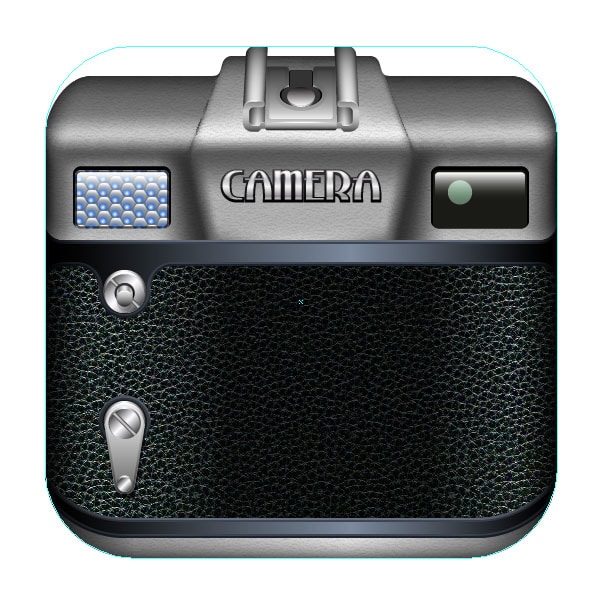
Another small touch – between the camera body and the “hot shoe” put a small black rectangle with rounded corners and opacity of 20%.
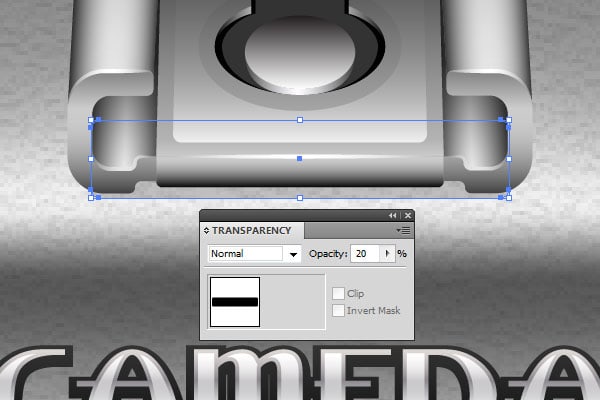
Step 23
In this step we will create the shutter. In a free place in the working area will create an ellipse size 40×20 px, and fill it with a radial gradient, as in the screenshot below.
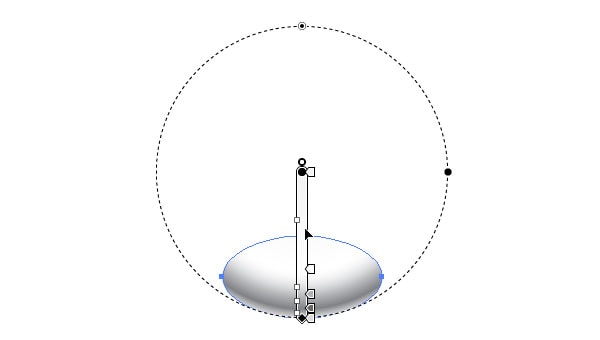
Add form below with a linear gradient in gray tones, then copy it to the clipboard Ctrl + C and paste the following Ctrl + B. Fill this object black color and move it to 1 px down.
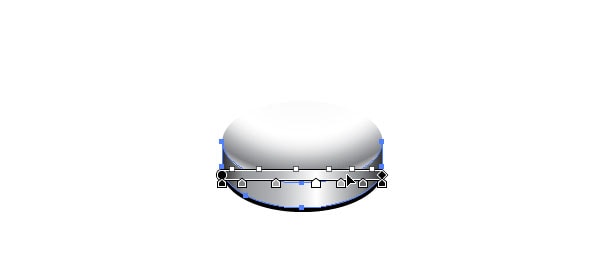
Group these objects, then create under them the ellipse with the size 82×40 px and filled with a radial gradient from black to dark-gray.
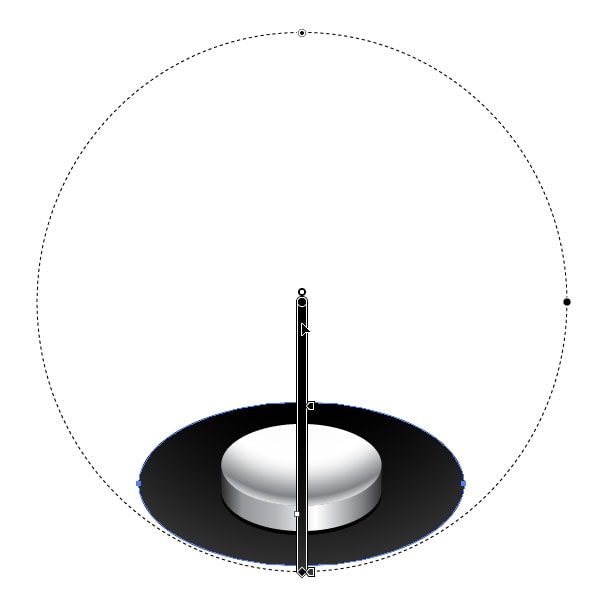
Even lower is another ellipse with a solid dark gray shading and size 88×44 px.
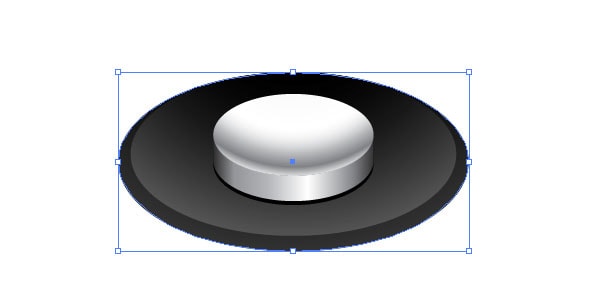
Next object, it will have an elliptical shape and is below all of the previous, with dimensions 114×62 px and radial gradient as the fill.
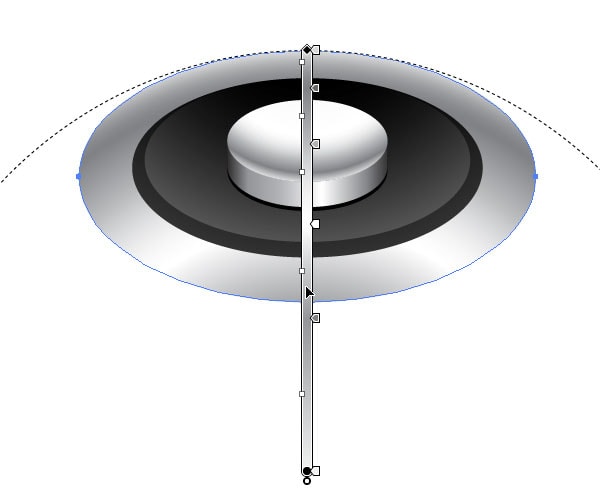
Moving on. Another ellipse with size 127×75 px, gradient look at the screenshot below.
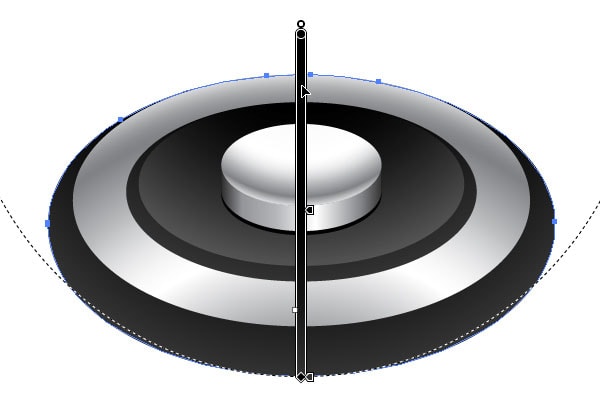
And now came the moment when the ellipses is over, at least for a while J. In the next step we will finish work at shutter release, and place it on the camera body.
Step 24
Let’s create a shape as shown in the screenshot below, filled with a radial gradient from light gray to dark gray.
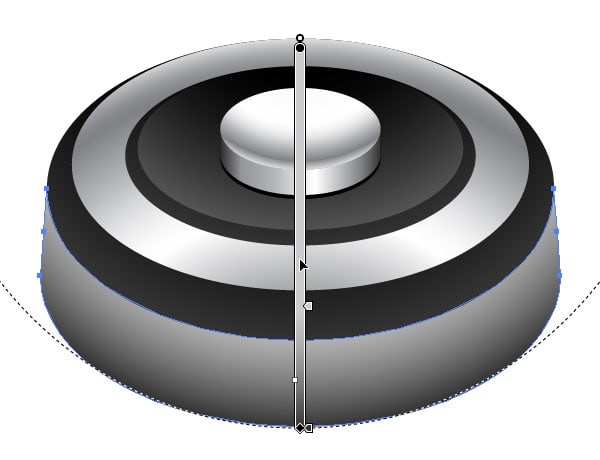
Duplicate it, change the gradient to the linear and the blending mode from Normal to Multiply.
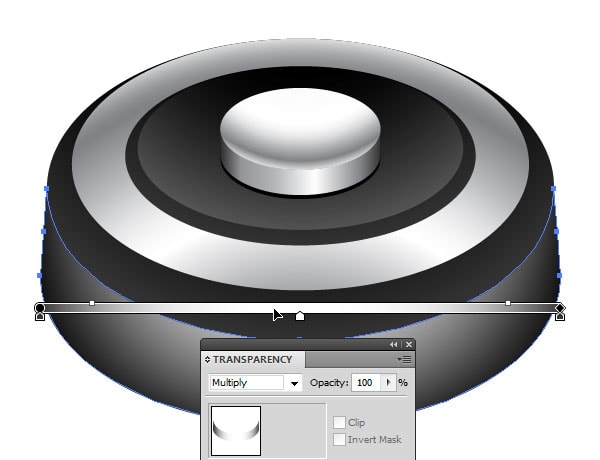
And add one more object at the bottom filled with black or dark-gray solid color.
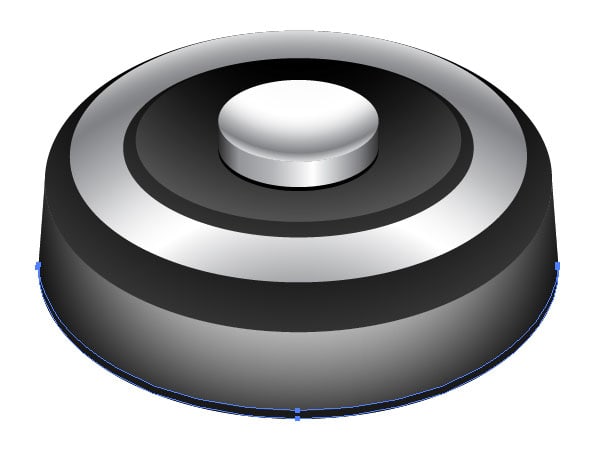
It’s time to work a little Pen Tool (P). So, take this tool and build shape, as shown in the screenshot, then fill it with a radial gradient in gray tones.
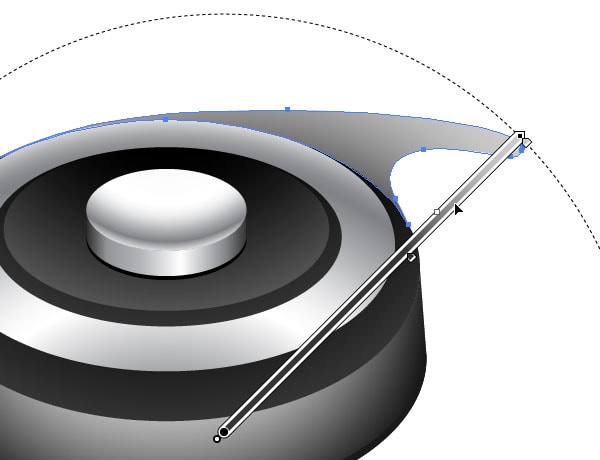
We continue to work Pen Tool, at this time fill shape with a linear gradient.

Make a bevel using Pen Tool (P), Width Tool (Shift + W) and the Gradient Tool (G).
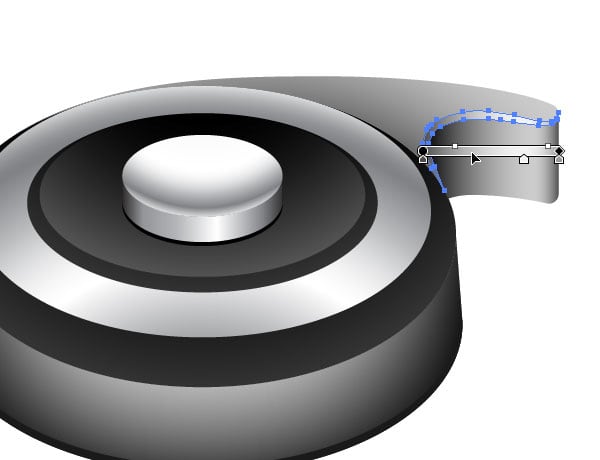
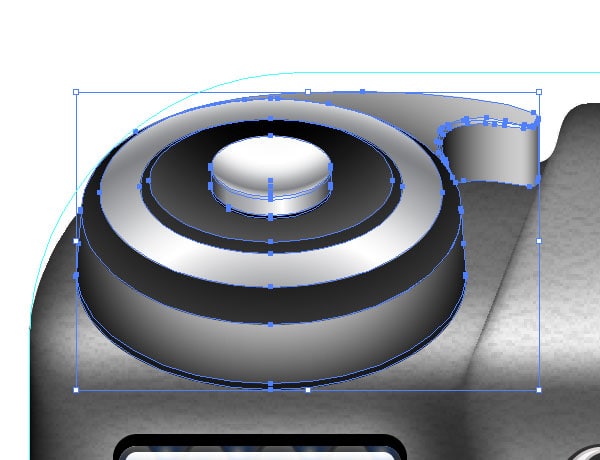
Now all the objects combine in a group, and place on top of the camera, with a focus on, so as not to go beyond the guide.
Step 25
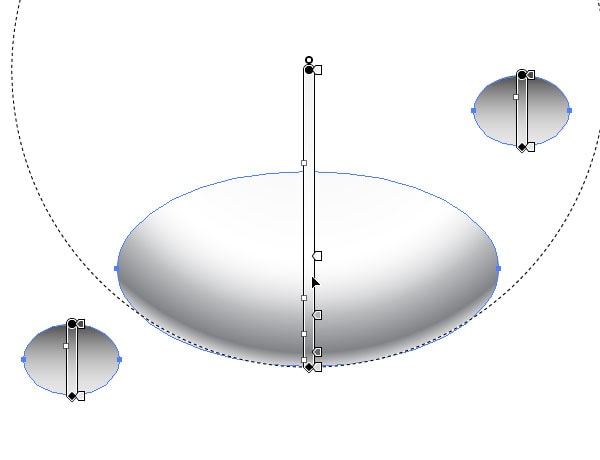
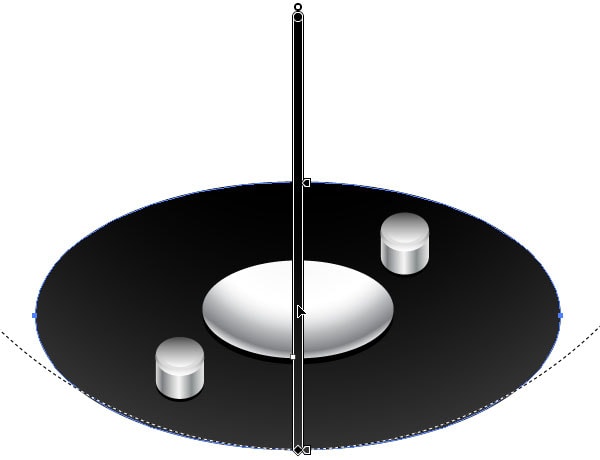
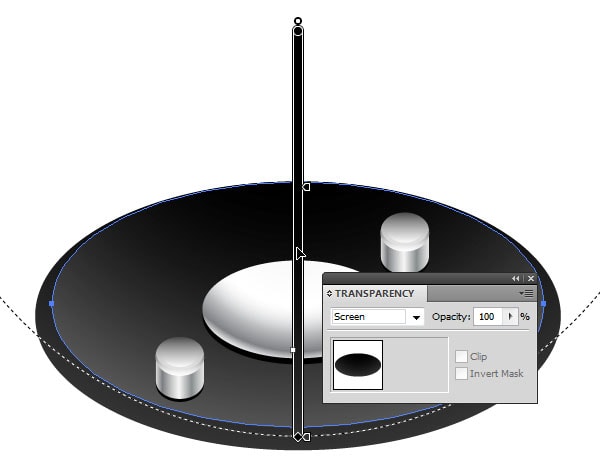
Well, we missed the ellipses with a radial gradient fills? ;-) Personally, I’m not! But nothing can be done, we will have to make another one part of the camera, located on the opposite side of the top panel.
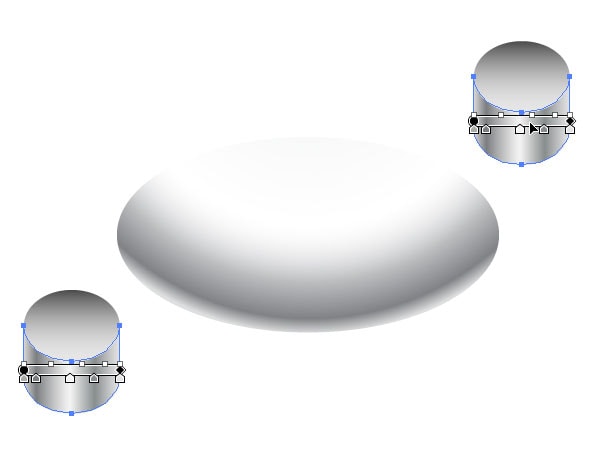
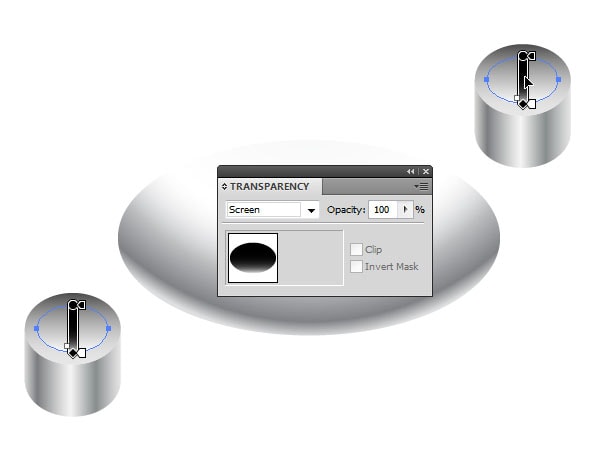
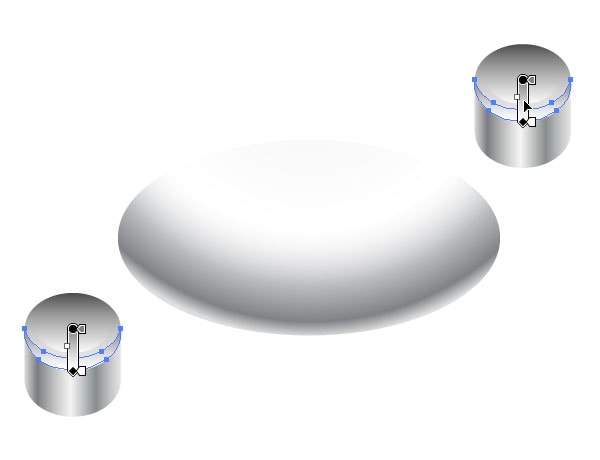
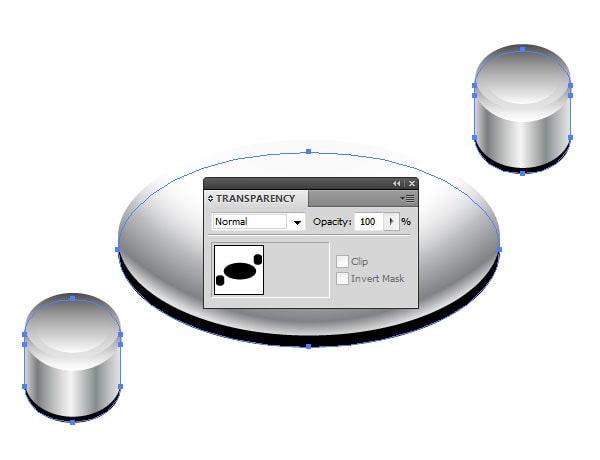
I will not comment in detail on each following screenshot, all these actions we did in the previous steps. I think that looking at the screenshots all will be clear.
Step 26
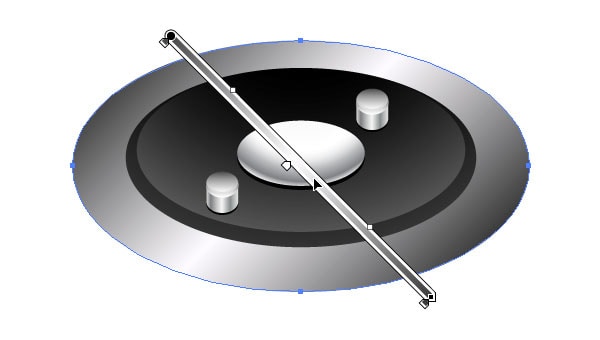
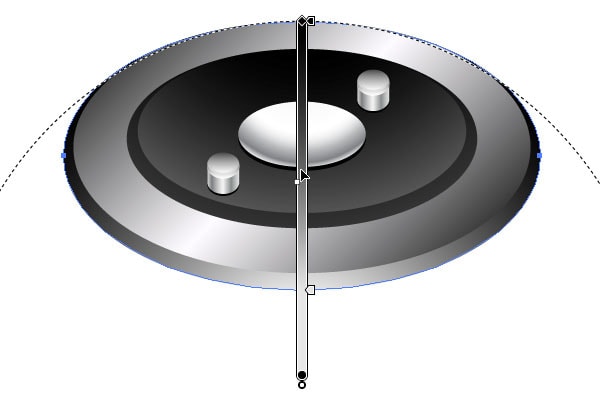
A few more screenshots with no comments.
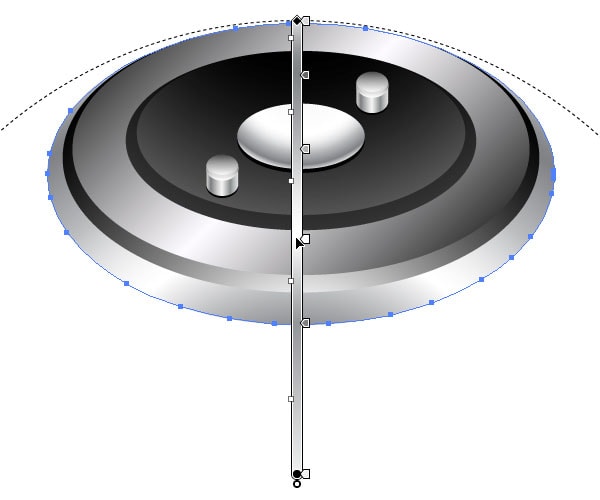
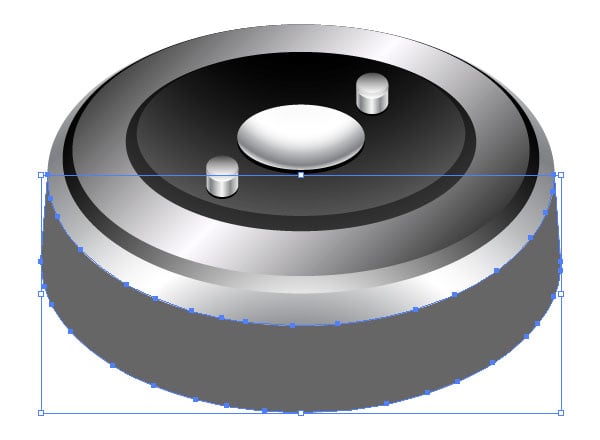
Step 27
We’ve just created a closed shape of gray color, although in this case, the color doesn’t matter, it can be any. Make sure that Smart Guides enabled, it can be done in the View menu.
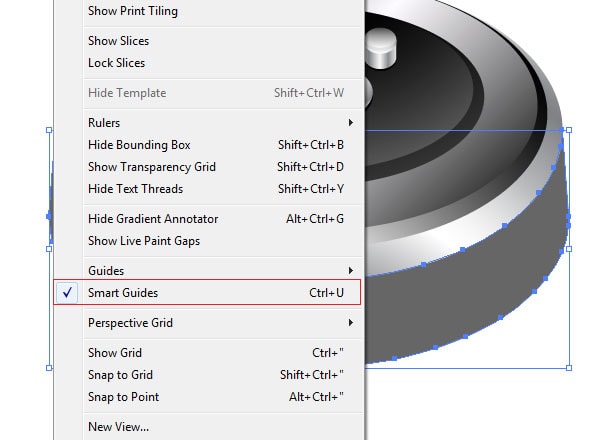
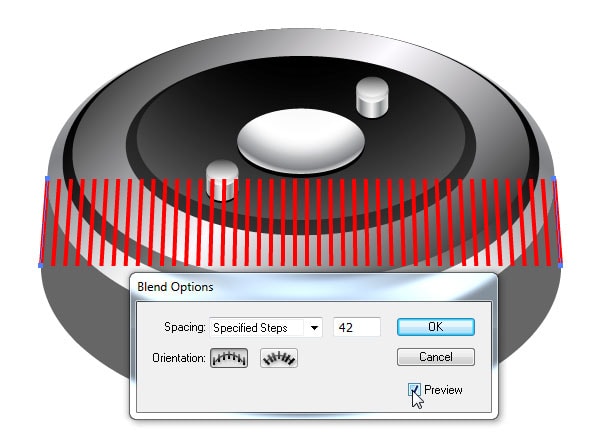
Take the Line Segment Tool (\) and draw two lines, as in figure below.
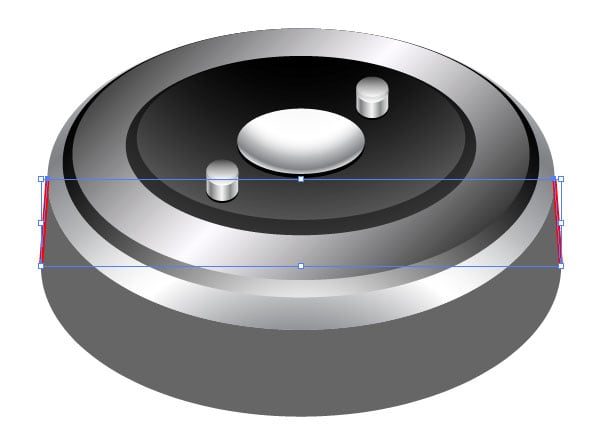
Create a blend from these two segments with number of steps 42.
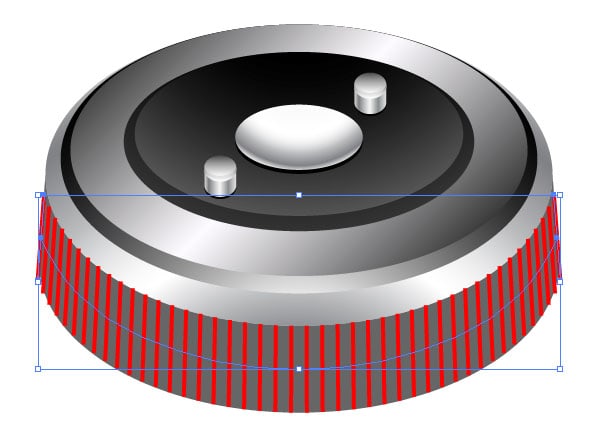
With the Pen Tool (P) create a curve, which runs through the middle of the gray shape, then select this curve and blend, and go to Object > Blend > Replace Spine. This action will place the blend steps along the curve.
Step 28
Now we expand the blend on the components, for this go to Object > Blend > Expand, still selected, hold down the Shift key and select the path with the gray fill (end of step number 26), now in the Pathfinder panel press the Divide.
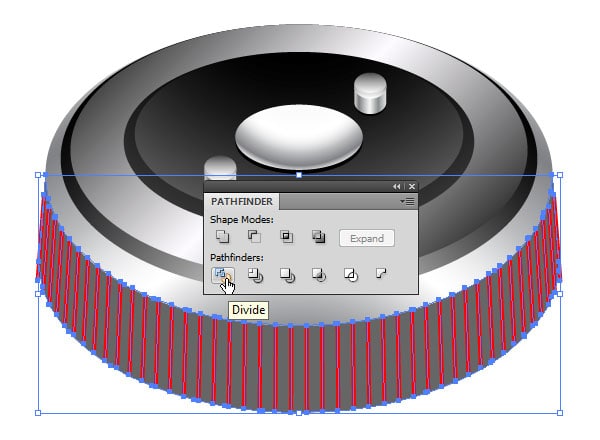
This will lead to the creation of a closed objects group, which repeats the original contour.
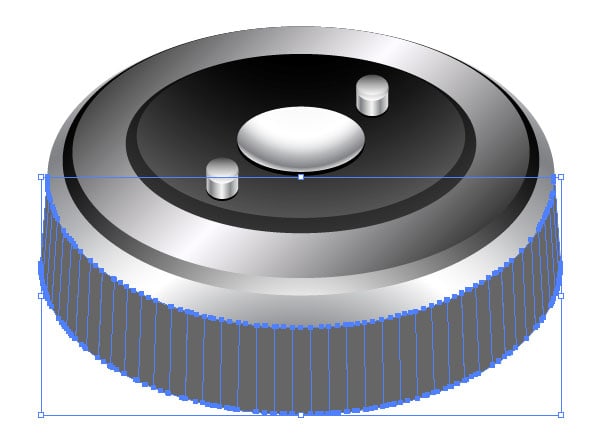
Now, each of these objects fill with a linear gradient of black – white – black. The angle of the gradient will range from -4° to +4°.
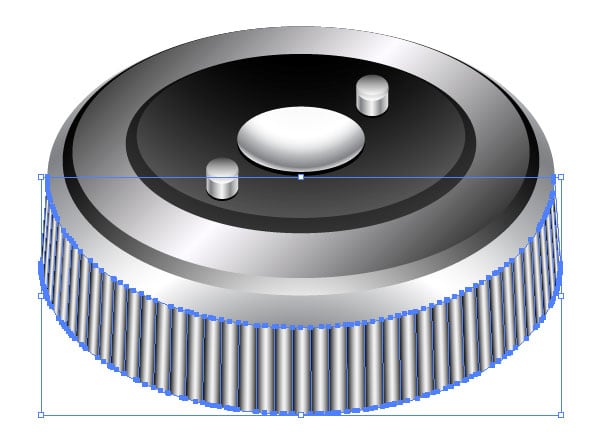
Add another shape with a linear gradient and Multiply blending mode.
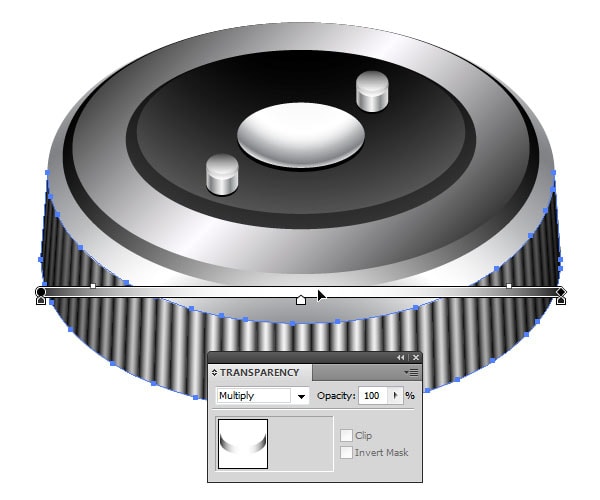
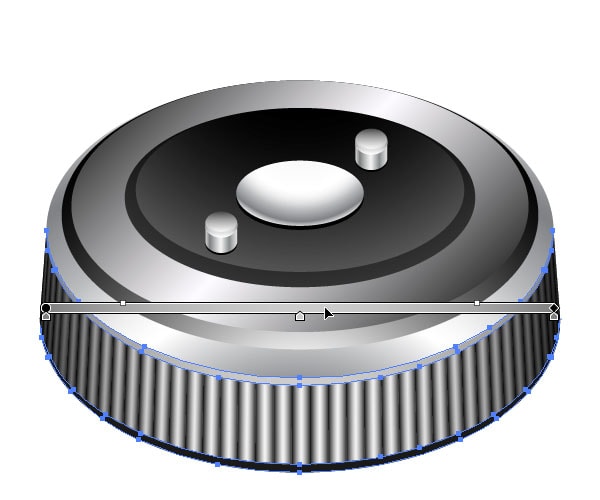
And one small addition.
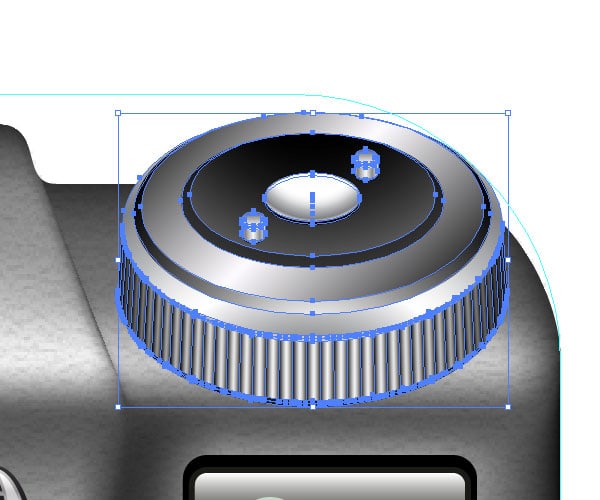
Now, place this item on the metal panel of the camera body, do not go beyond the guide.
That came to an end the first part of the tutorial on creating a vintage camera icon. In the second part we will make an integral part of any camera – lens. But now propose to look at the works of our creativity.
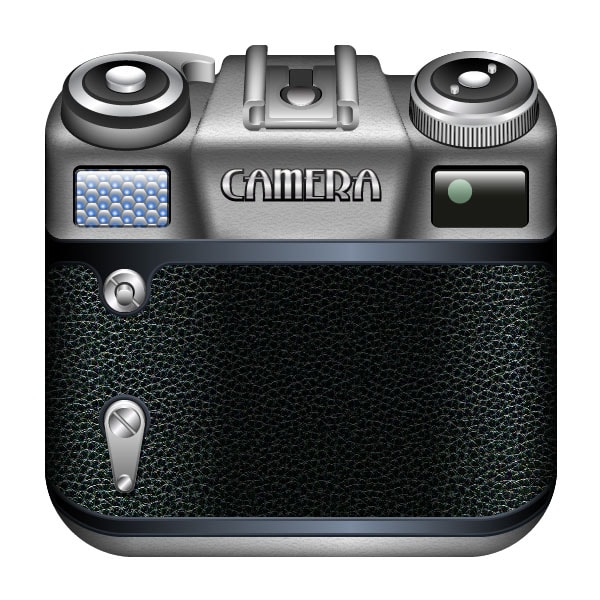
Step 29 – Create Lens
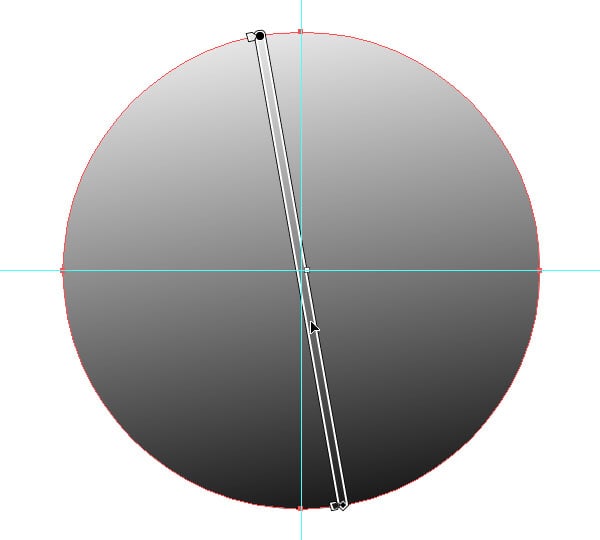
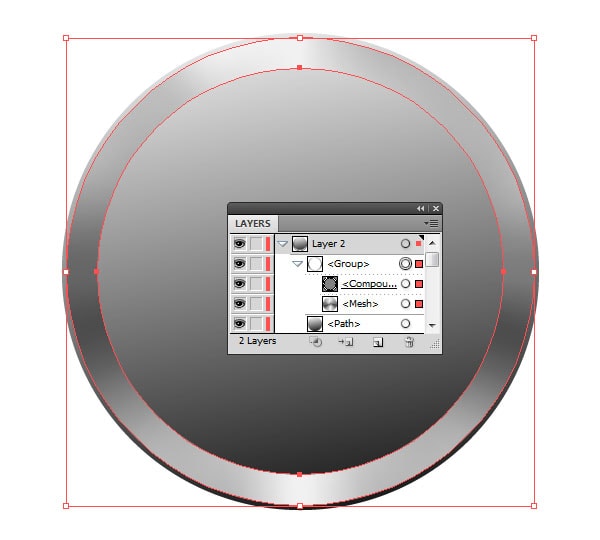
In the Layers panel add a new layer with the name Layer 2, which will place two perpendicular guides. Next, take Ellipse Tool (L) and create an ellipse with size 318×318 px, whose center should be located at the intersection of the guides, and fill this ellipse with a linear gradient.
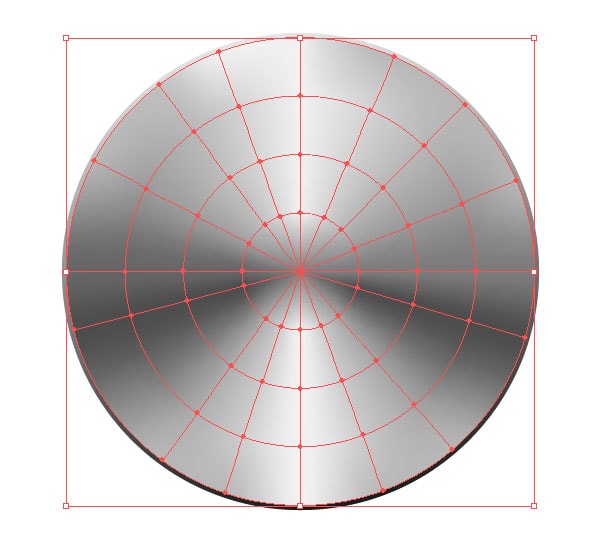
Create over an ellipse a conical Gradient Mesh with size 312×312 px. How to make a conical mesh can be found here.
Add Compound Path with diameter outer circumference 312 px, and the diameter inner circumference 271 px.
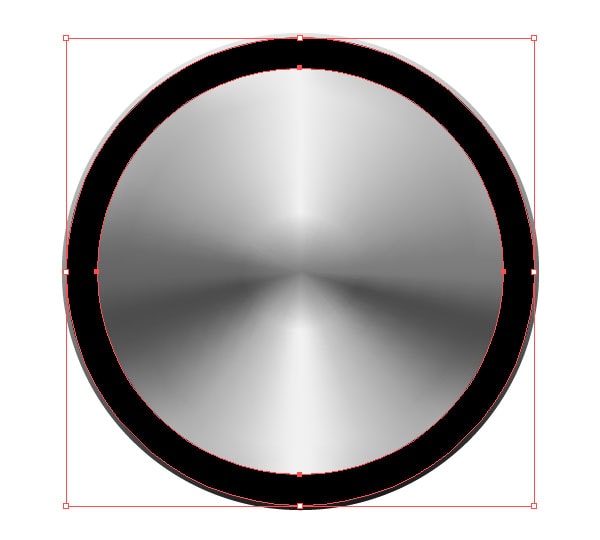
Select Compound Path and Gradient Mesh and go to menu Object > Clipping Mask > Make, or press the hotkey Ctrl + 7.
Step 30
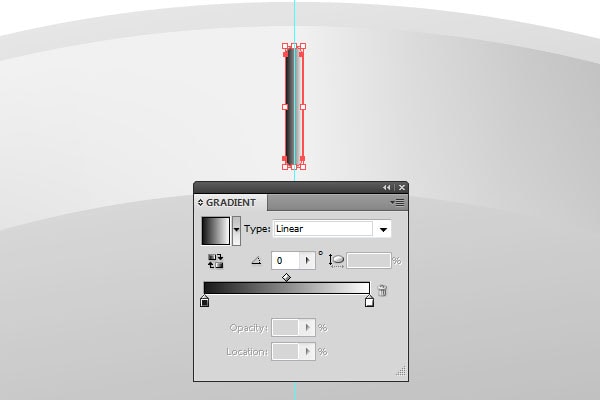
Create a small rectangle with rounded corners and size of 2×15 px and simple linear gradient from black to white. Place this object as shown in the screenshot below.
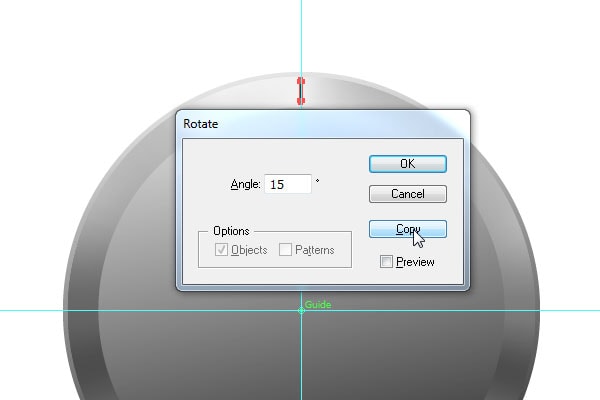
Keep rectangle selected, take the Rotate Tool (R) and with the Alt key pressed, click at the intersection of the guides, then in the dialog box, enter 15 ° and click Copy.
Now press the key combination Ctrl + D 22 times.
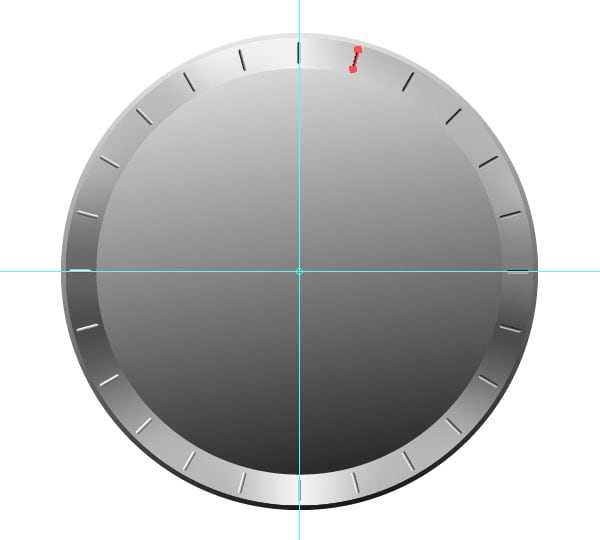
Using the same technique, create a small incisions.
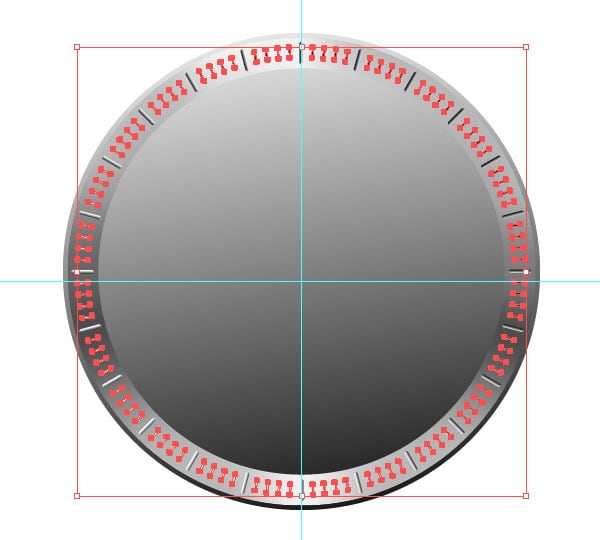
Step 31
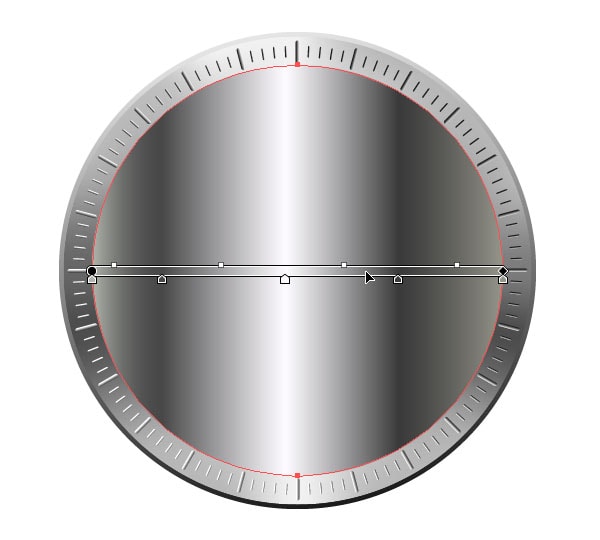
Create in the center, circle with size of 274×274 px, and fill it with a linear gradient in gray tones.
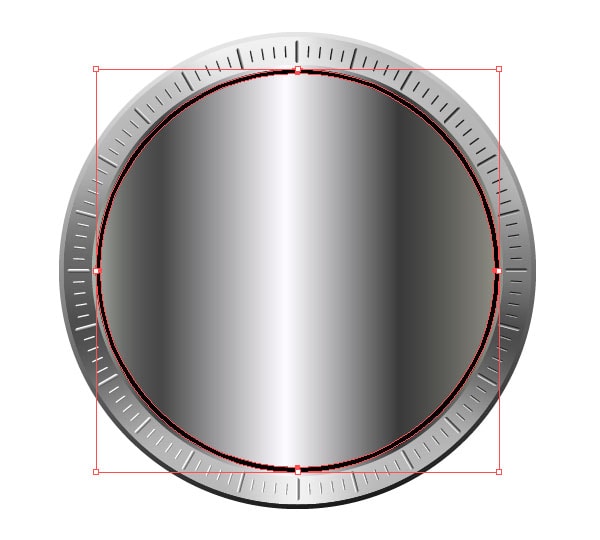
Create a Compound Path with diameter outer circumference 269 px, and the diameter inner circumference 262 px, then fill it black color.
Create a shape as shown in the screenshot, and fill it with a light-gray gradient.
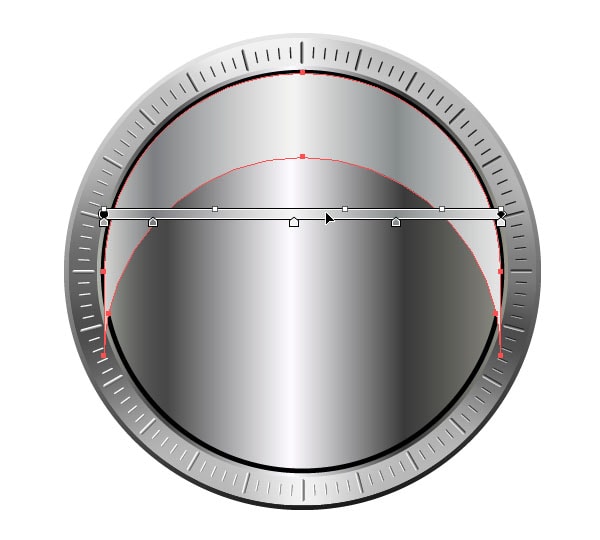
Duplicate the just-created object, and transform it into Gradient Mesh using the technique, that we used in steps 8 and 9 of this tutorial.
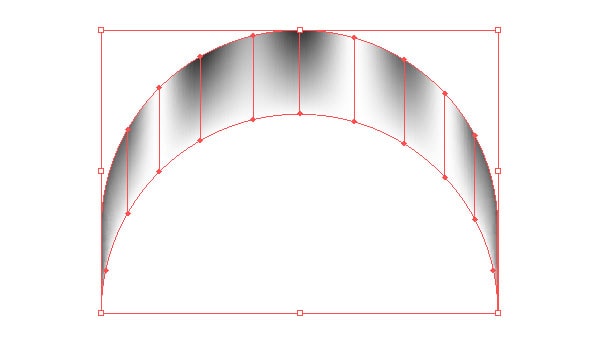
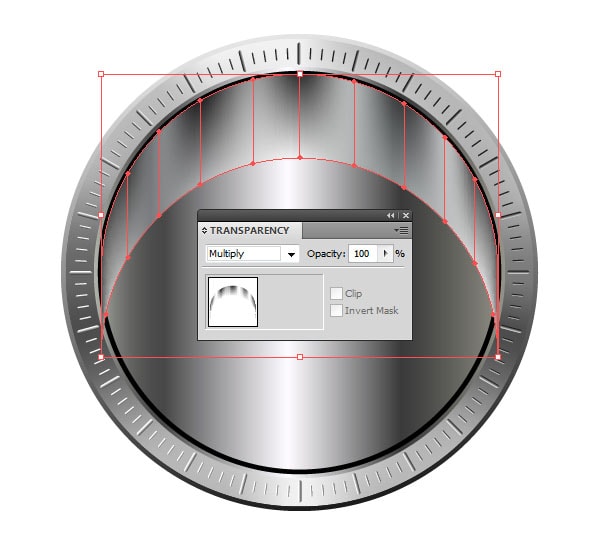
Now change the mesh blending mode to Multiply. This will create a shading effect of the previous form.
Step 32
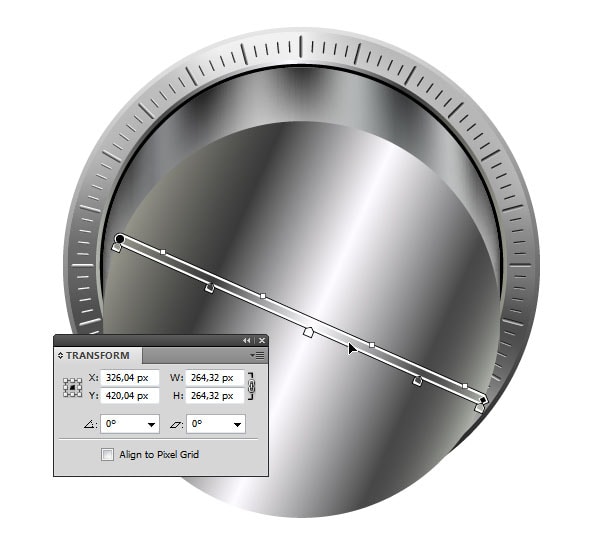
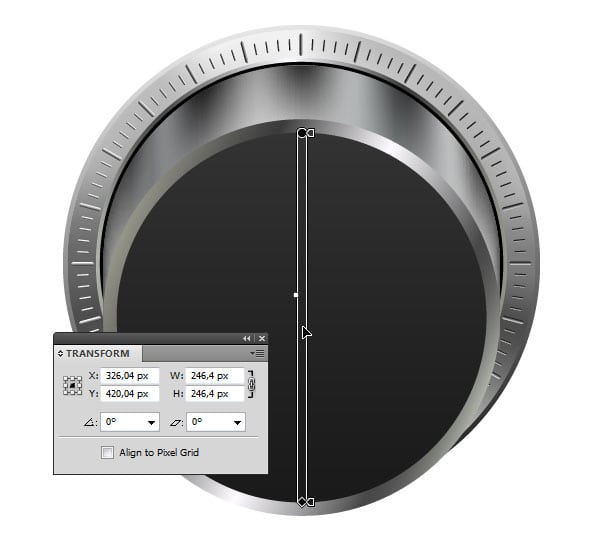
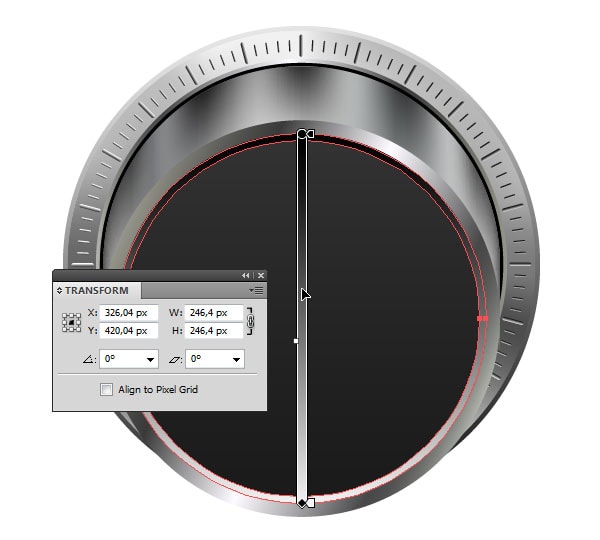
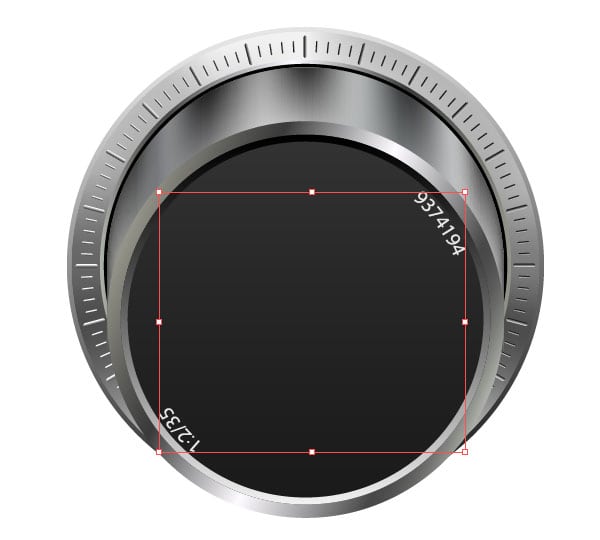
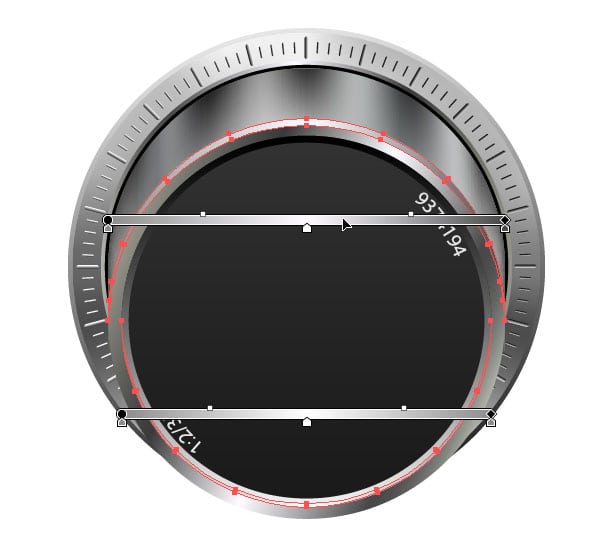
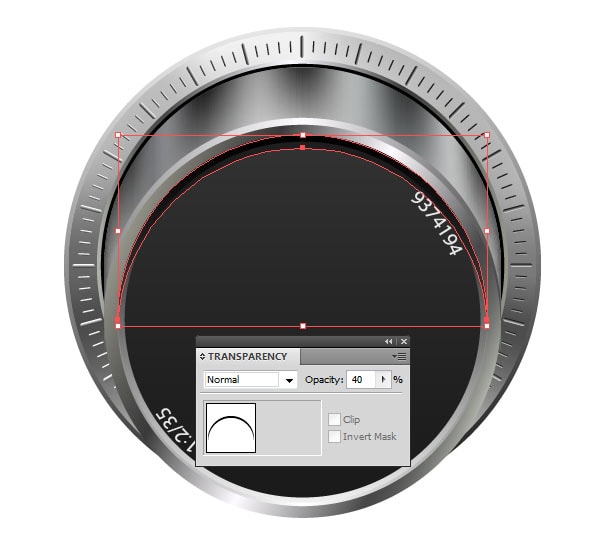
More of the following will be very simple, so will only screenshots, without comments.
Step 33
Now create an ellipse with size 206×206 px, and fill it with a linear gradient as shown in the screenshot.
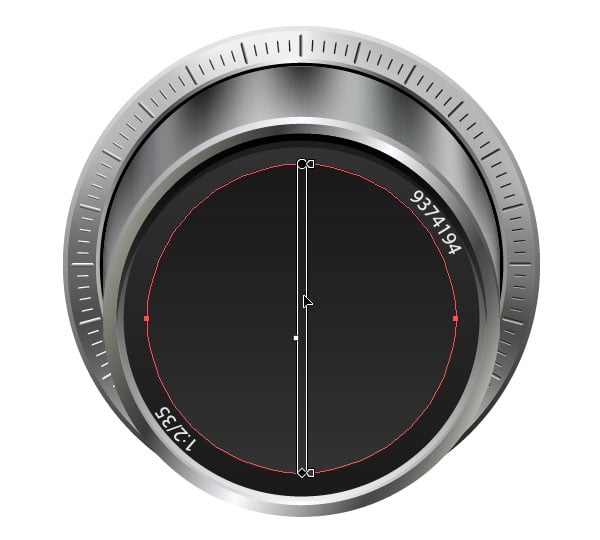
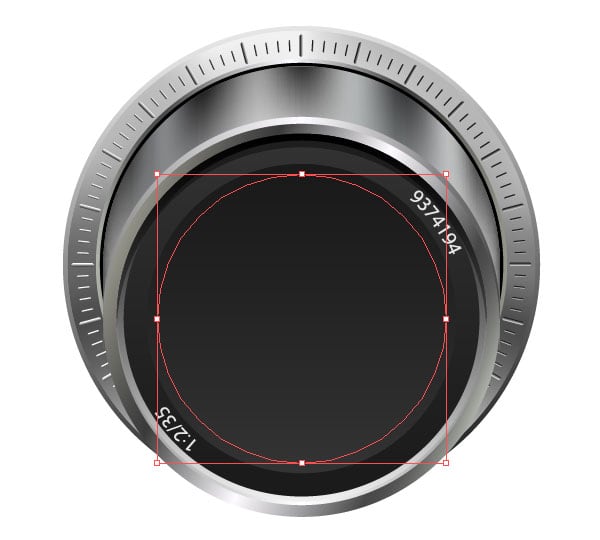
Copy this ellipse to Clipboard and Paste in Front, then resize it to 192×192 px.
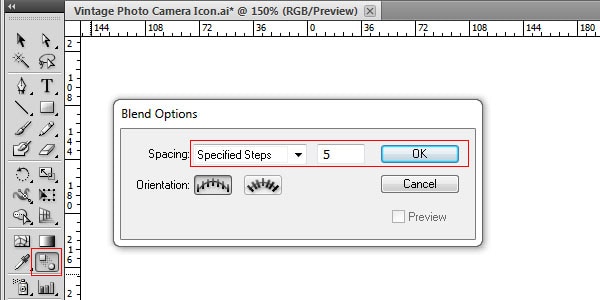
Now double-click on the Blend Tool in the toolbar, open the configuration dialog box of the tool, and set a value of 5 steps, then press OK.
Create a blend from the last two ellipses.
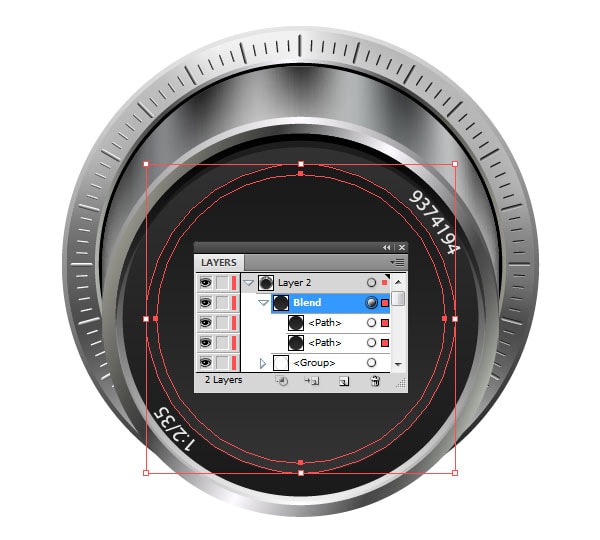
After then go to Object > Blend > Expand.
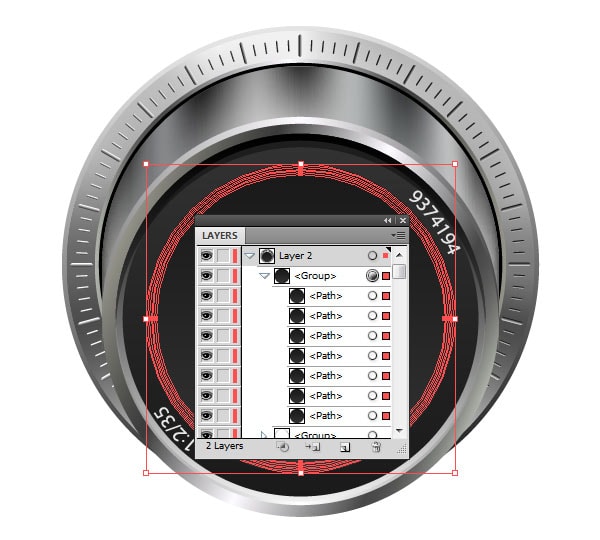
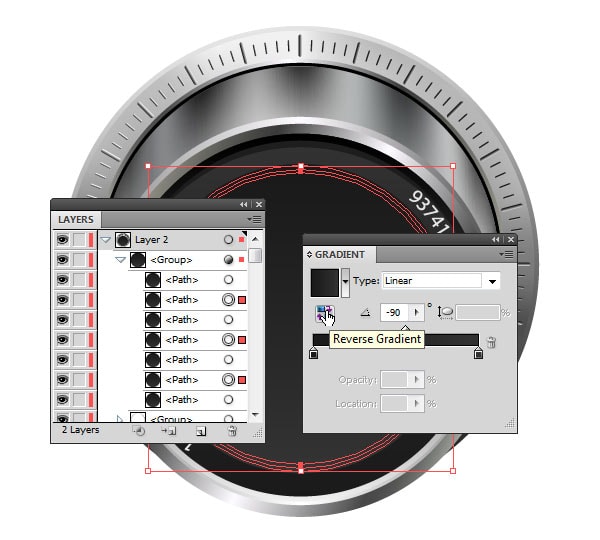
In the resulting group, keep selected only the second, fourth and sixth object, and click on the Gradient panel Reverse Gradient button.
Step 34
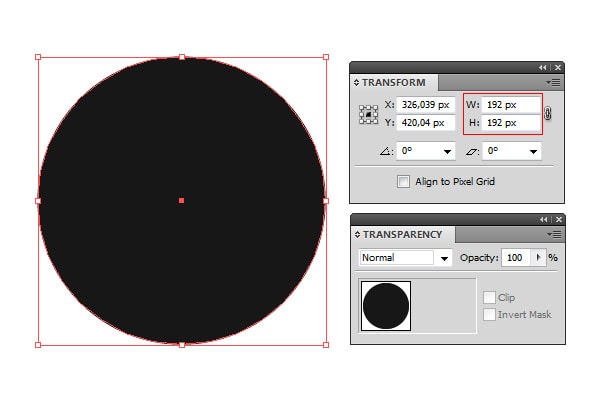
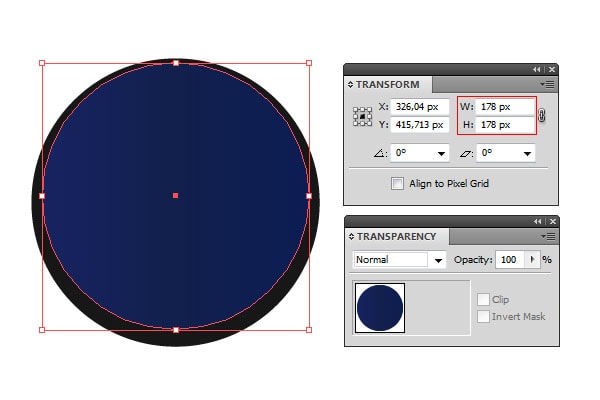
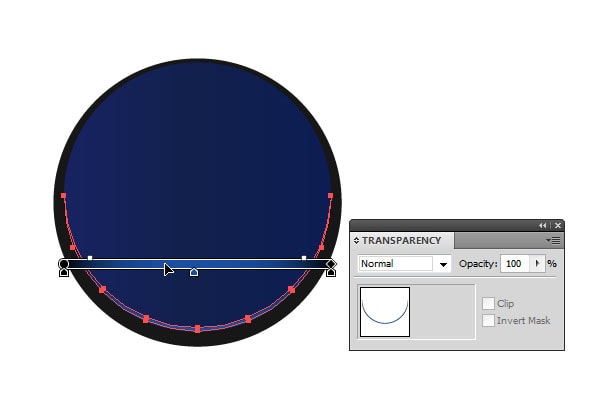
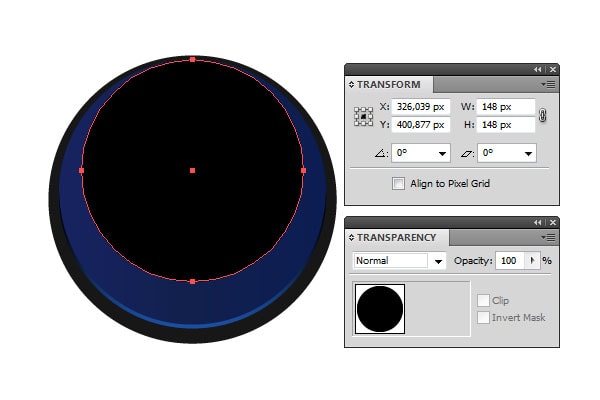
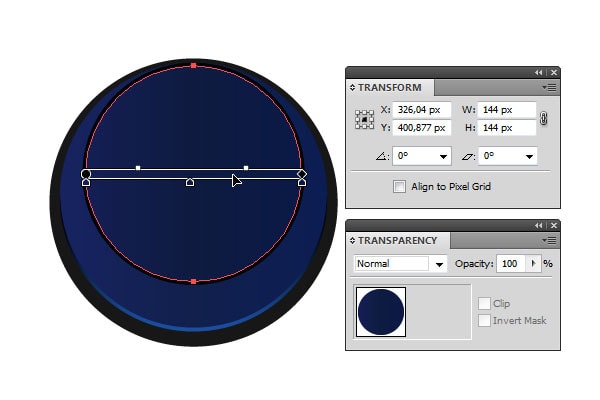
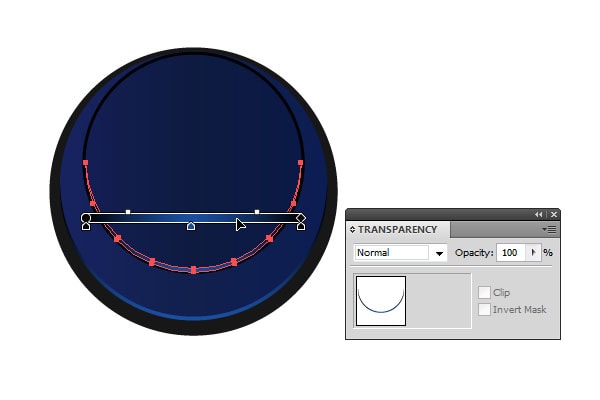
Most of the lens has been created, except glass, glare and aperture. Follow-up actions will be very simple and the same type, so I will not comment on them, but give detailed screenshots.
Step 35
In this step, we continue to create elements of the lens.
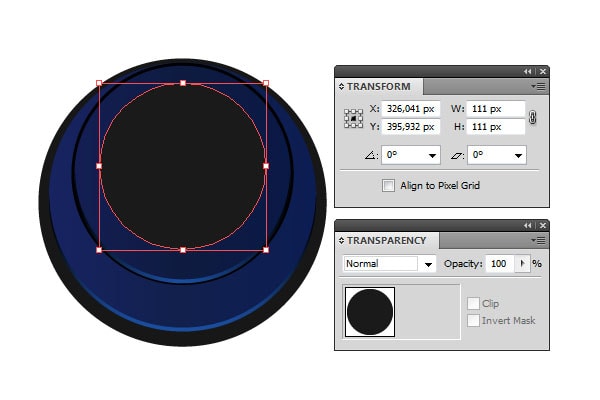
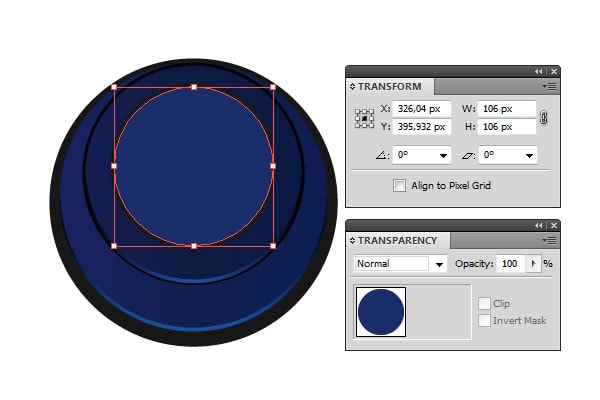
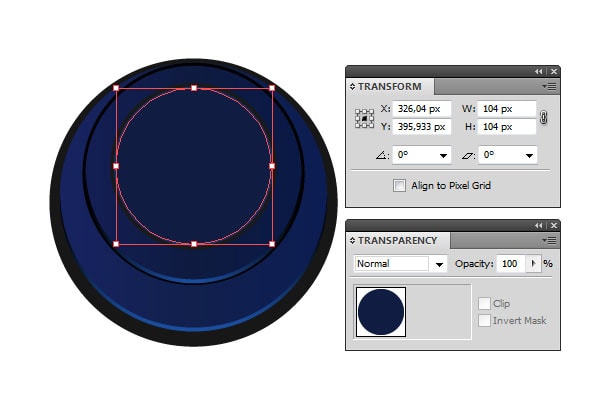
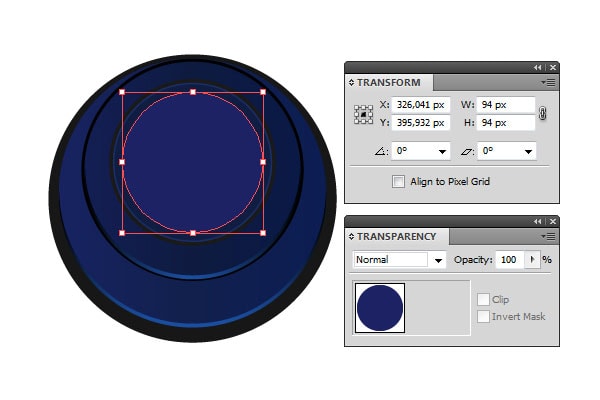
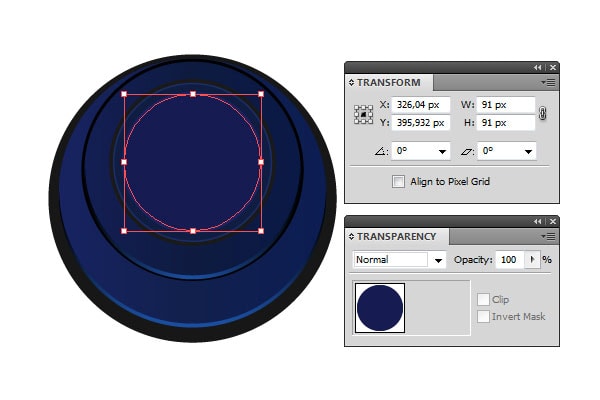
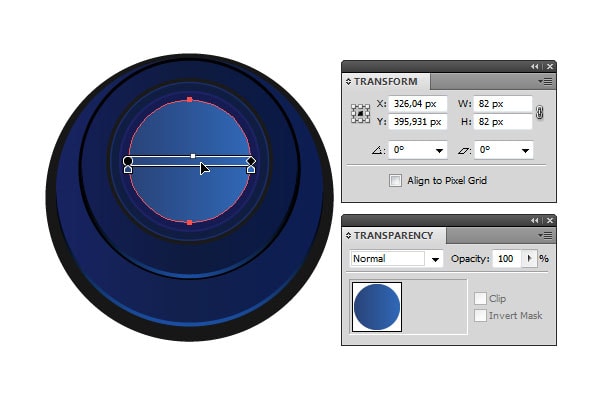
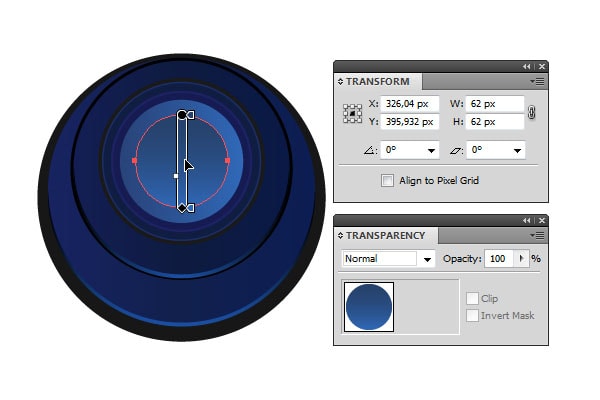
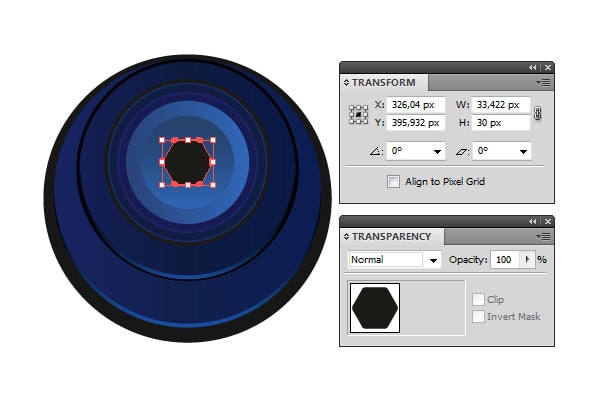
To simulate the aperture add a little bit of a hexagon with rounded corners.
Step 36
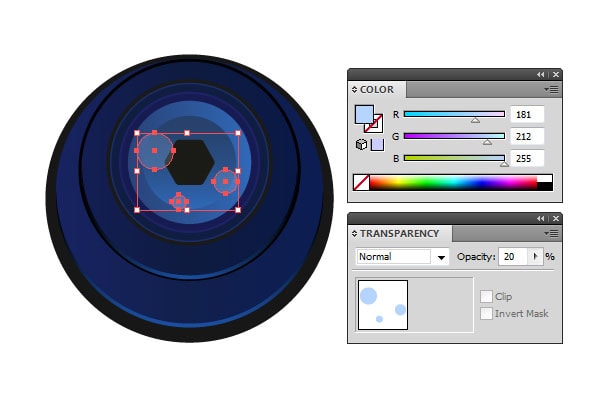
In this step we will add highlights to our lens.
Take the Pen Tool (P) and create such forms, as shown in screenshot. Fill them with radial gradient and change blending mode to Screen.
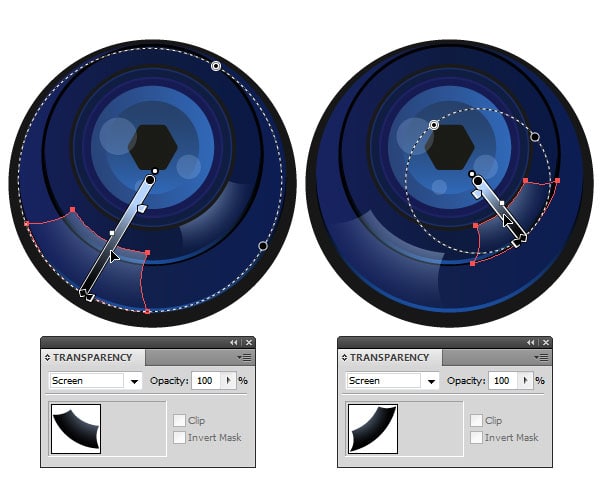
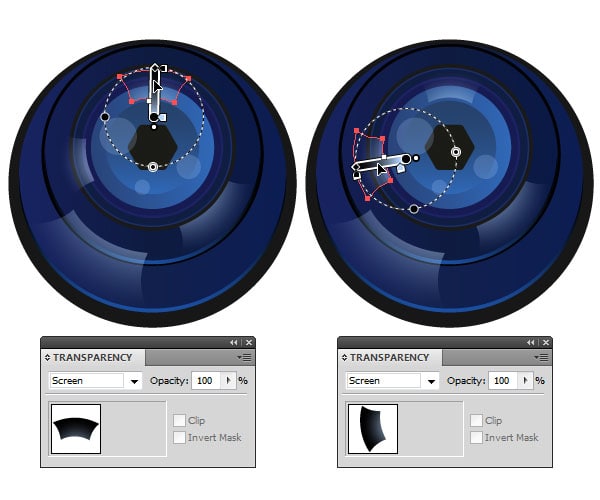
A few more round highlights. As before, fill them with radial gradient and Screen blending mode.
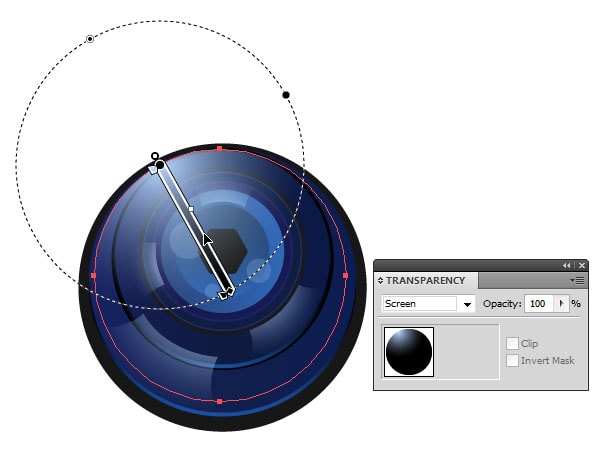
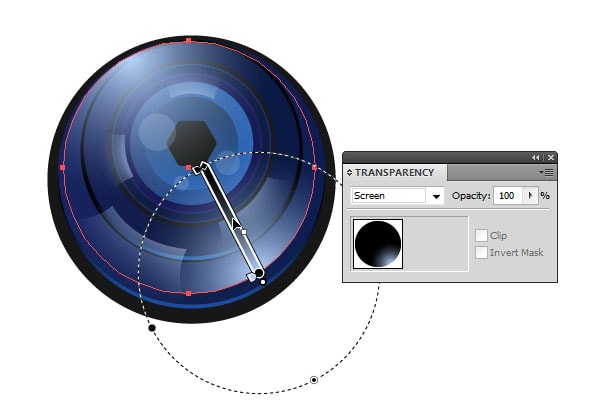
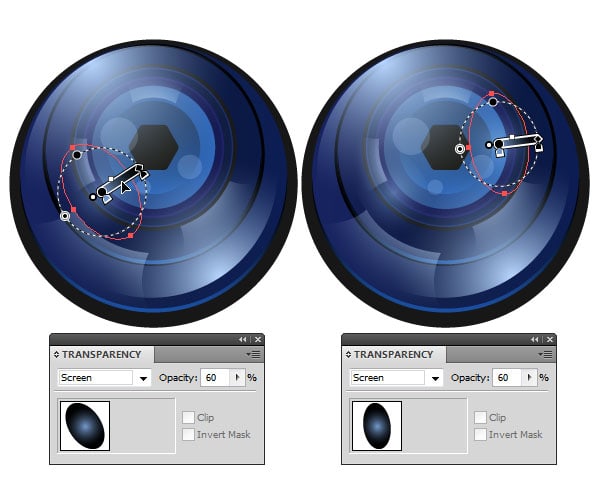
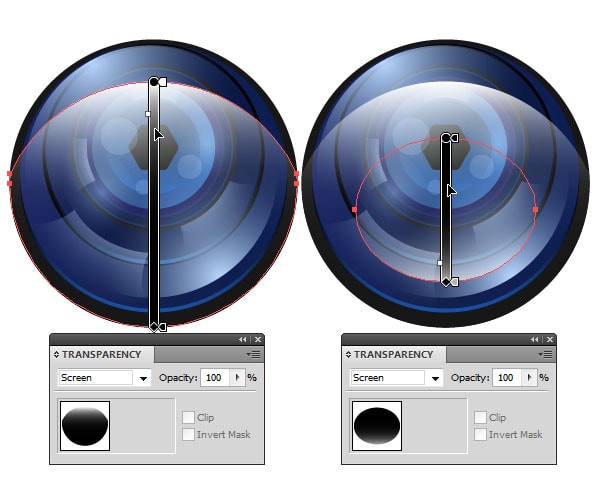
In this, creation of the lens is almost over, and with it coming to an end and our work over the icon of vintage camera in general.
Step 37
Group all the objects that we have created in the last 3 steps. Above this group will create the latest in today’s lesson ellipse with size 190×190 px.
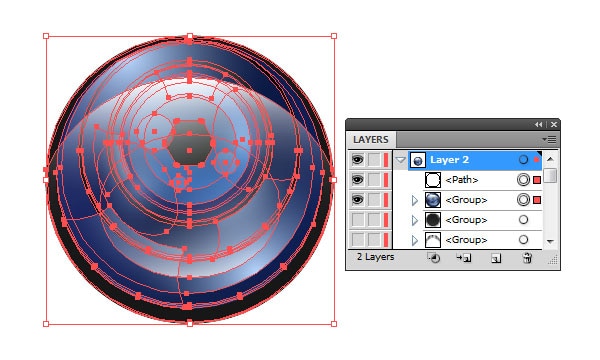
Go to Object > Clipping Mask > Make, or press the hotkey Ctrl + 7.
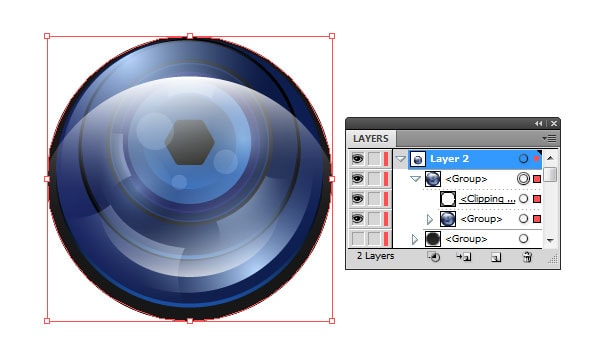
Now turn on the visibility of the remaining elements of the lens.
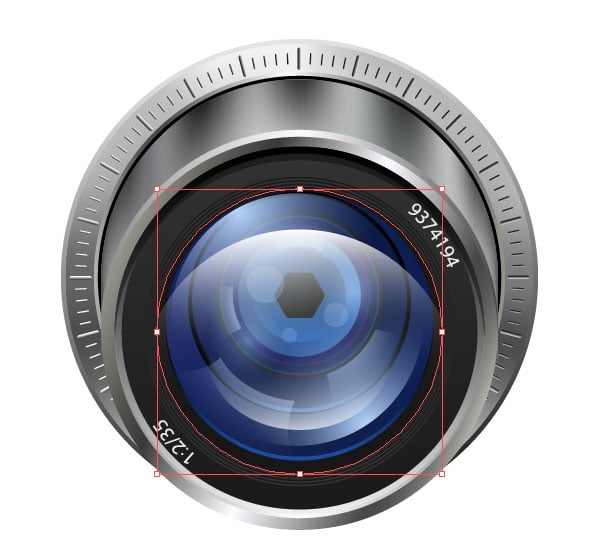
Turn on the visibility of the Layer 1 with the camera body, and put the lens on the body, as shown in the screenshot below.
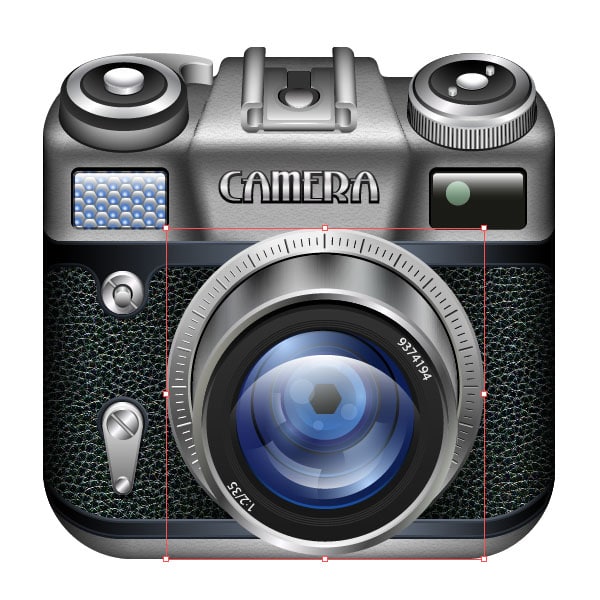
And finally, add the shadows from the lens for more realism.

Conclusion
In this, tutorial on creating a vintage camera icons is over. I showed to you how to use simple techniques and a little patience, you can create amazing illustrations.
If you want, you can add a shadow under the camera and some abstract background.
