How to Export an Animated GIF using Adobe Photoshop and After Effects (Part 3)
Previous articles:
- How to Create a Flat Design Bicycle (Part 1)
- How to Animate a Flat Design Bicycle in After Effects (Part 2)
Animated GIF images are one of the most popular image types on the web. The process of making a design and animating it is a different story, but in today’s tutorial I’ll show you how to export an animated GIF.
If you are interested I will make a tutorial about the process of making the bicycle design below for import into Adobe After Effects. Let me know in comments.

I have attached folder where you can find the After Effects file and Adobe Illustrator file as well.
Step 1: Open Attached After Effects File
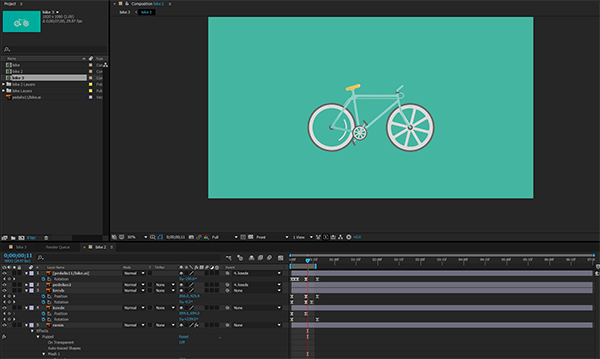
First, open the file you wish to make into a GIF image. Download the file I have attached and choose file “bike.”
With Postcards Email Builder you can create and edit email templates online without any coding skills! Includes more than 100 components to help you create custom emails templates faster than ever before.
Free Email BuilderFree Email Templates
Press 0 (zero) on keyboard to render the file; you should see bicycle moving.
This is a quick animation, and if you are familiar with After Effects you should be able to make something similar in no time.
Step 2: Export the JPG Sequence
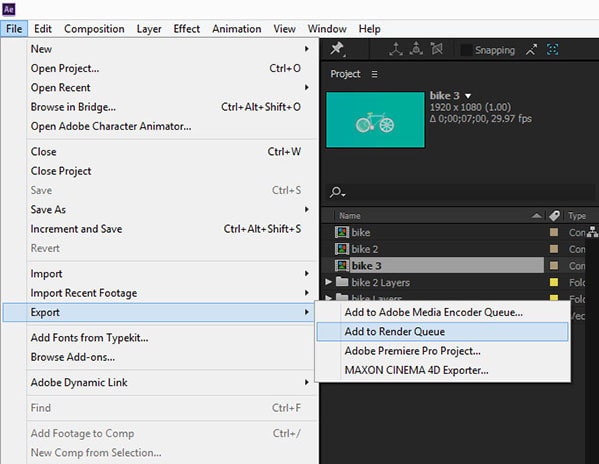
When the file is animated and ready to export click File – Export – Add to Render Queue as shown below.
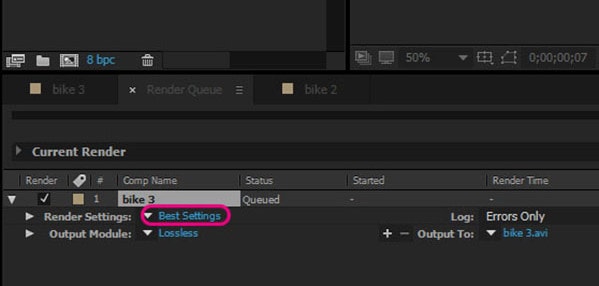
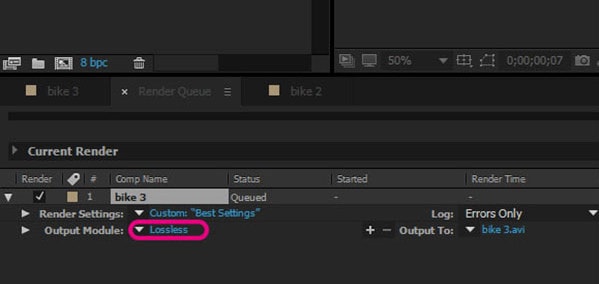
Before you render the image, you’ll want to check your settings. Click Best Settings.
With Startup App and Slides App you can build unlimited websites using the online website editor which includes ready-made designed and coded elements, templates and themes.
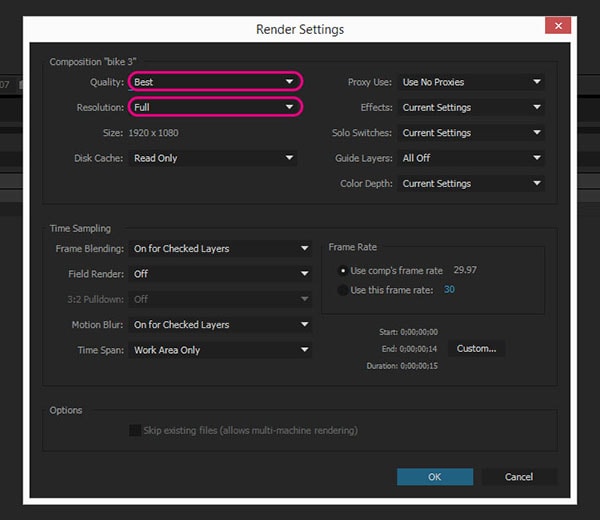
Try Startup App Try Slides AppOther ProductsMake sure you have Best Quality and Full Resolution, if you want the best settings. Leave everything else as is.
Click Lossless as shown below. Its right below the Best Settings option we just used.
For Format dropout choose JPEG Sequence and click OK. This will make multiple JPG images from your AE original file. All the JPEG images combined will make an animation.
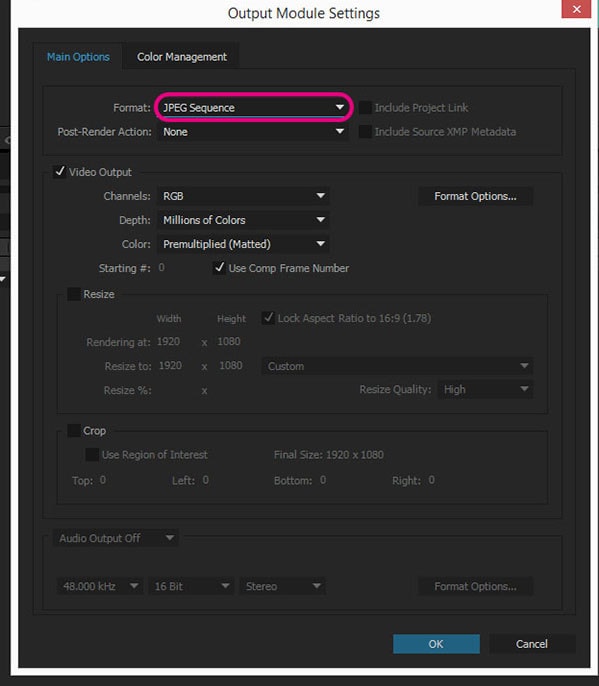
Click the name beside “Output To” and choose a destination.

Click Render. This will render JPEG Sequences and put them in a folder.

Step 3: Export an Animated GIF
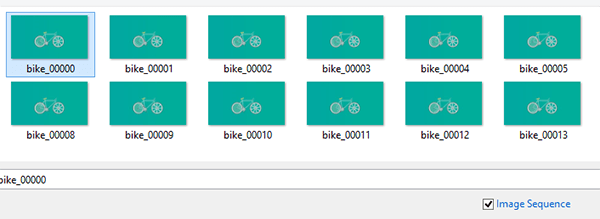
Open Adobe Photoshop and navigate to the folder where your JPEG sequences are located, select the first image in folder and check Image Sequence. By doing so you will create a video file. Click Open.
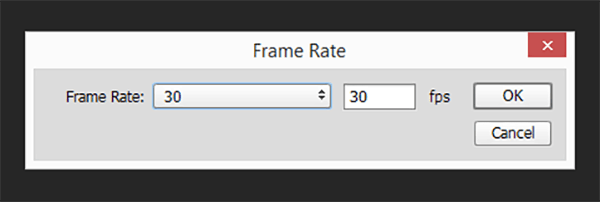
A new window will pop up; leave 30 frames per second. You can also choose 25 fps, if you have worked using that frame rate.
Click File – Export – Save for Web.
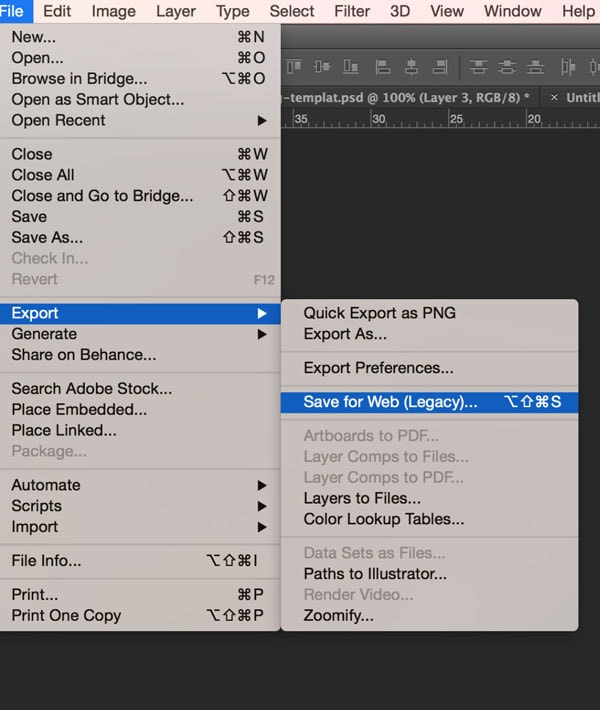
You should see window like this.
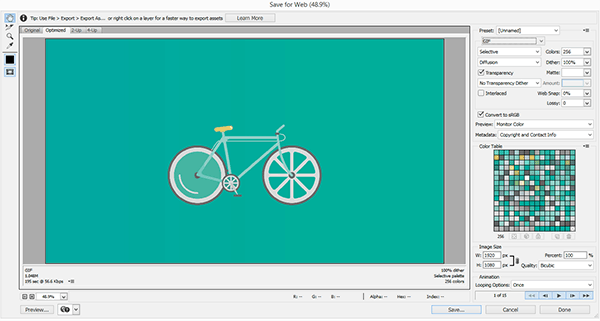
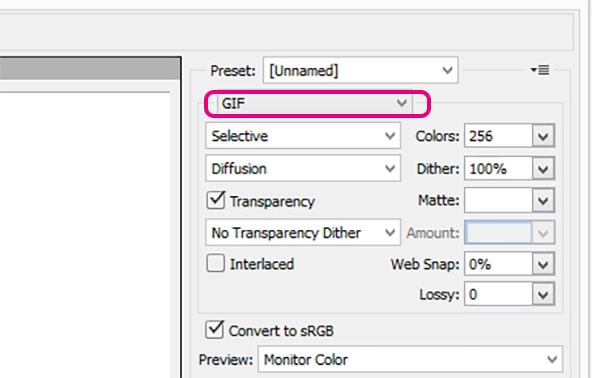
To make a GIF image you should select GIF on right corner.
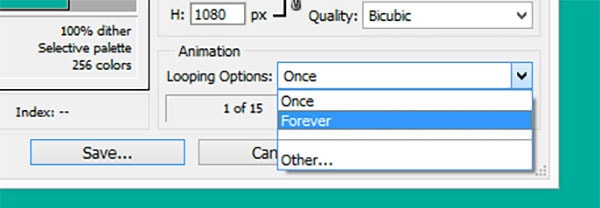
Select Forever on the bottom. This option will make a loop on your animation so it will never end.
Click Save and choose a destination.
Previous articles:
- How to Create a Flat Design Bicycle (Part 1)
- How to Animate a Flat Design Bicycle in After Effects (Part 2)