Alignment and Combining Objects in Adobe Illustrator
Difficulty: beginner
Estimated completion time: 15 minutes
Today we will be talking about objects alignment using the Align panel and combining them with the help of the Pathfinder panel and Shape Builder Tool. What you read here is the basic minimum that will allow you to work efficiently with these tools in Adobe Illustrator.
Alignment of vector objects
Align panel is designed to align objects in Adobe Illustrator (Window > Align).
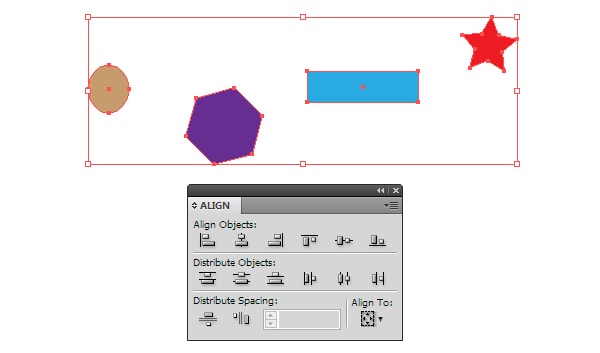
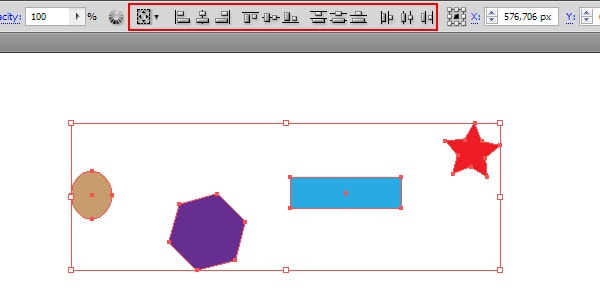
The same alignment options are available in the Control panel as long as multiple objects are selected.
The top row of buttons in the Align panel is designed for absolute alignment of objects. The icons on the buttons clearly tell us what kind of alignment will be achieved. The picture below shows the align bottom of objects. In fact, the alignment occurs along the bottom of the bounding box of the lowest object.
With Postcards Email Builder you can create and edit email templates online without any coding skills! Includes more than 100 components to help you create custom emails templates faster than ever before.
Free Email BuilderFree Email Templates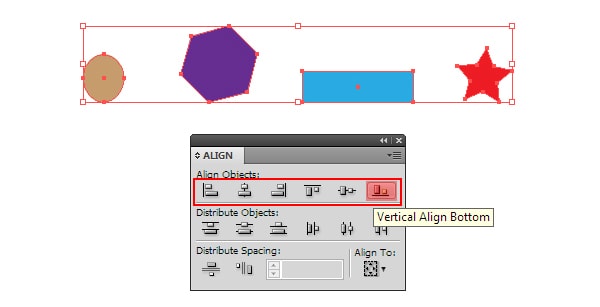
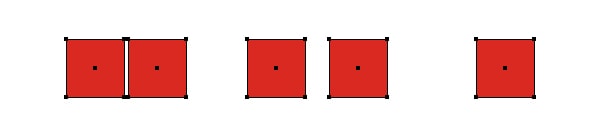
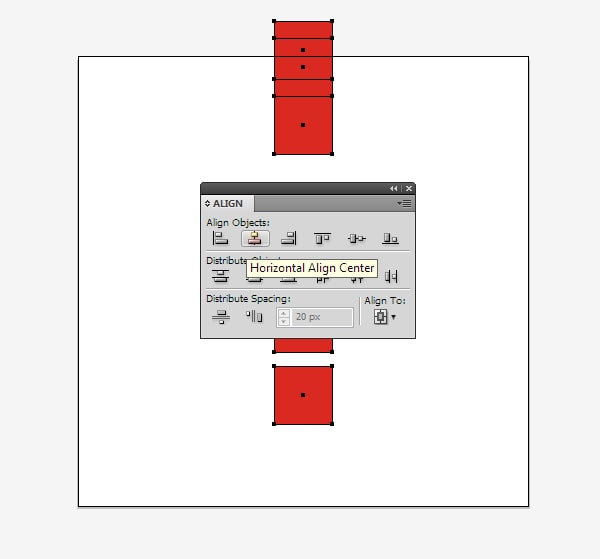
Middle row of buttons is designed for the distribution of objects in several directions. I will not go in details on these features, because in all years of my practice I have never used them. In practice you often need to arrange the objects so that the distance between them was of the same given amount. The lower part of Align panel is designed for these purposes. Let’s see how to implement such a distribution. Let’s suppose that we have several similar objects aligned vertically, but at different distances one from another.
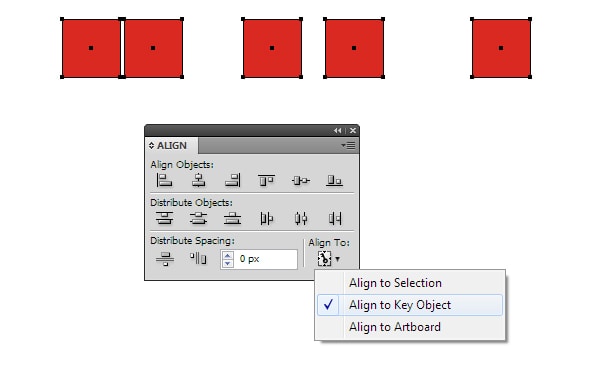
Open the fly-out menu Align to: and choose Align to Key Object.
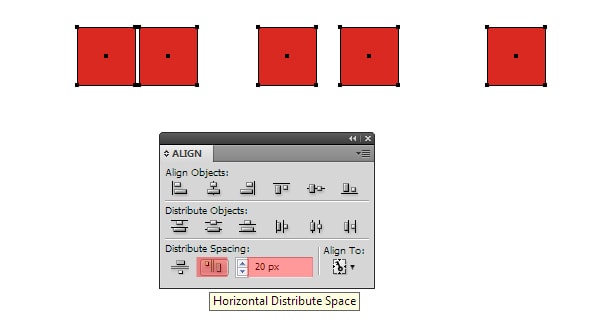
Key in the necessary amount in the numeric field, and press the Horizontal Distribute Space button for distribution of objects in horizontal direction.
Now objects are located so as we wanted them to be.
With Pulsetic you’ll be instantly notified the moment your website, API, or server becomes unavailable. Monitor uptime from multiple global locations and respond to incidents before your users are affected.
Create beautiful status pages in minutes to keep customers informed during outages and build trust with transparent communication.
Start Monitoring for Free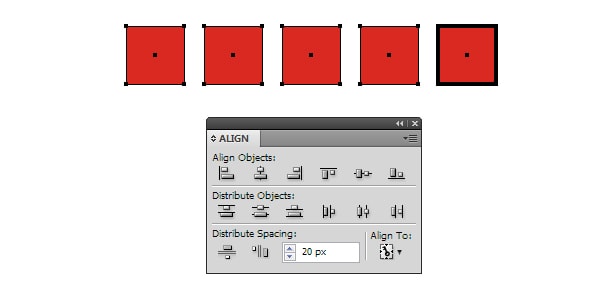
Sometimes we need to align objects along the Artboard. To do this, select Align to Artboard in the menu Align to:
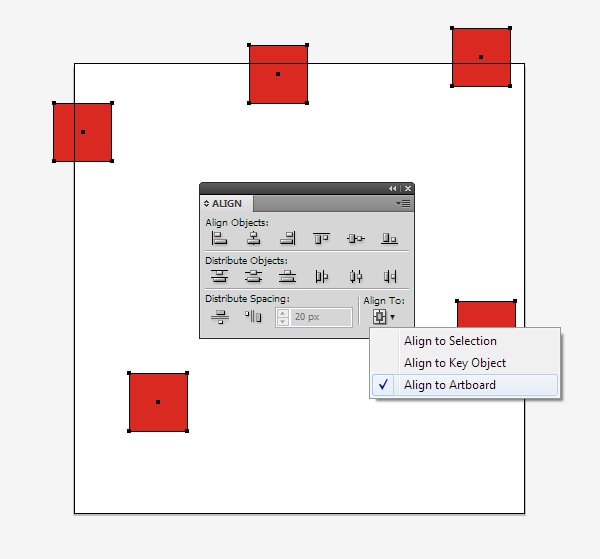
Then click on the desired alignment button in the Align panel.
Now, let us consider the case where we need to align objects according to a single object. It is also very common. Select all the objects, then click on the object according to which the alignment will be done, hold Command / Ctrl key.
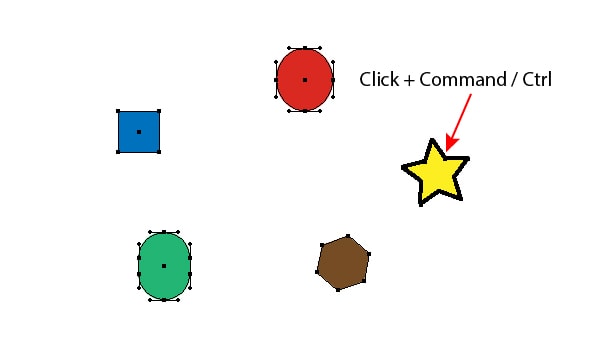
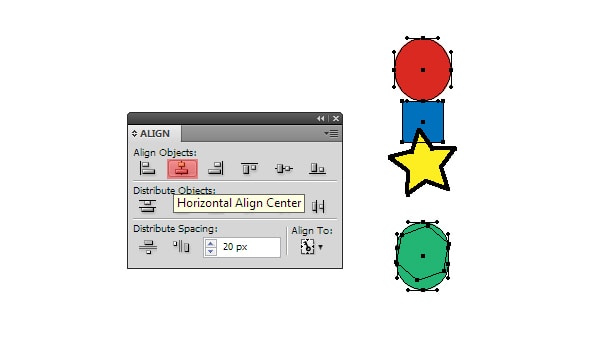
Now select the desired alignment option.
You can align two objects using a special mode, called Smart Guides (View > Smart Guides (Command / Ctrl + U)). When you move one of the objects temporary guides turn on. These guides show the center and the edge of a nearby object.
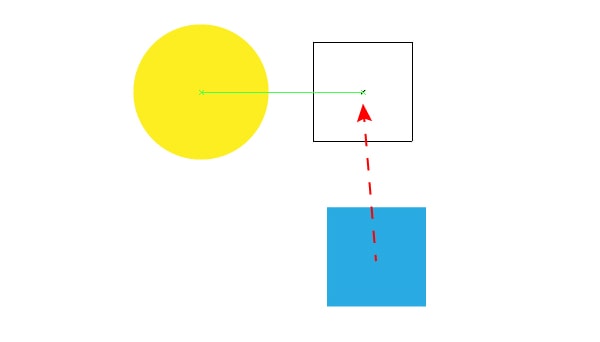
By the way, I always work with the Smart Guides mode on.
Combining objects with the help of the Pathfinder panel and Shape Builder Tool
Very often complex geometric shapes can be created using a combination of simple geometric objects, the creation of which we discussed in the article Creating Objects Using Basic Geometric Shapes in Adobe Illustrator. For example, it is not reasonable to create the shape of the wrench as shown in the picture below using the Pen Tool (P).
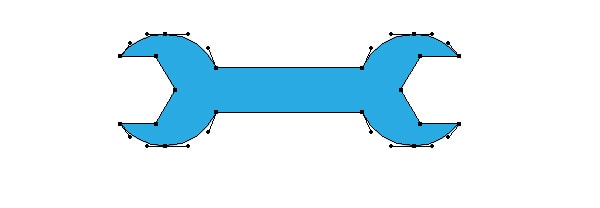
In such cases simple geometrical objects, Pathfinder panel and Shape Builder Tool become very helpful. Pathfinder panel has many features, but in practice I use only four of them. These are Unite, Minus Front, Intersect and Divide.

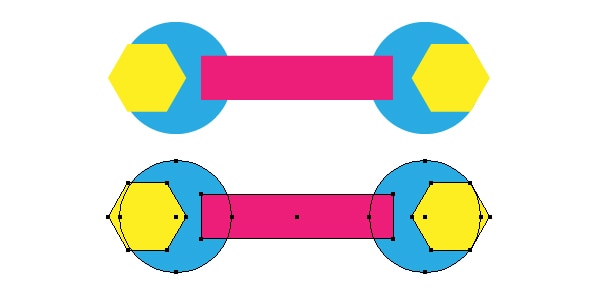
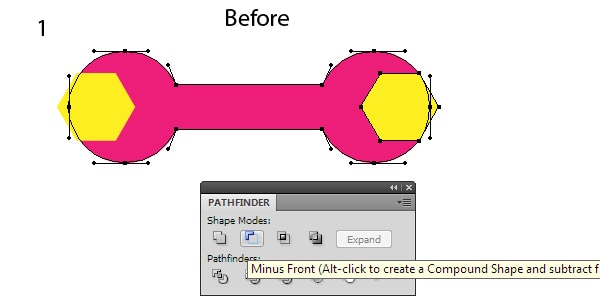
Let’s go back to our wrench and see how these features work. Thus, the shape of the wrench can be represented as a combination of two circles, two hexagons and a rectangle.
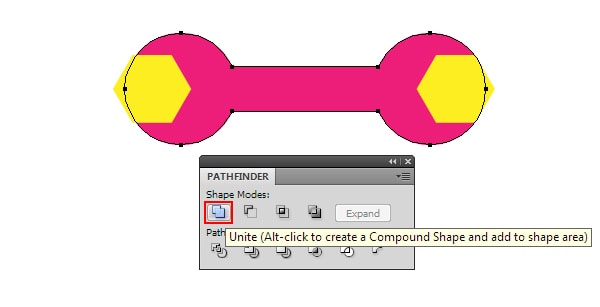
To combine a rectangle and two circles into one shape use Unite button in the Pathfinder panel.
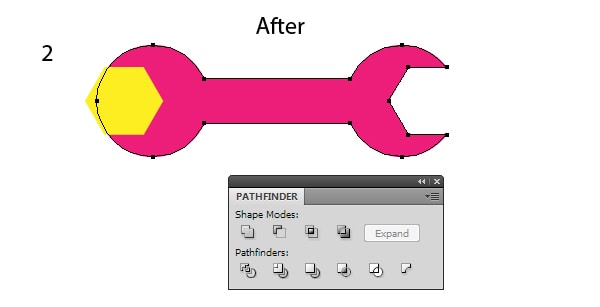
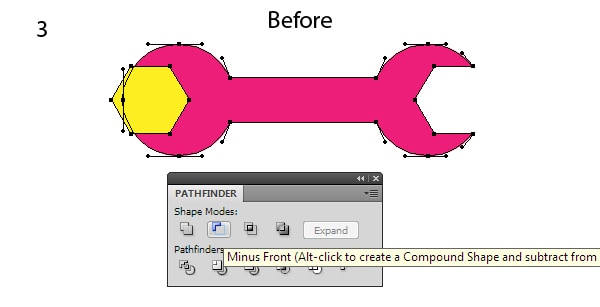
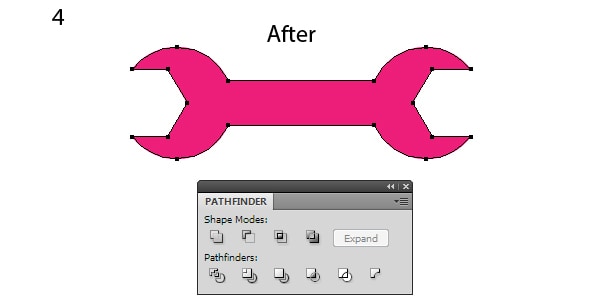
Minus Front subtract the shape of the shape of the upper object from the shape of the lower object.
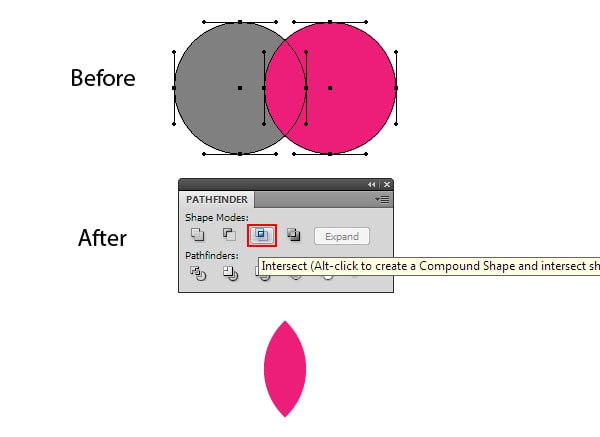
Intersect command removes some of the objects that are beyond their intersection, combining the rest into a single path.
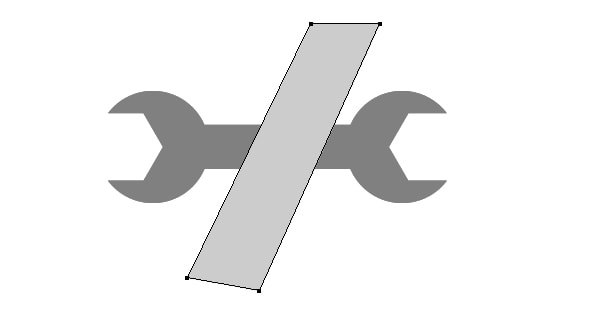
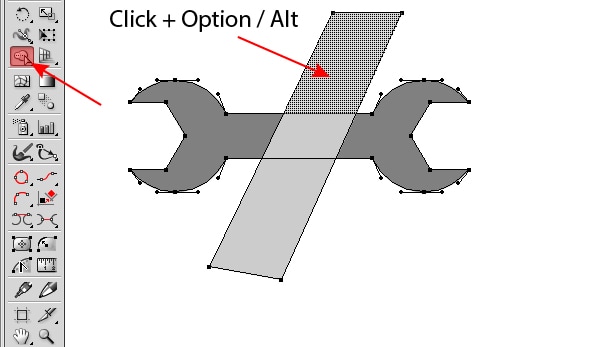
In practice, the Intersect is used to create glares and shadows on the objects. Let’s see how it can be done. The picture below shows the wrench and the shape that will become a glare.
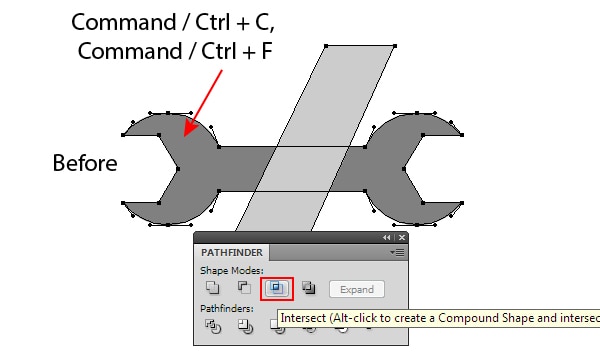
Copy the shape of the wrench and paste it in front (Command / Ctrl + C, Command / Ctrl + F), then select the upper shape of the wrench and shape of glare and click Intersect in the Pathfinder panel.
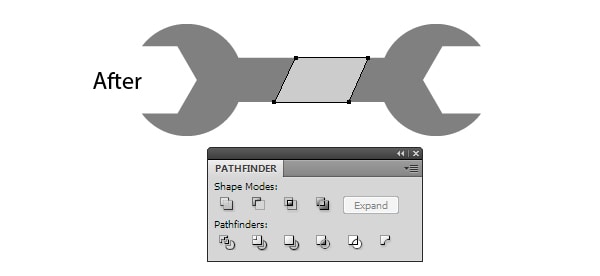
Too many actions? I agree. The last two releases of Adobe Illustrator have Shape Builder Tool, which allows you to do the same operation much faster. Let’s go back to the original objects. So, select the shape of glare and wrench, take the Shape Builder Tool, holding down Option / Alt key, click on the parts of the glare that go beyond the intersection.
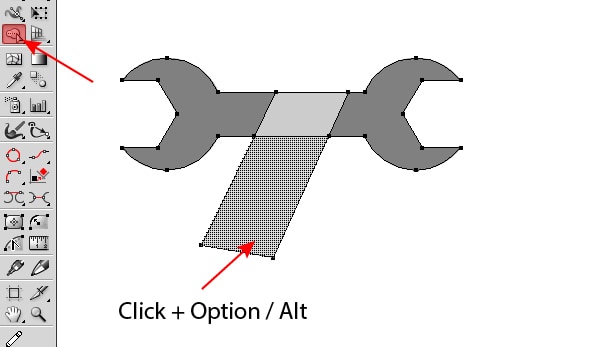
This will remove the selected parts of the object. Just two clicks and the required shape is ready.
Divide cuts the artwork into separate pieces wherever shapes overlap.
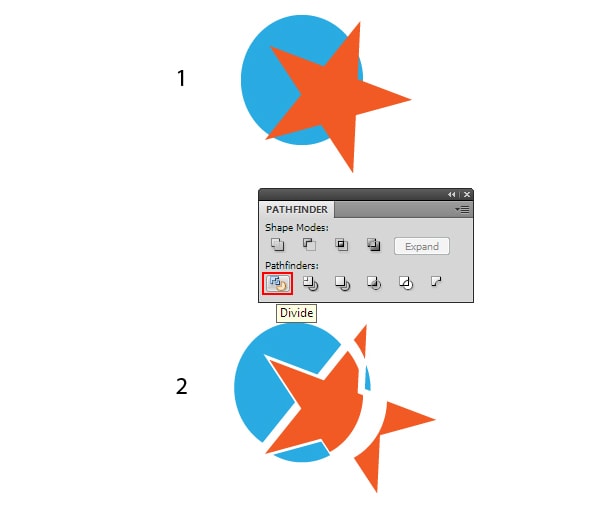
In practice, I often cut an object with the help of one or more paths.
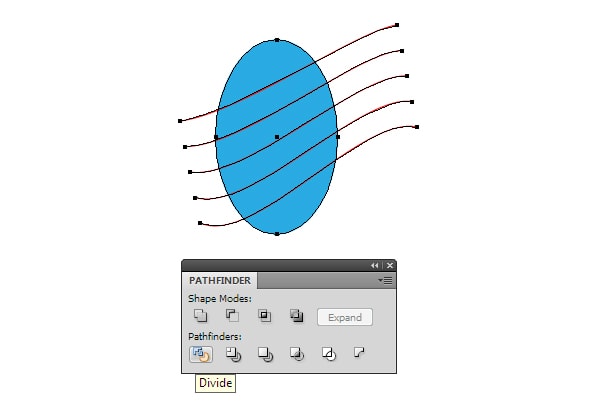
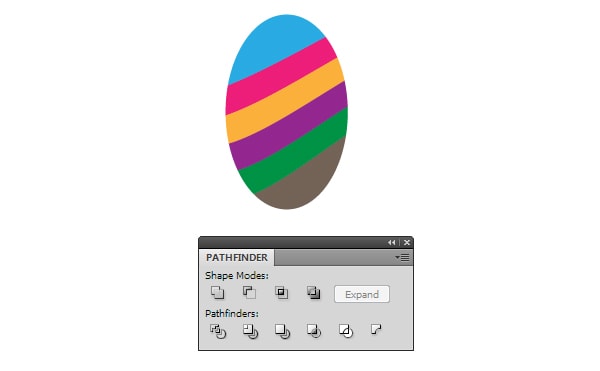
In the picture above the new objects are colored in different colors for clarity purposes.
Perhaps I could write a book about the tools described in this brief article. I only cover the practical side of my creative process. And I think that this is enough for the successful work. Next time we will talk about 3D modeling in Adobe Illustrator.