How to Control Gradient Mesh in Illustrator
I met a lot of graphic designers who avoid working with a gradient mesh by a reason of the complexity of controlling the object. I also met real fans of gradient meshes that create real photorealistic artworks with their help. Even though they accept that this process is very time consuming, which is unsuitable for commercial projects. Despite this, gradient mesh can become an integral part in daily workflow of the graphic designer, as with its help we can reproduce the light distribution over the surface of a complex shape.
Therefore, in today’s tutorial we will take a look at the basics of working with gradient meshes, which will help you to master this complex and very temperamental tool.
In order to evaluate the capabilities of this feature let’s look at the portrait of Jack Nicholson by Dion Aoki, which was created only with the help of gradient meshes.

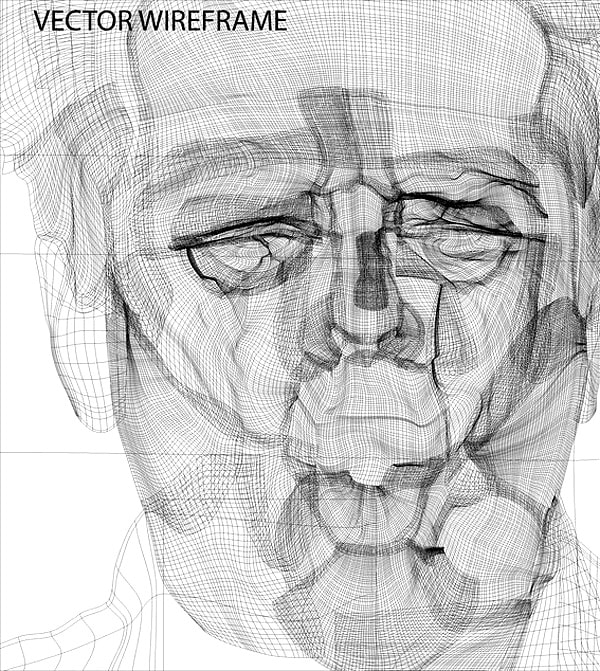
No, this is not a photograph. To confirm my words, I want to show you how the same portrait looks like in the Outline Preview mode. Yes, it is an entirely vector artwork.
With Postcards Email Builder you can create and edit email templates online without any coding skills! Includes more than 100 components to help you create custom emails templates faster than ever before.
Free Email BuilderFree Email TemplatesNow let’s go into the technical details.
Create Gradient Mesh
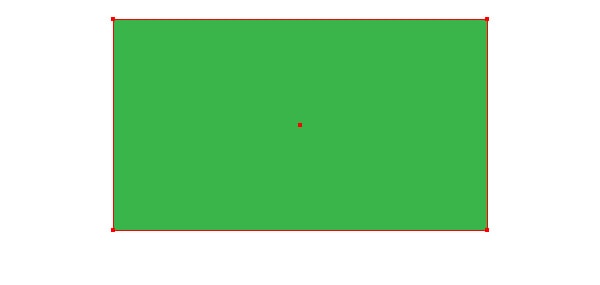
I know three ways to create a gradient mesh of the existing vector objects. Let’s create a rectangle with a solid fill.
Go to Object > Create Gradient Mesh …, now we have the ability to specify the amount of rows and columns in the dialog box.
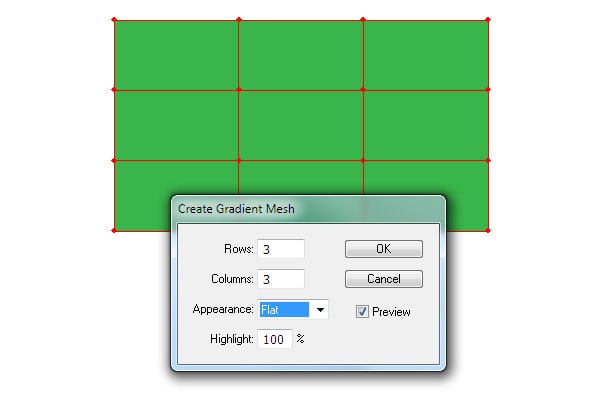
As you can see, this dialog box includes other options that I, however, never use. If you use this method to create a gradient mesh, you get cells of the same size, at least when you’re dealing with a rectangle.
You can create mesh points and mesh lines with the help of the Mesh Tool (U). To do so, simply click with the tool at the place where you want to create the first mesh point.
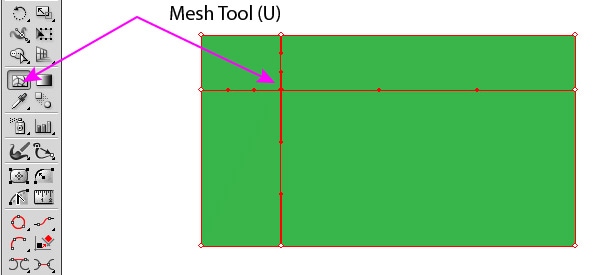
The rectangle has become a gradient mesh now and you can add new mesh lines, where it is needed.
With Startup App and Slides App you can build unlimited websites using the online website editor which includes ready-made designed and coded elements, templates and themes.
Try Startup App Try Slides AppOther Products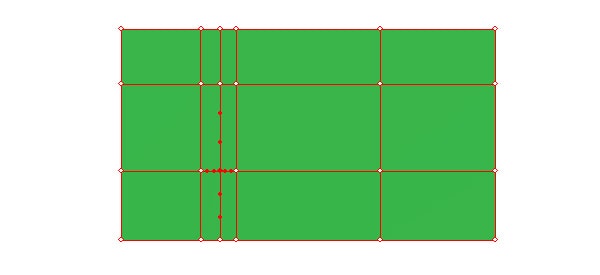
Using this method, you get a lot of freedom in creating the desired mesh, although you will be required accuracy in work. In order not to create unnecessary points and lines you have to just click on the existing lines.
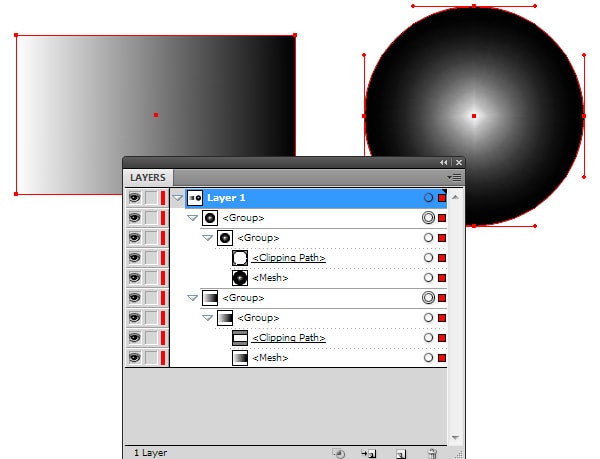
Finally, we can convert linear or radial gradient into a gradient mesh. Let’s create a rectangle with a linear gradient fill and a circle with a radial gradient fill as it is shown in the picture below.
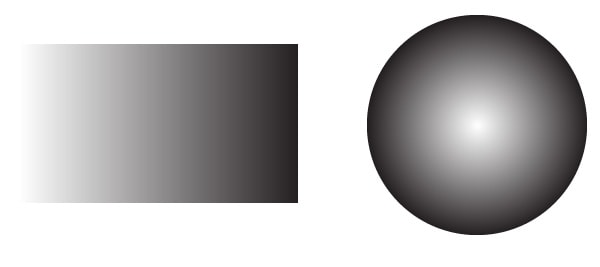
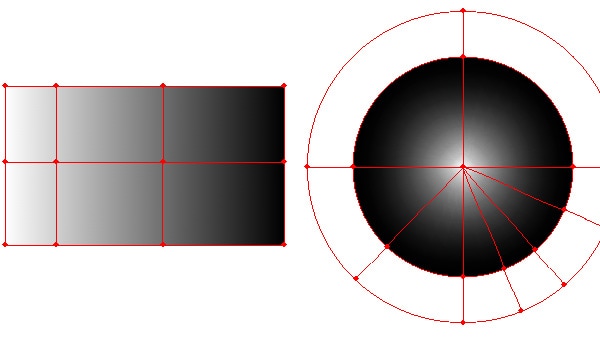
Select objects, then go to Object > Expand … and choose the Gradient Mesh option in the dialog box.
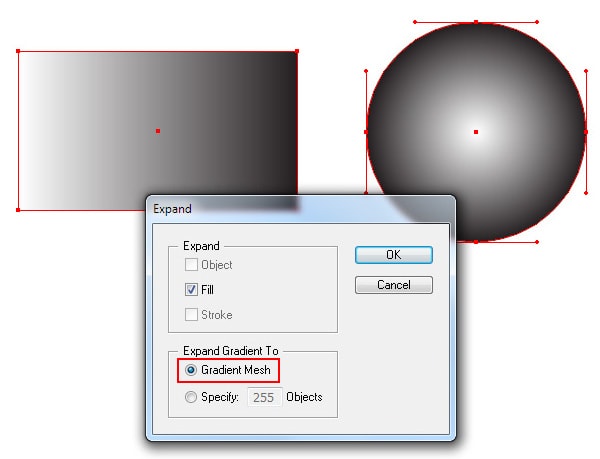
Now we can continue building the mesh using the Mesh Tool (U).
Controlling and coloring mesh points
You can select and move mesh points, as well as manipulate its handles using the Mesh Tool (U) or the Direct Selection Tool (A).
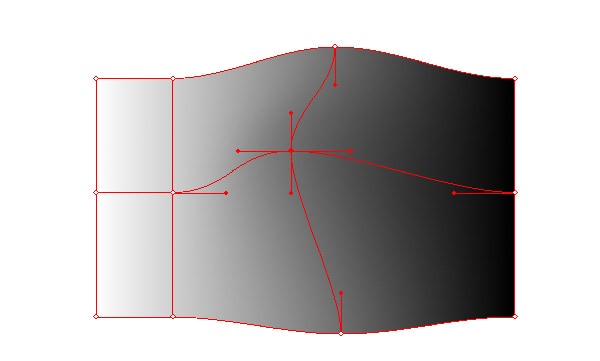
To delete a mesh line, click on it with a Mesh Tool (U) while holding down Option / Alt.
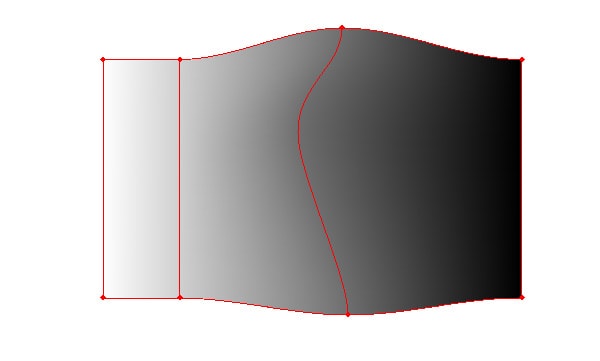
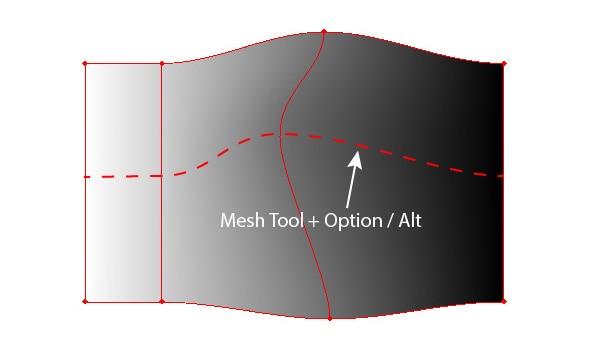
You can also select and delete the mesh point by pressing the Delete key. In this case both mesh lines passing through this point will be deleted.
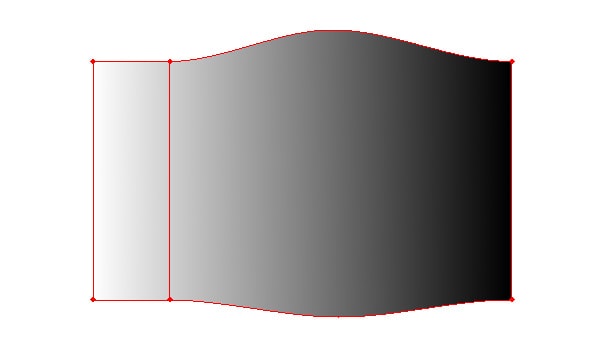
I do not want to scare you with the terminology and theory, but I must say that there are three types of mesh points. The points that are located at the intersection of the lines can be colored; other types of points serve only to create the shape of the mesh. Select one of these points and color it with blue, for example.
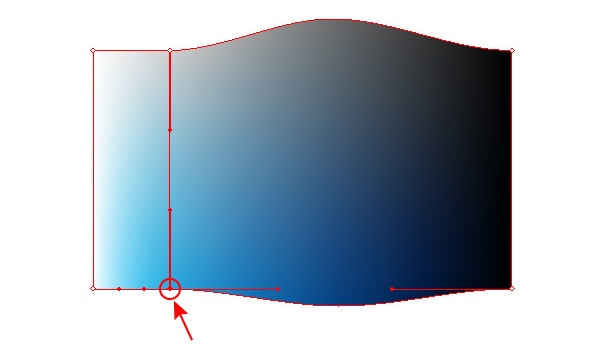
Keep your eye on the curved segments on the top and bottom of the gradient mesh. These segments have invisible points that become active only if we take the Add Anchor Point Tool.
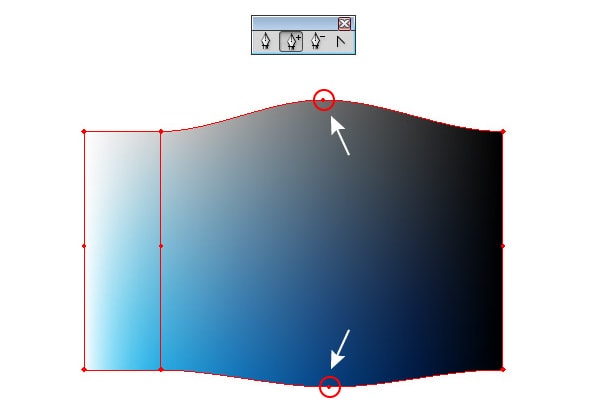
This type of points cannot contain color information and cannot be controlled directly. Create a new mesh point with the help of the Add Anchor Point Tool.
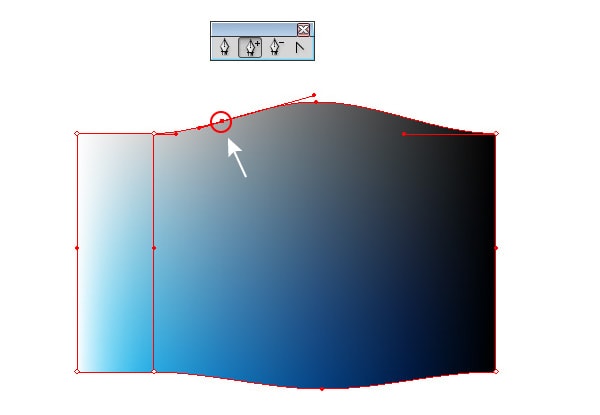
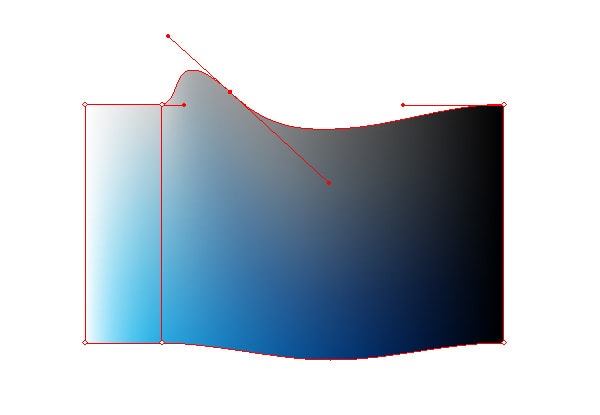
This point can be controlled with the help of the Mesh Tool (U) or Direct Selection Tool (A), but it also cannot contain the color information.
Creating gradient mesh of complex shape
Let’s try to create a mesh of more complex shape.

Select the object, then go to Object > Create Gradient Mesh …
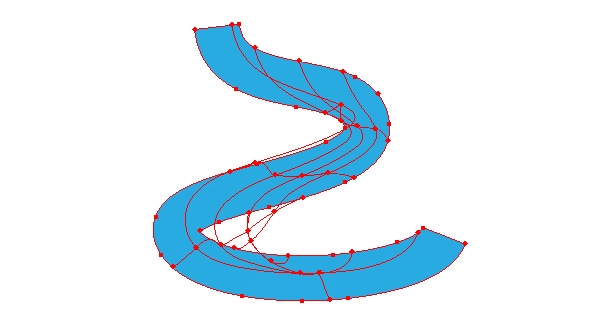
Damn! Controlling and coloring of such gradient mesh is out of the question. When we create a gradient mesh out of a rectangle, you usually do not encounter this strange behavior of mesh lines. Consequently, to obtain a well-controlled gradient mesh of a complex shape it is necessary that you create it by transforming a rectangular mesh. At the same time you can use all the available tools of transformation and selection, such as the Rotate Tool (R) and Lasso Tool (Q), for example. In the picture below you can see the stages of transformation of the rectangular gradient mesh using these tools.
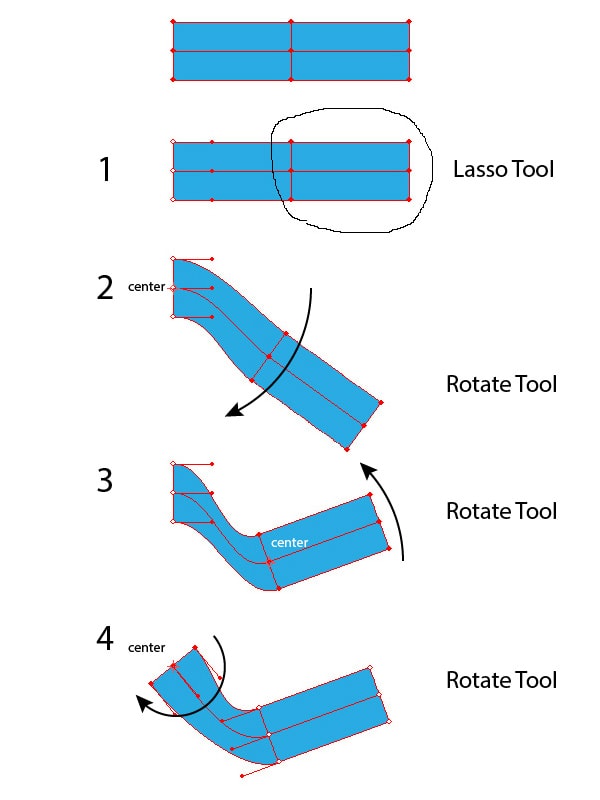
Using this technique I created the smoke from the match in the tutorial Create a Burning, Vector Match Using Gradient Meshes.

How to avoid artifacts when coloring a gradient mesh
When coloring a gradient mesh there can appear different types of artifacts such as folds.
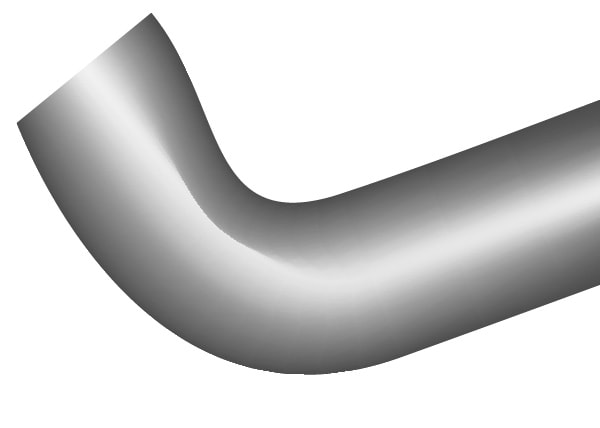
In order to avoid this kind of issue, make sure that that mesh lines do not intersect and are sufficiently far from each other.
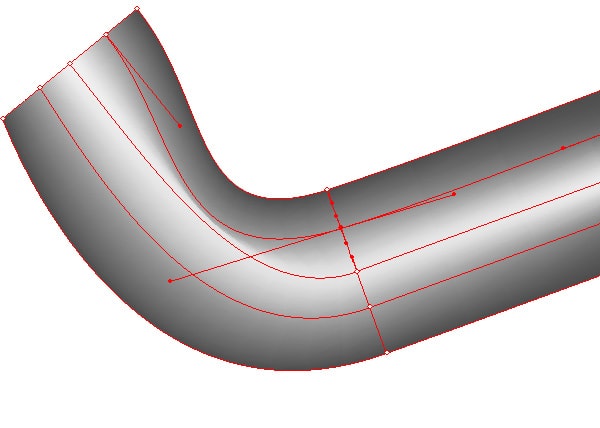
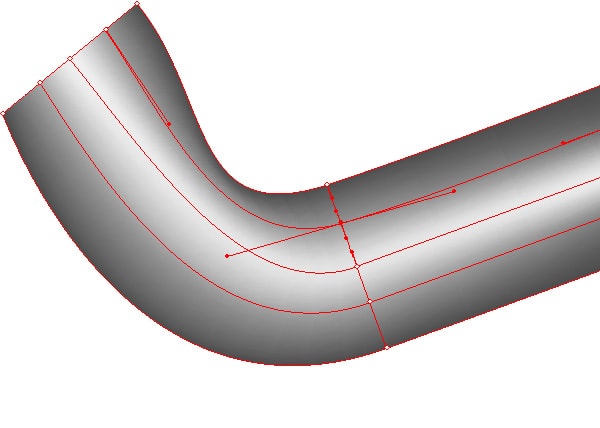
Also avoid handles two adjacent points overlapping each other.
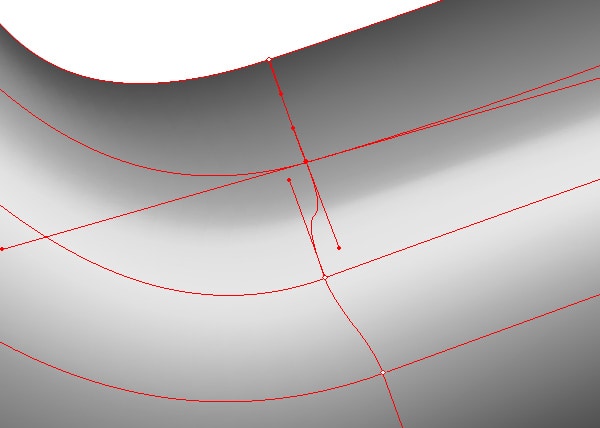
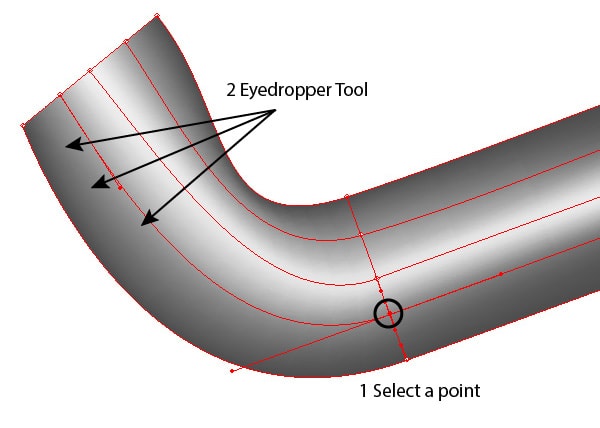
In order to achieve a smooth color distribution from point to point, try use other then Color panel, but also take colors directly from the already colored cells.
In conclusion, I would like to say that having enriched oneself with information from this article, you will still feel uncomfortable when working with gradient meshes, as this complex subject requires more in-depth study. Fortunately, you have an option to use the free Mesh Tormentor plug-in, which is designed to work with gradient meshes and fixes a lot of issues that may arise in your working process.


