How to Control Gradient Fills in Adobe Illustrator
Difficulty: beginner
Estimated completion time: 15 minutes
Gradient fills are used to create transitions between colors. Most often they are used to add volume to flat vector objects, creating light and shadow. Today we’ll learn how to create gradients and control them.
Adobe Illustrator has only two types of gradient fills. These are linear and radial gradients. Radial gradient can be transformed into an elliptical one. This kind of gradient has been available since the release of CS4.
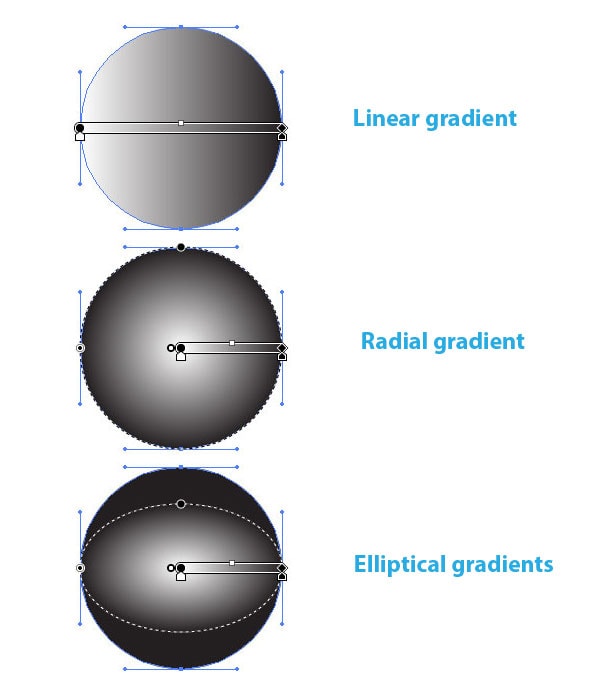
I would like to mention that other vector editors may have additional types of gradients. For example, CorelDraw has also Conical and Square gradients.
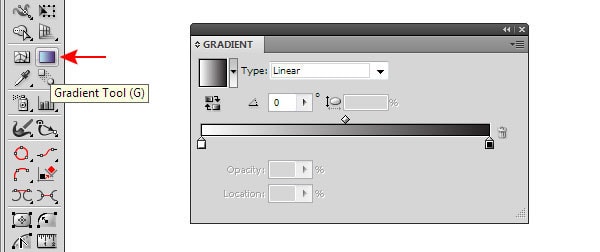
Gradient panel (Window > Gradient) and Gradient Tool (G) that can be found on the Tools panel, serve to control the gradient fills in Adobe Illustrator.
With Postcards Email Builder you can create and edit email templates online without any coding skills! Includes more than 100 components to help you create custom emails templates faster than ever before.
Free Email BuilderFree Email TemplatesYou can also control the gradient using the Gradient Annotator.
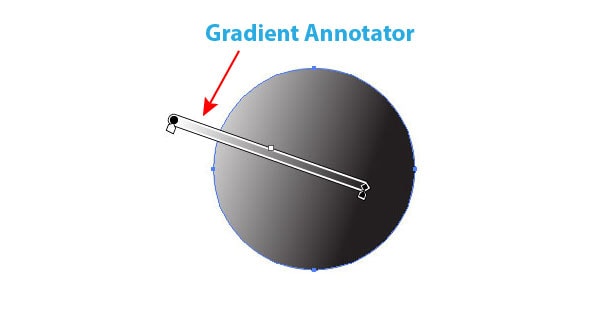
This feature, as well as an elliptical gradient, has only appeared in Adobe Illustrator CS4. Gradient Annotator becomes active only after you choose the Gradient Tool (G). For various reasons Gradient Annotator may disappear in the process, which is the cause of thousands of identical questions in illustrator forums. To turn on the Gradient Annotator, go to View > Show > Gradient Annotator or use Option / Alt + Command / Ctrl + G shortcuts.
So let’s see how to apply a gradient and then know how to manage it. To apply a gradient fill to a selected object, you should choose this type of filling on the Tools panel.
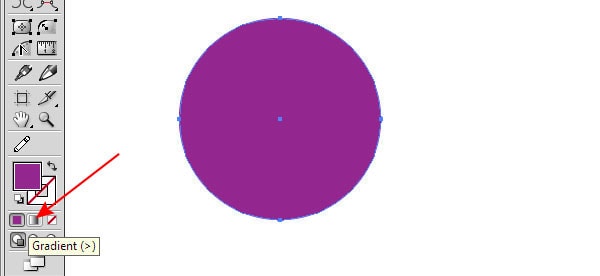
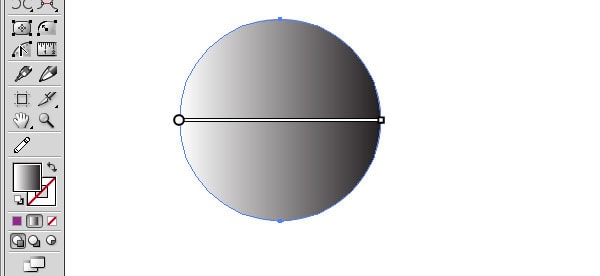
By default, this is black and white linear gradient.
You can also use gradients from the Swatches panel or from its numerous libraries.
With Pulsetic you’ll be instantly notified the moment your website, API, or server becomes unavailable. Monitor uptime from multiple global locations and respond to incidents before your users are affected.
Create beautiful status pages in minutes to keep customers informed during outages and build trust with transparent communication.
Start Monitoring for Free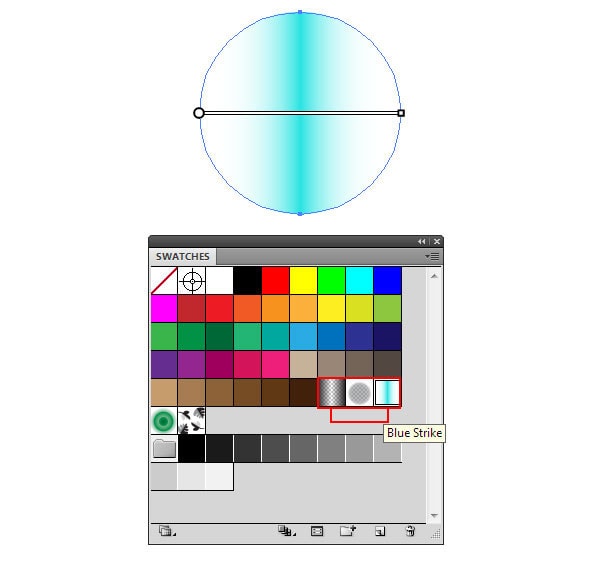
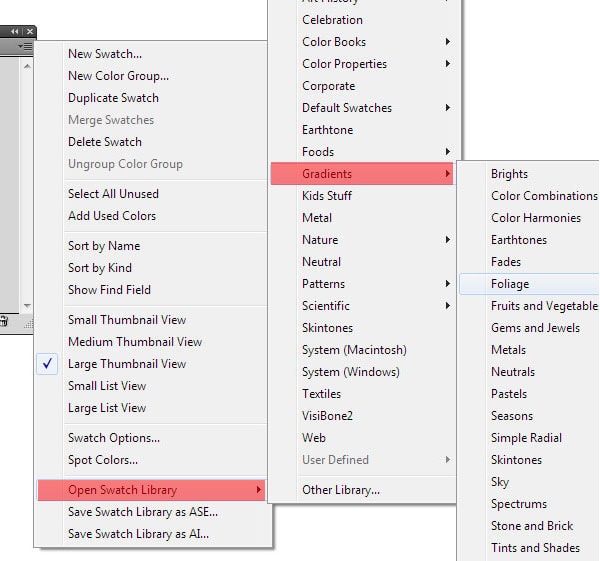
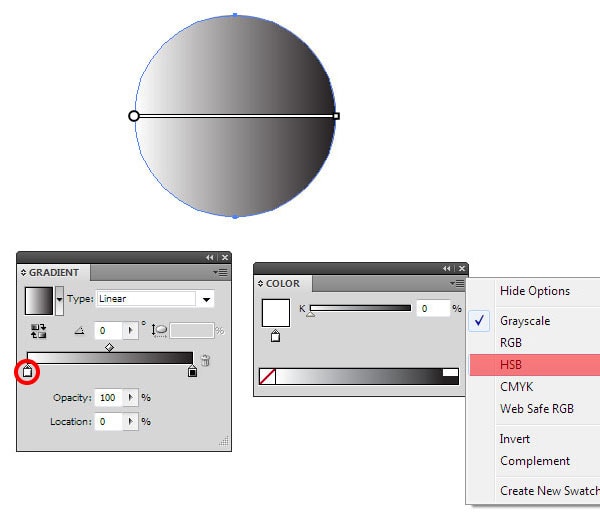
Personally, I prefer to start working with a gradient fill from black and white linear gradient.
To change the color of the gradient, select one of its Color Stops in the Gradient panel, then choose the color model in the Colors Panel and then set the desired color.
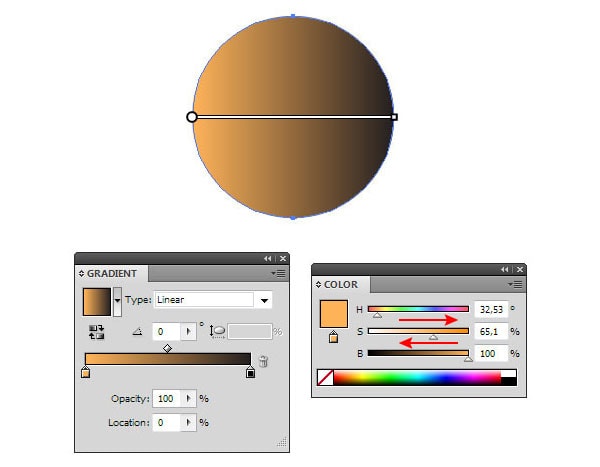
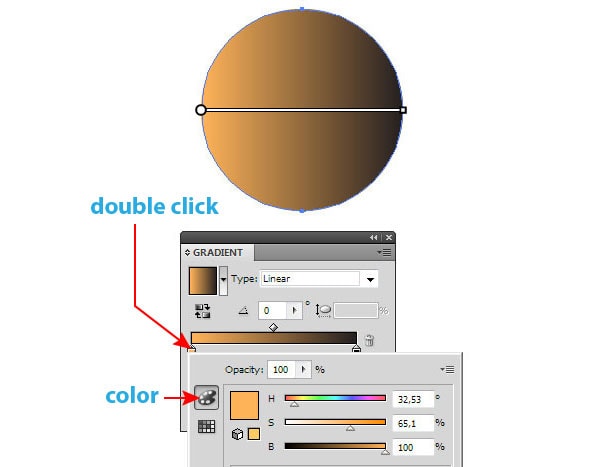
If you work in Adobe Illustrator CS4 – CS6, then by double clicking on the Color Stop, it opens Colors or Swatches panel right in the Gradient panel. Now you can mix colors, or choose a color from the available samples.
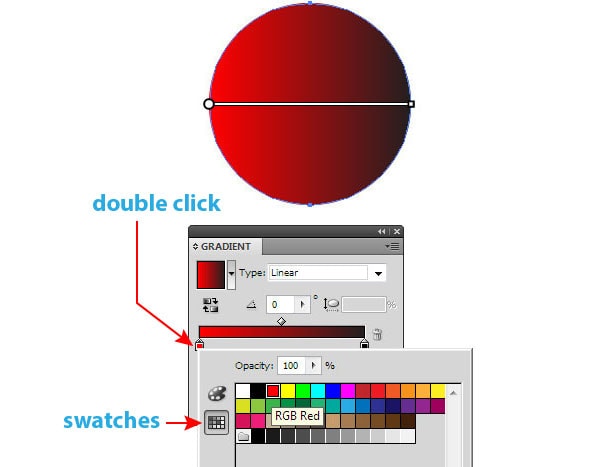
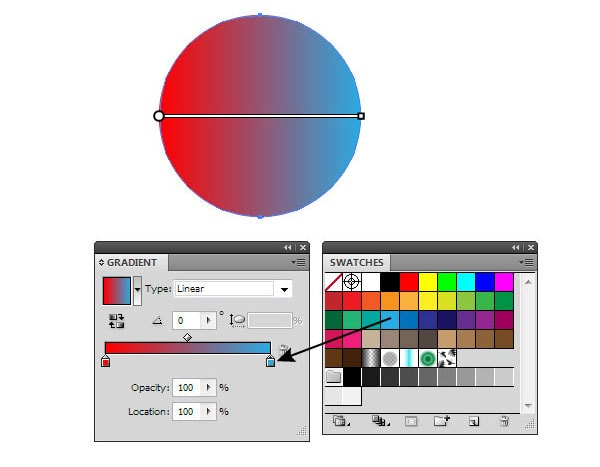
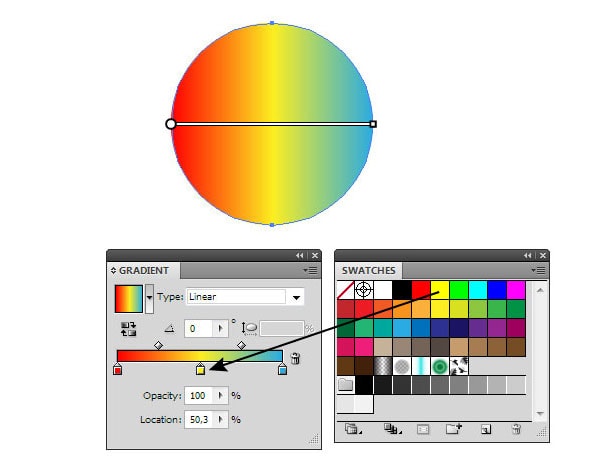
You can also drag colors from the Swatches panel on any Color Stop to swap its color or to create a new Color Stop.
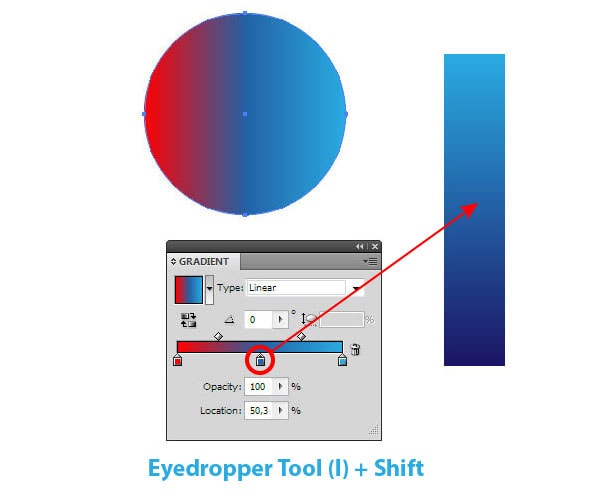
To change the color of the Color Stop, you can also use the Eyedropper Tool (I). Select one of the Color Stops, take the Eyedropper Tool (I), hold Shift, and take a color from another object that has a solid or gradient fill. The same way, you can also take colors from bitmap images or gradient mesh objects.
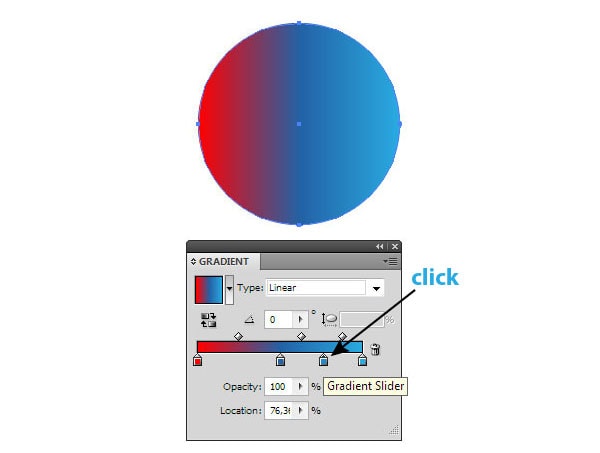
To create a new Color Stop you just need to click on a blank area of the slider in the Gradient panel.
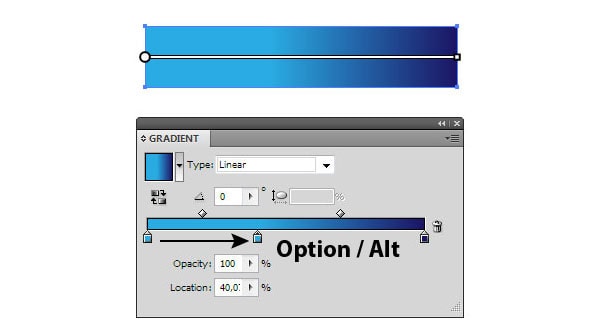
You can also duplicate the Color Stop, to do this, drag it to the side, holding the Option / Alt key.
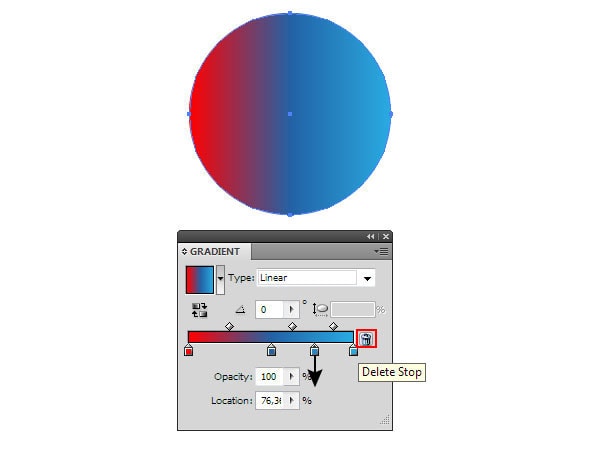
To delete Color Stop, pull it down or press Delete Stop icon.
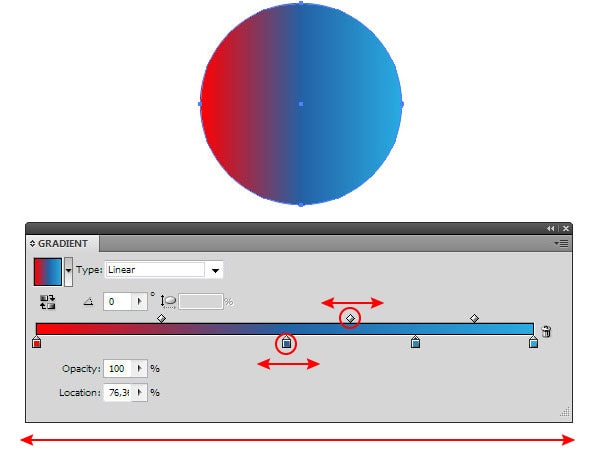
By moving the Color Stops and Midpoints, you can achieve the desired color distribution. In practice, you often need to work with complex gradients that have a lot of Color Stops. For the convenience of working with such gradients, simply extend the Gradient panel.
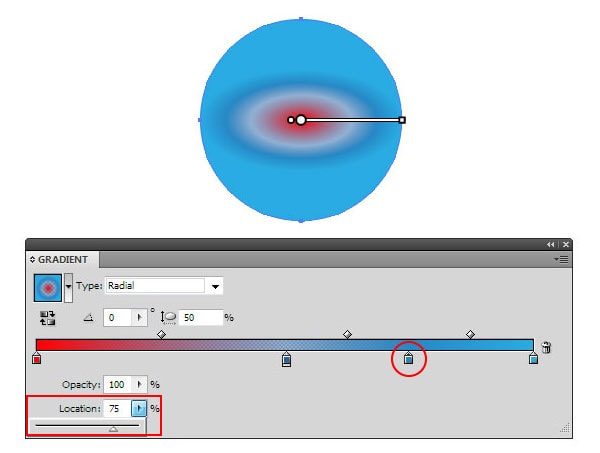
In the Gradient panel, you can also select the type of gradient…
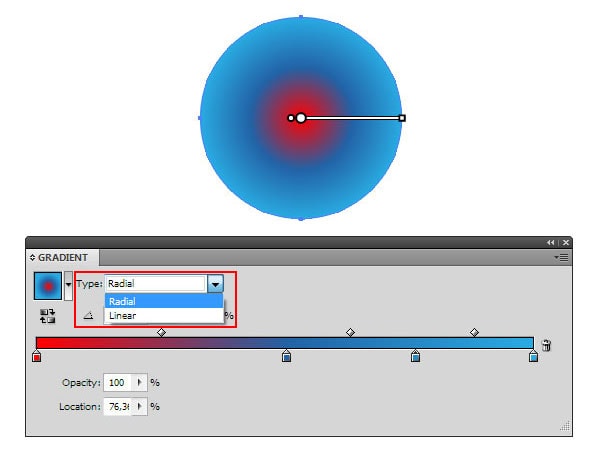
to set its angle…
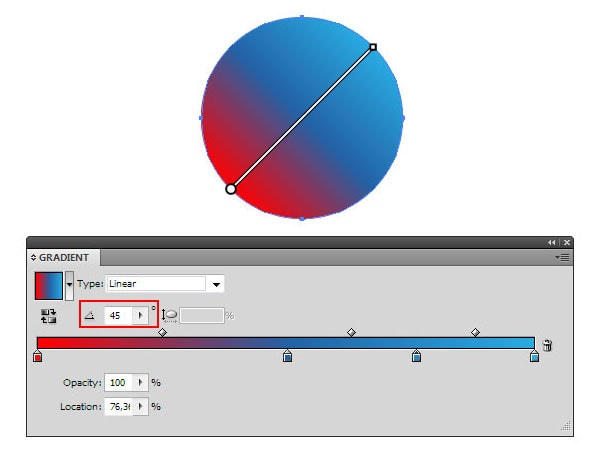
set the Aspect ratio for the radial gradient that will transform it into an elliptical one…
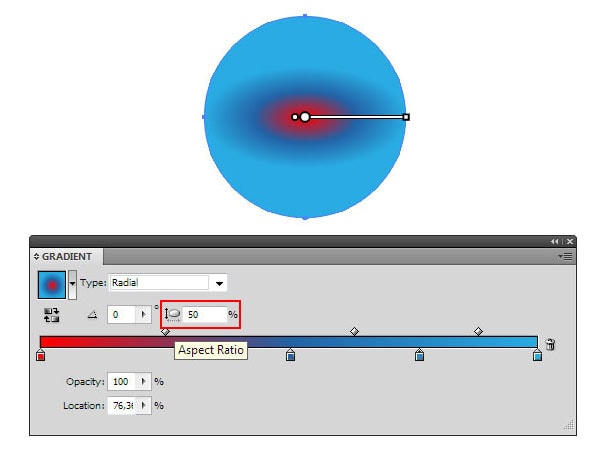
to reduce the opacity of the Color Stops (available for users of Adobe Illustrator CS5 – CS6 )…
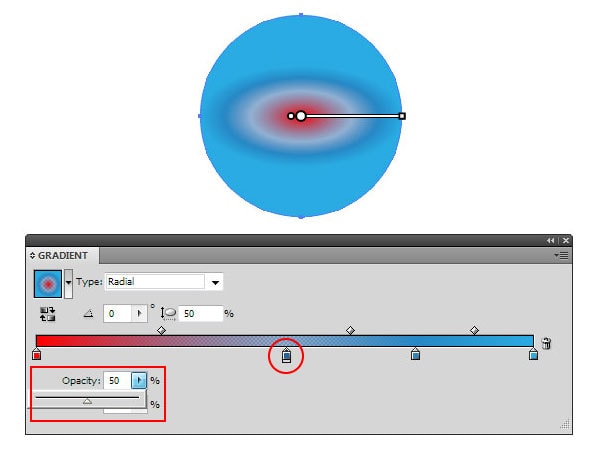
and to set a more accurate location of the selected Color Stop.
If you take the Gradient Tool (G), then you can control the gradient directly on the object using Gradient Annotator. You can move it, change the angle and move the Color Stops.
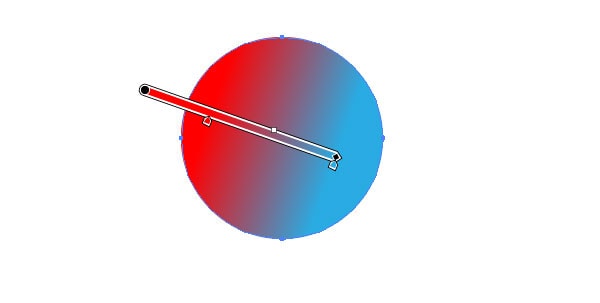
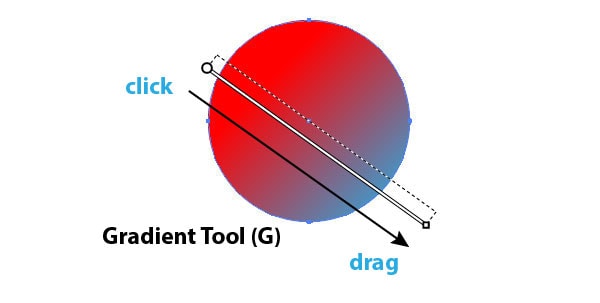
With the help of the Gradient Tool (G), you can set the angle, direction and length of the gradient using click and drag method.
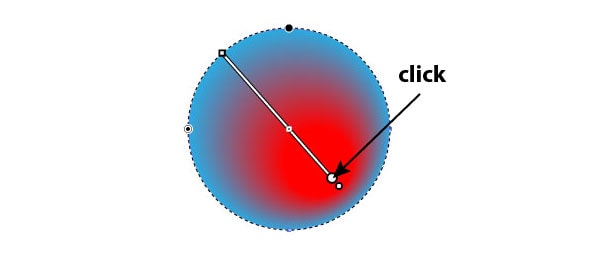
If after you create a radial gradient, you click on any place with the help of the Gradient Tool (G), then the center of the gradient will be moved to this place, and at the same time we will get the eccentric radial gradient, as shown in the following picture.
Of course, in the article about the gradients I should say that in Adobe Illustrator CS6 we are able to apply a gradient to a stroke. This filling has three types: gradient within stroke, gradient along stroke, gradient across stroke.
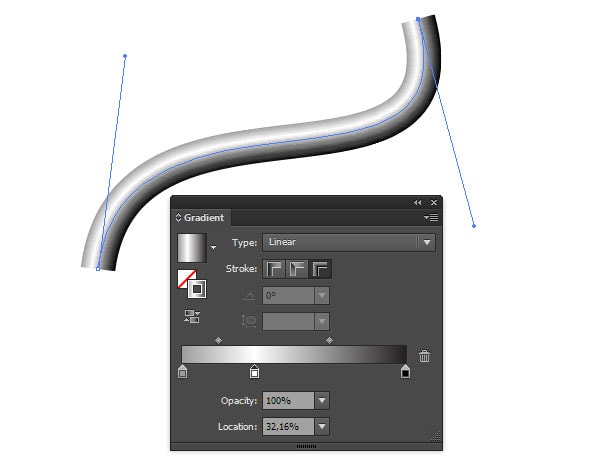
And I’ve already used the new feature a few times in practice.
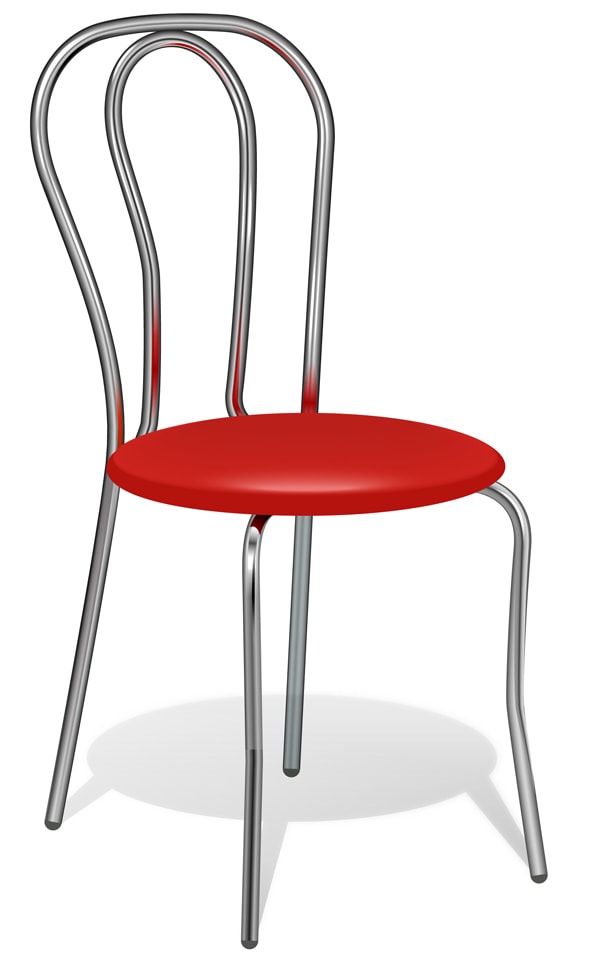

That’s about all I know about the controlling of gradient fills. But that’s not all I want to tell you today. I am often asked the same question: in what cases and what kind of gradient effect should be applied? It depends on several factors:
- The shape and location of the light source;
- The form of the illuminated object;
- The presence of reflexes;
- Material of the illuminated object (although this factor does not affect the shape of the gradient, but only on the contrast of the colors and the position of color stops, that means on the smoothness of the transitions between colors).
Does it sound complicated? Let’s take a look at the above mentioned in practice.
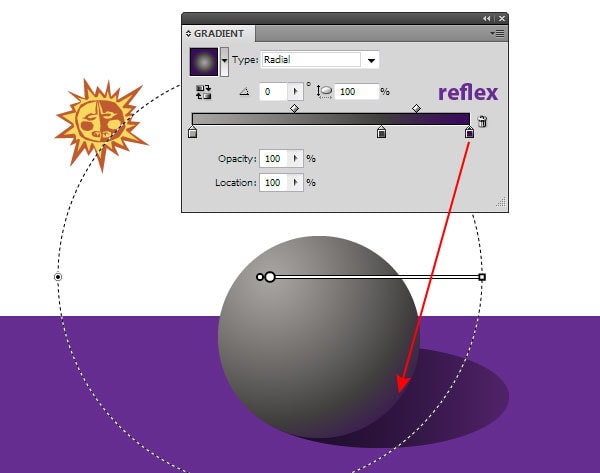
Object is a plastic sphere that is illuminated by a point light source. The object is located on a colored background.
To fill such an object, use a radial gradient, the center of which move towards the source of light. Do not forget about the reflex on the surface area, which must be the same color as the background, but a darker shade. Here I would like to recommend you to start coloring objects only after you will create background of the illustration. This will allow you to choose the right color intensity, direction of the gradients and reflex colors.
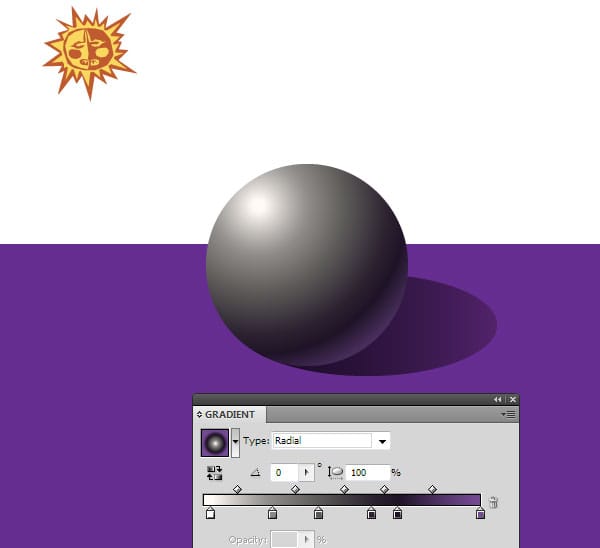
When illuminating the metal sphere, we need to use more contrasting colors and add some new color stops to adjust color transitions.
Object is a metal cylinder.
In this case, we need to use a linear gradient.
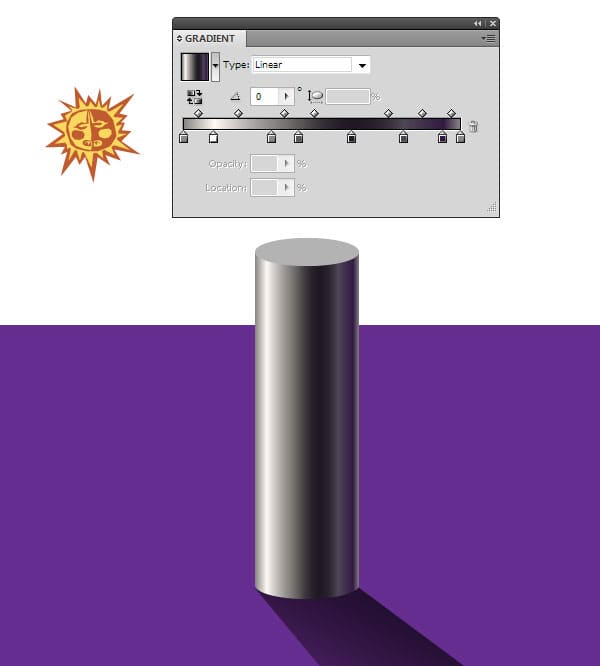
The plane area can be filled with a linear or radial gradient, it all depends on what effect you want to achieve.
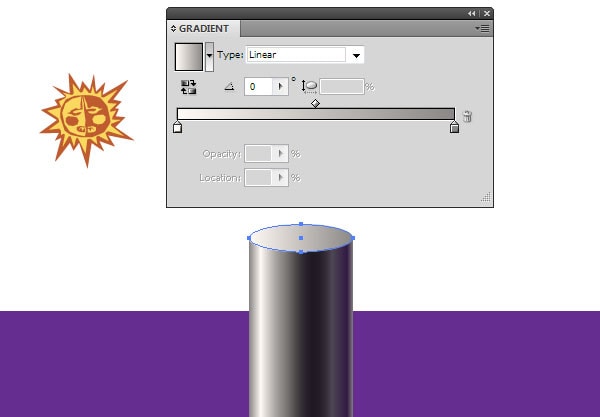
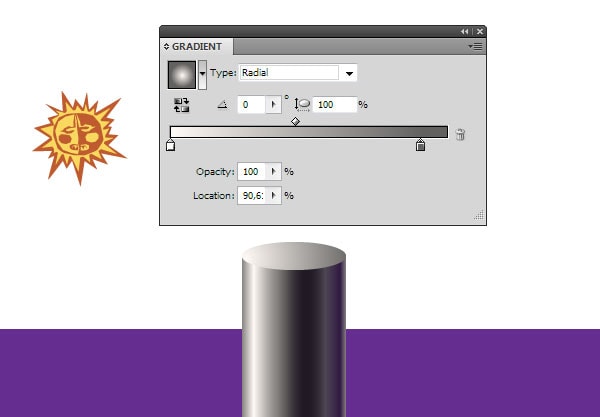
In order to add volume to more complex objects we will need to combine several gradients, using opacity masks and gradient meshes. And all this will be discussed in our next tutorials. Let today’s tutorial be a good foundation for exploring the new material.


