How to Create a Splash Screen Illustration
In this tutorial, we will walk through the process of creating a splash screen illustration using vector elements created in Illustrator and applying them to a template in Photoshop before exporting for the web.
Splash Screen
What exactly is a splash screen?
A splash screen is a launch image that is primarily used on mobile devices.
A launch image is a placeholder image that iOS displays when your app starts up. The launch image gives users the impression that your app is fast and responsive because it appears instantly and is quickly replaced by the first screen of your app – in portrait orientation!
With Postcards Email Builder you can create and edit email templates online without any coding skills! Includes more than 100 components to help you create custom emails templates faster than ever before.
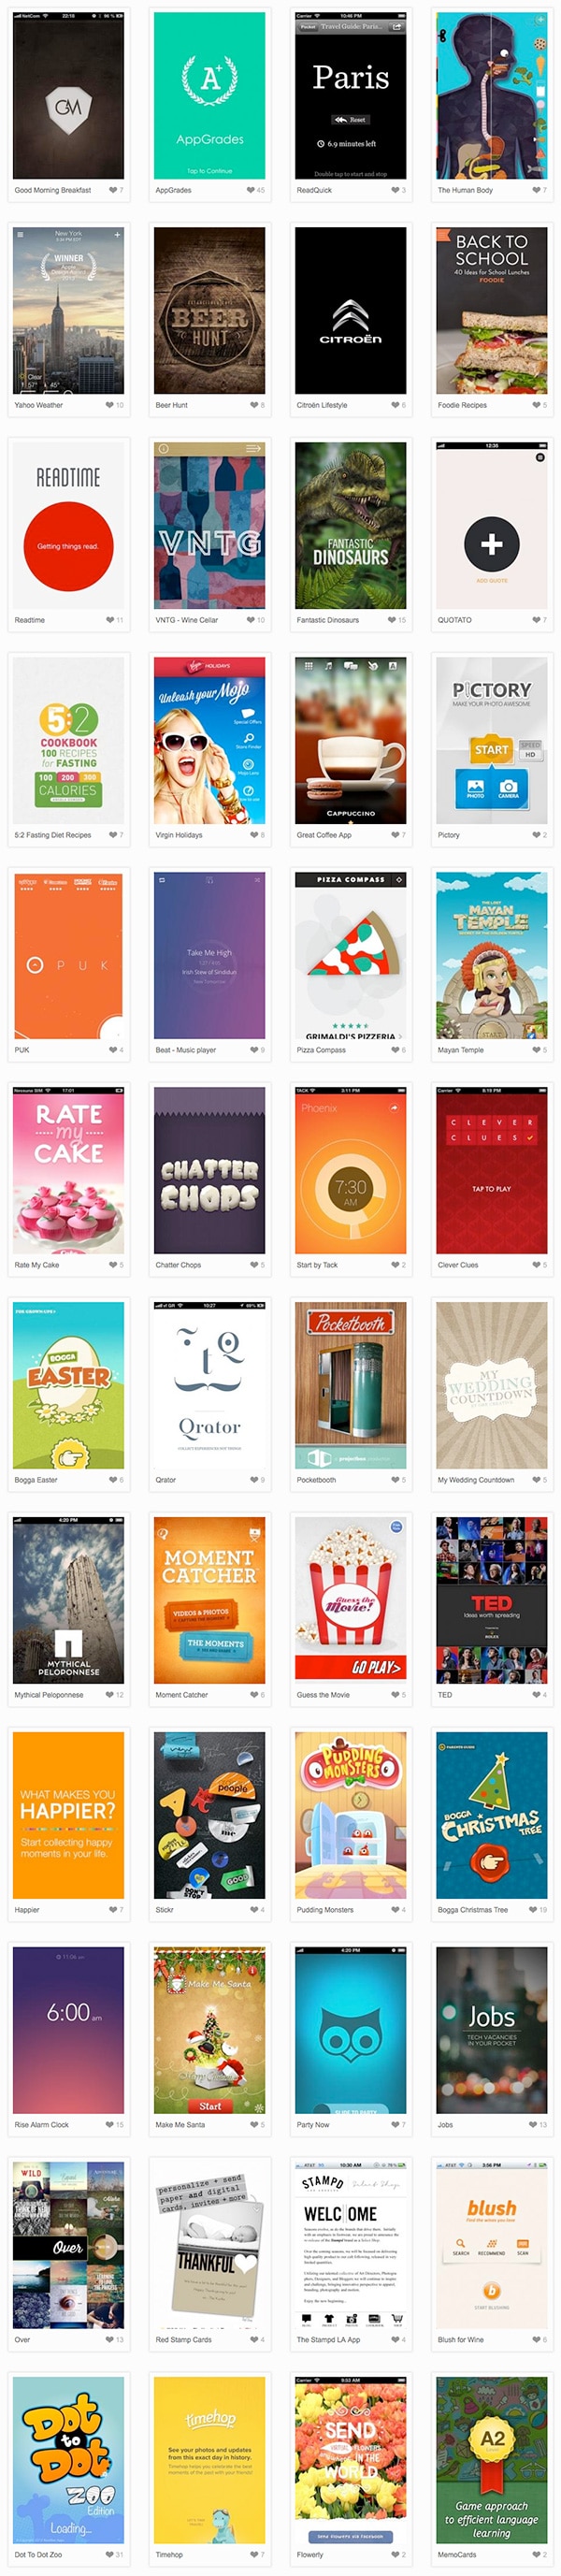
Free Email BuilderFree Email TemplatesMobile Mozaic has a collection of mobile screenshots with a dedicated section for splash screens.

There are other collections to explore as well, these can be a great source of inspiration – Mobile Patterns.
Starting Point
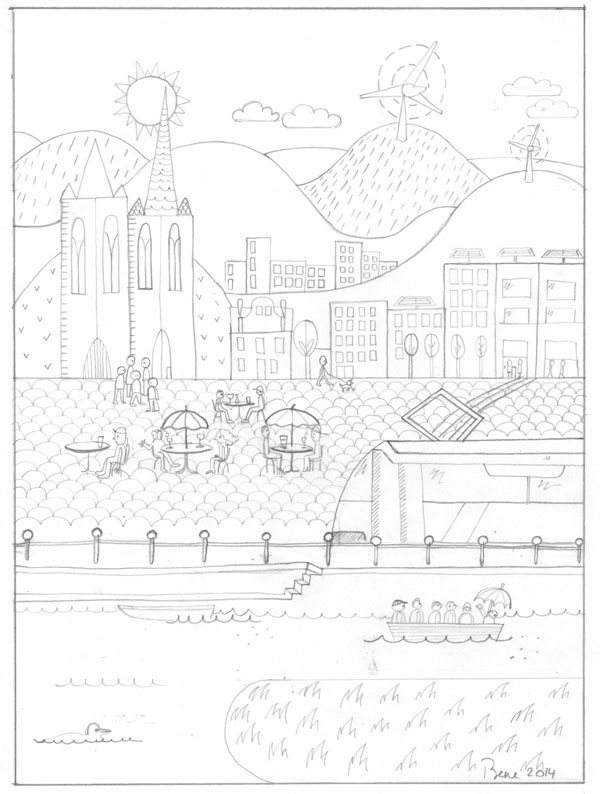
The first step is sketching the illustration.
Before starting the actual illustration, I sketched out the cityscape that is envisioned for the project.
Choose a Color Palette
While sketching, think about how color will be used. Because I love flat and simple colors, I was drawn to Flat UI colors. The palette is created by Ahmet Sülek, who also developed a website where you can sample the colors in different formats: By name, RGB, Hex value. It’s a great tool.
Flat UI colors are also used in Flat UI Pro, available from Designmodo’s shop.
With Pulsetic you’ll be instantly notified the moment your website, API, or server becomes unavailable. Monitor uptime from multiple global locations and respond to incidents before your users are affected.
Create beautiful status pages in minutes to keep customers informed during outages and build trust with transparent communication.
Start Monitoring for Free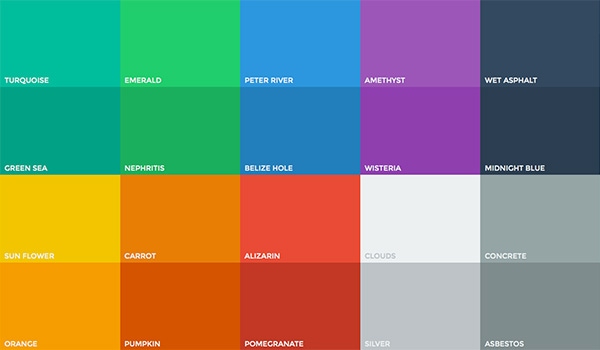
Flat UI colors are bright, simple and are a good fit for the elements.
Create an Inventory
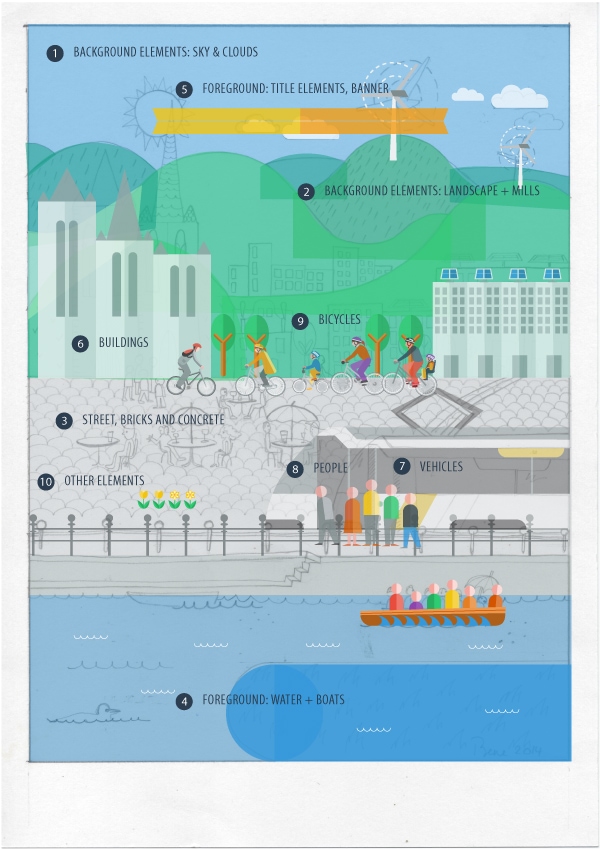
Because every splash screen will be different, I created a template with an inventory of every element that will be used in the illustration. Vectorize every element and place them in categories. (Because it’s scenery of a small city, I am calling it city elements/shapes.) For every element, I will be able to scale it or replace it when needed. This template/inventory will be my starting point.
An inventory is handy for future reference and can be super flexible if you like to add new elements or adjust existing ones. It will also help for the next step, creating a composition for the city scene.
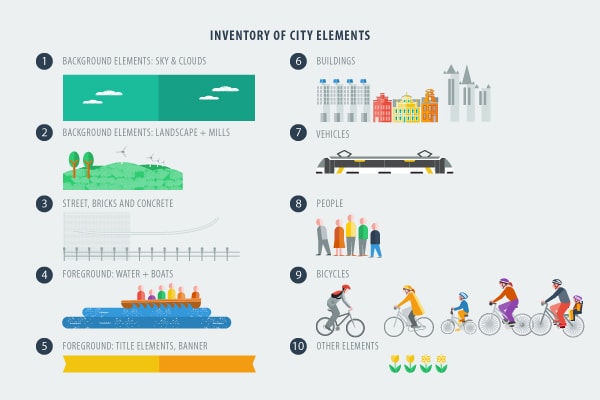
My inventory with the elements needed to make a composition in my illustration.
Create the City Scene
Step 1
Open the existing sketch in Illustrator and add 10 new layers, naming them 1 to 10.
The first layer is the most backward layer with background elements like the sky, clouds and a sun or birds.
Step 2
On top of layer nr. 1 is the second layer nr.2.
The layer will include landscape elements such as hills, grass and trees.
Step 3
Add streets and roads.
On top of the landscape, start placing grey parts, like streets, concrete and bricks. I used a cobblestone pattern because it is typical for old, medieval cities in Belgium.
Step 4
On top of layer nr. 3 is the water layer.
In the front of the picture, add a fourth layer that includes water elements in the city scene.
Step 5
Layer nr.5.
On this layer, place foreground elements and title of the splash screen, a title element and banner element
Step 6
Layer nr.6.
On top of the fifth layer comes another layer that includes buildings of various types, including houses, apartments buildings and churches.
Step 7
Layer nr.7.
This layer is the vehicle layer, at first I added cars but the image looked to crowded and I opted to stick with just a cable car design.
Step 8
Layer nr.8.
This layer is designed as a location for the people in the splash screen image.
Step 9
Layer nr.9.
The next layer is the bicycle layer, these are riding in the back.
Step 10
Layer nr.10.
The last layer, called “0ther elements,” is used to place detail elements, such as the waves in front of the water, flowers. Collect all the smaller details in this top layer.
Using layers is an easy method to adjust the z-index of elements and to avoid conflicts of elements that are in front and need to be in the back and vice versa. Another big advantage of working with layers is that you can easily select all of the elements in one layer and apply a color, shadow or other style element to it. You can also lock or hide layers, which can be an advantage while working on a certain layer or detail.
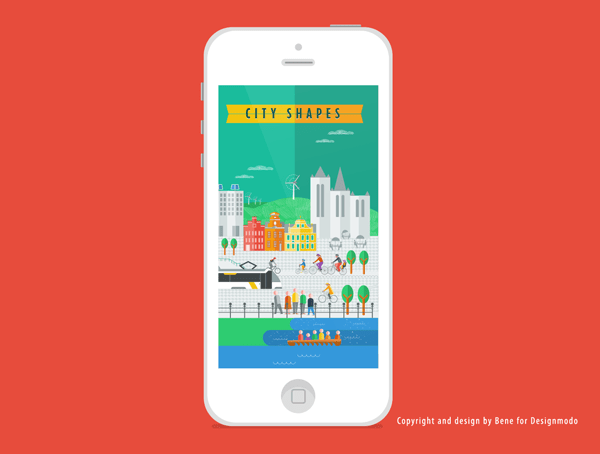
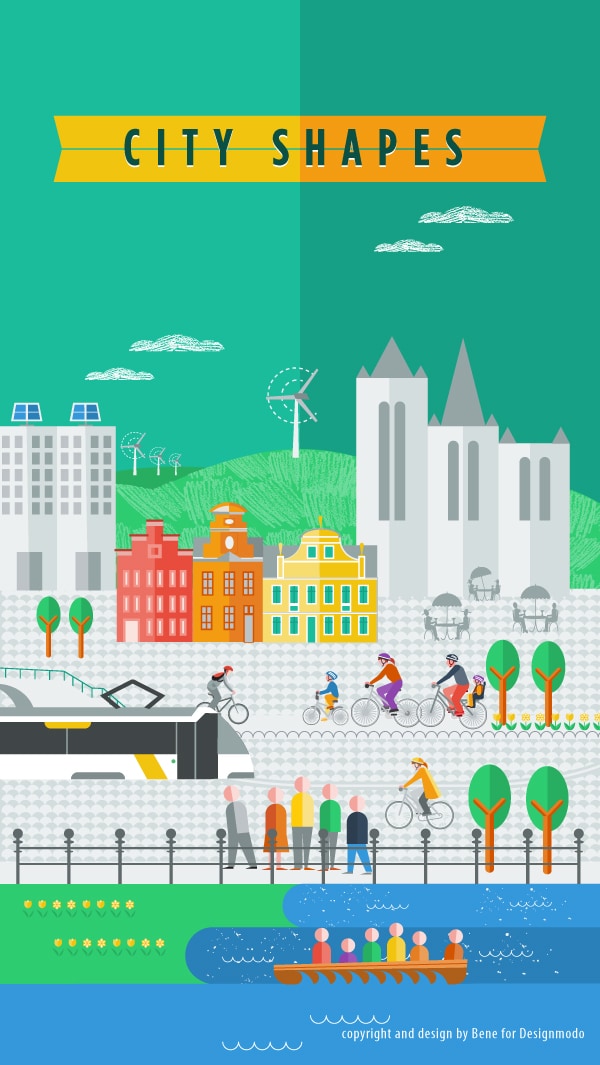
The Finished Illustration
Once the illustration is ready, open Photoshop.
We’re going to open a template in Photoshop in which we will place the finished illustration from Illustrator.
Assembling the Illustration in Photoshop
Download the template and open the template or make one yourself.
The Splash Screen template: I’m using the iOS Splash Screen template by David Lillo, a great template that you can use as a starting point for different dimensions for the screens.
The Photoshop layers are self-explanatory, and it is well-explained in the file itself.
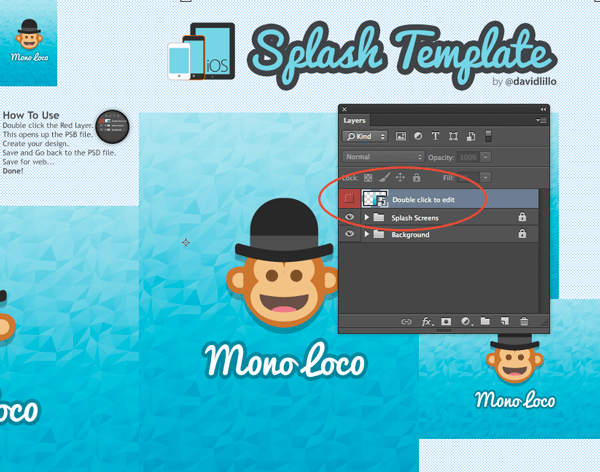
The top layer holds the Illustrator file.
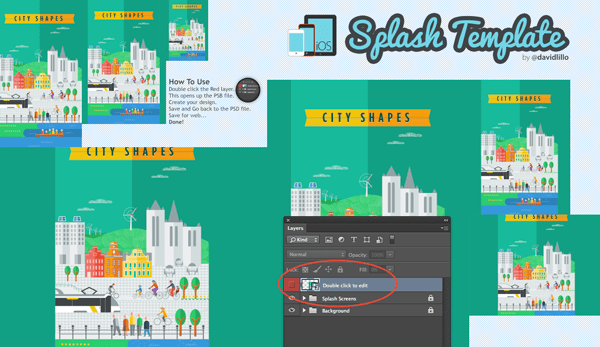
Double-click the top layer and paste your artwork, then save and close. Use a splash screen template to export to different dimensions.
References
- Mobile Mozaic
- Mobile Patterns
- Flat UI Colors
- Flat UI Kit
- Launch Images as in developer guide by Apple
- iOS splash screen template by David Lillo
- App Splash Screen Sizes on GitHub