


Latest Articles
-
How to Transform and Duplicate Objects in Adobe Illustrator
Topic: Adobe Illustrator Difficulty: beginner Estimated completion time: 15 minutes Illustrations, logos, and designs may …
-

Free Photoshop Tutorials for Graphic Designers
Fantastic fantasy worlds, realistic 3D typefaces, mind-blowing line art, and just photos with perfect bodies …
-

How to Create Vector Textures in Adobe Photoshop and Illustrator
For some time, textures have been an important part of graphic design, but the process …
-
How to Create Seamless Subtle Patterns in Adobe Illustrator
Topic: Adobe Illustrator Difficulty: beginner Estimated completion time: 30 minutes In this Illustrator tutorial, we …
-

How to Create a Sleek iOS App Icon in Photoshop
This is something you need in your design toolkit — the ability to create a …
-

How to Create Animals Icons in Adobe Illustrator
In this tutorial I will show you how to create an animal icon in Adobe …
-

How to Animate a Flat Design Bicycle in After Effects (Part 2)
In this tutorial we will learn how to animate the flat design bicycle from the …
-

How to Export an Animated GIF using Adobe Photoshop and After Effects (Part 3)
Animated GIF images are one of the most popular image types on the web. The …
-

How to Create a Flat Cityscape in Adobe Illustrator
In today’s tutorial I’m going to show you step by step how to create a …
-

How to Create a Coding Page Illustration in Adobe Illustrator
With all the flat style madness going on in the design community, we can quickly …
-

Tips and Tricks to Design with Pixel Perfection in Adobe Illustrator
Ever since Adobe Illustrator was launched, people wondered if they could make the transition and …
-

How To Create a Web Icon in Adobe Illustrator
Ever wanted to design an icon for the web? Today is your day. In this …
-

How to Create a Splash Screen Illustration
In this tutorial, we will walk through the process of creating a splash screen illustration …
-

Photoshop Plugins you Won’t be Able to Live Without
To help make 2014 the most awesome year for you yet, here is a collection …
-

How to Control Gradient Mesh in Illustrator
I met a lot of graphic designers who avoid working with a gradient mesh by …
-

How to Create Color Transition with Blend Tool in Adobe Illustrator
Topic: Adobe Illustrator Difficulty: beginner Estimated completion time: 15 minutes In this tutorial we will …
-
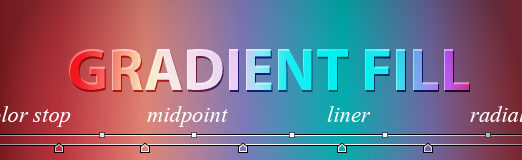
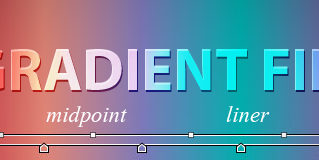
How to Control Gradient Fills in Adobe Illustrator
Topic: Adobe Illustrator Difficulty: beginner Estimated completion time: 15 minutes Gradient fills are used to …
-

How to Obtain the Right Color in Adobe Illustrator
Topic: Adobe Illustrator Difficulty: beginner Estimated completion time: 15 minutes In this tutorial we will …
-
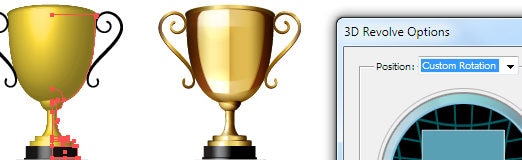
3D Modeling in Adobe Illustrator
Topic: Adobe Illustrator Difficulty: beginner Estimated completion time: 30 minutes In this tutorial we will …
-

Alignment and Combining Objects in Adobe Illustrator
Topic: Adobe Illustrator Difficulty: beginner Estimated completion time: 15 minutes Today we will be talking …
-
Creating Objects Using Basic Geometric Shapes in Adobe Illustrator
Topic: Adobe Illustrator Difficulty: beginner Estimated completion time: 10 minutes The shape of most objects …
-

Create a Simple Contact Form in Adobe Photoshop
Software: Adobe Photoshop Difficulty: Beginner Estimated completion time: 40 minutes In this tutorial we will …
-
Create Objects’ Shapes Using the Pen Tool in Adobe Illustrator
Topic: Adobe Illustrator Difficulty: beginner Estimated completion time: 30 minutes Today we begin a series …
-
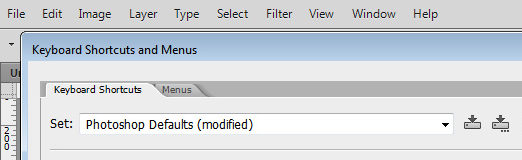
How to Customize Keyboard Shortcuts in Photoshop
Each of us who work in Adobe Photoshop use different tools from drop down menus, …