How to Create Forms Using Slides and Collect Data on Static.app
Web forms are everywhere. Almost every person on this planet who uses the internet will fill in at least one form occasionally.
A web form, also called an HTML form, is an essential part of a website that allows user input either with information or files similar to a paper document. Web forms are rendered in browsers using HTML and related web-based technologies.
Collecting data with forms is not an easy task and requires external tools, third-party technologies and services to get set up.
Form submissions can be collected or processed in several ways either via:
- A client-side programming language (such as JavaScript and related frameworks)
- A server-side programming language (such as PHP, Ruby, and Python)
- Or any programming language or platform that can handle form data collection.
While you can use any of these methods to collect your form data, there are ways to generate form templates without learning hardcore programming or even touching numerous lines of codes such as using a pre-built form.
In this tutorial, I’m going to walk you through how you can quickly generate forms with Slides which you can use with the Static.app static-form feature to collect, access, and manage your form submissions.
With Postcards Email Builder you can create and edit email templates online without any coding skills! Includes more than 100 components to help you create custom emails templates faster than ever before.
Free Email BuilderFree Email TemplatesSlides is a static website generator that is used to create beautiful, animated, static websites in a matter of minutes. It comes with native components and modules that are easy to customize to help you execute your web design ideas in a few clicks.
On the other hand, Static.app is a static website hosting solution with a one-click drag and drop feature that can unpack your archive and create a URL for each page in a matter of minutes.
Video Version
Without further ado let’s get started.
Using Slides to generate a pre-built contact form
Slides makes it easy for anyone to create contact forms using its pre-built themes. In order to generate a contact form theme, head to designmodo.com/slides.

To start, we need to either sign up for an account on Designmodo.
Note: In order for us to use the slides contact form theme, we need to sign up for a Business or Agency Account.
After logging in to our account, we need to create a new project by clicking the “new project” box on our slides dashboard, and a modal window will pop up.
With Pulsetic you’ll be instantly notified the moment your website, API, or server becomes unavailable. Monitor uptime from multiple global locations and respond to incidents before your users are affected.
Create beautiful status pages in minutes to keep customers informed during outages and build trust with transparent communication.
Start Monitoring for Free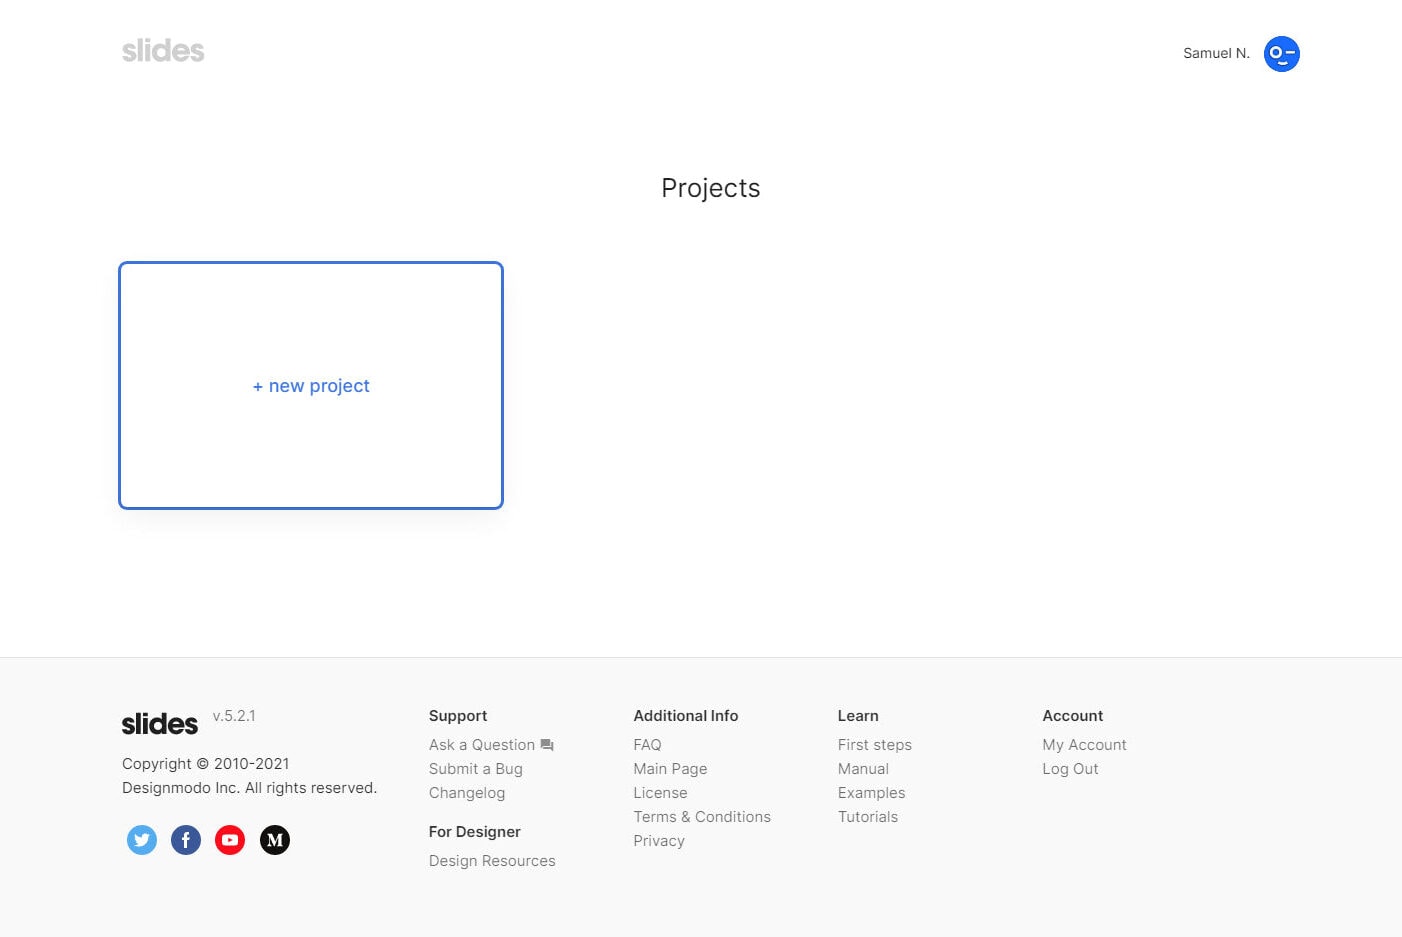
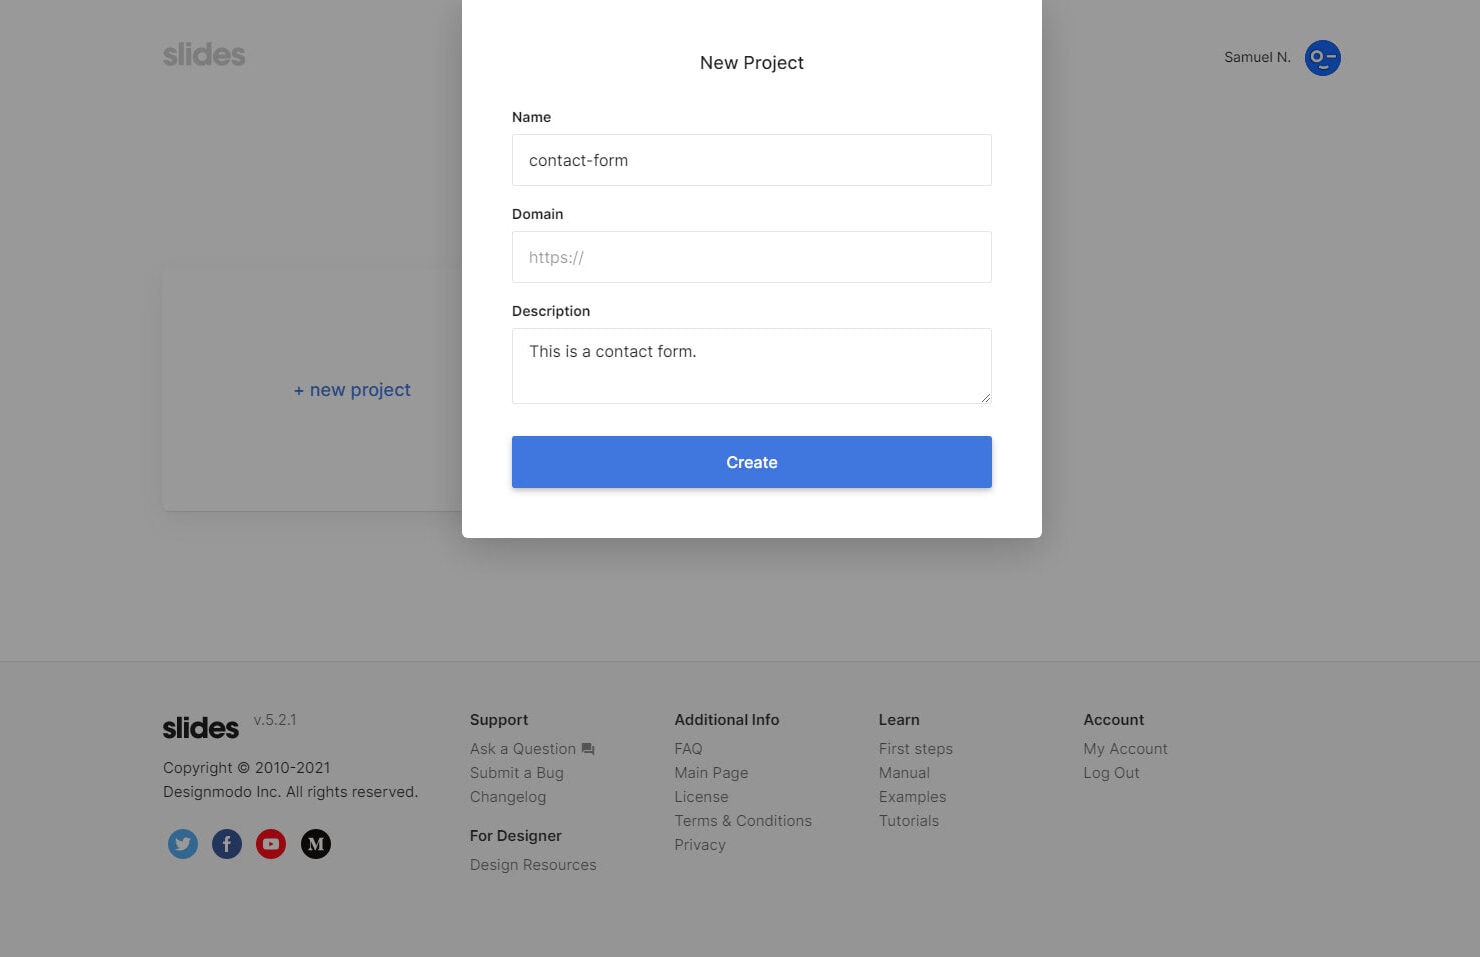
From the modal, we can name our project, domain, and description according to our liking as seen in the image below.
As an example, I will name our project “contact-form” and put a description of “This is a contact form“. I will leave the domain blank for now since we’re going to upload this on Static.app. To create this project, we need to click on the “Create” button as seen in the image below.
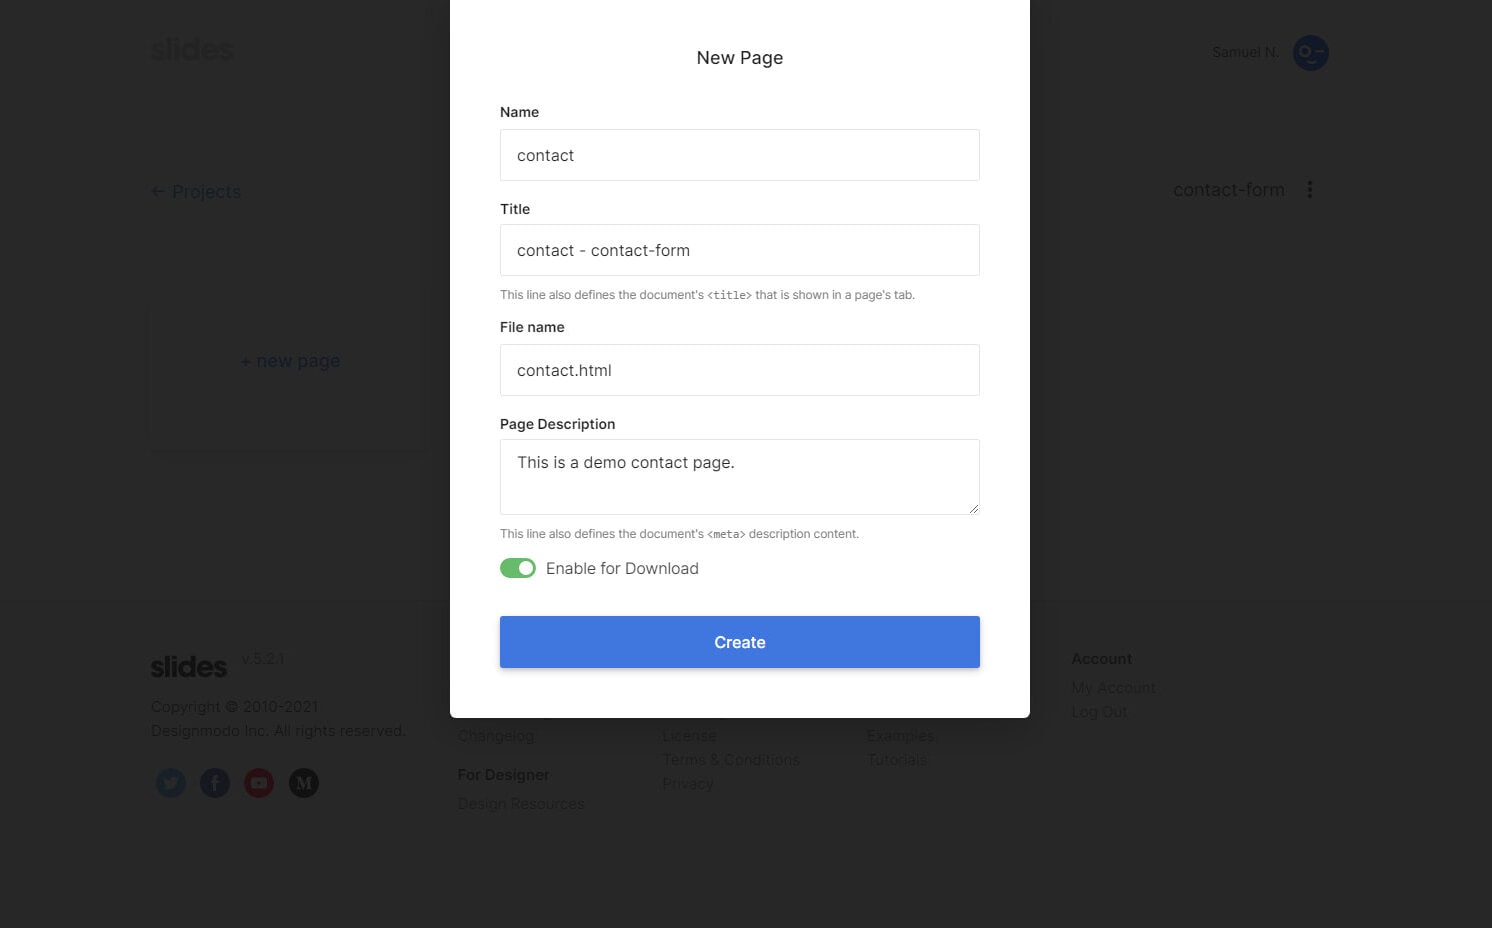
Next, we need to create a page. On the create page dashboard, click on the “new page” box and another modal will pop up on the screen.
From here, we can put on our preferred name and it will auto-generate the title and file name for us. Additionally, we can also put our desired page description and tick on the “Enable for Download” to be able to download the page later.
As an example, we will name this page as “contact” and put a page description of “This is a demo contact page.” To create this page, we need to click on the “Create” button as seen in the image below.
After creating the page, we will be redirected to the slides page where we can select a template of our choice.
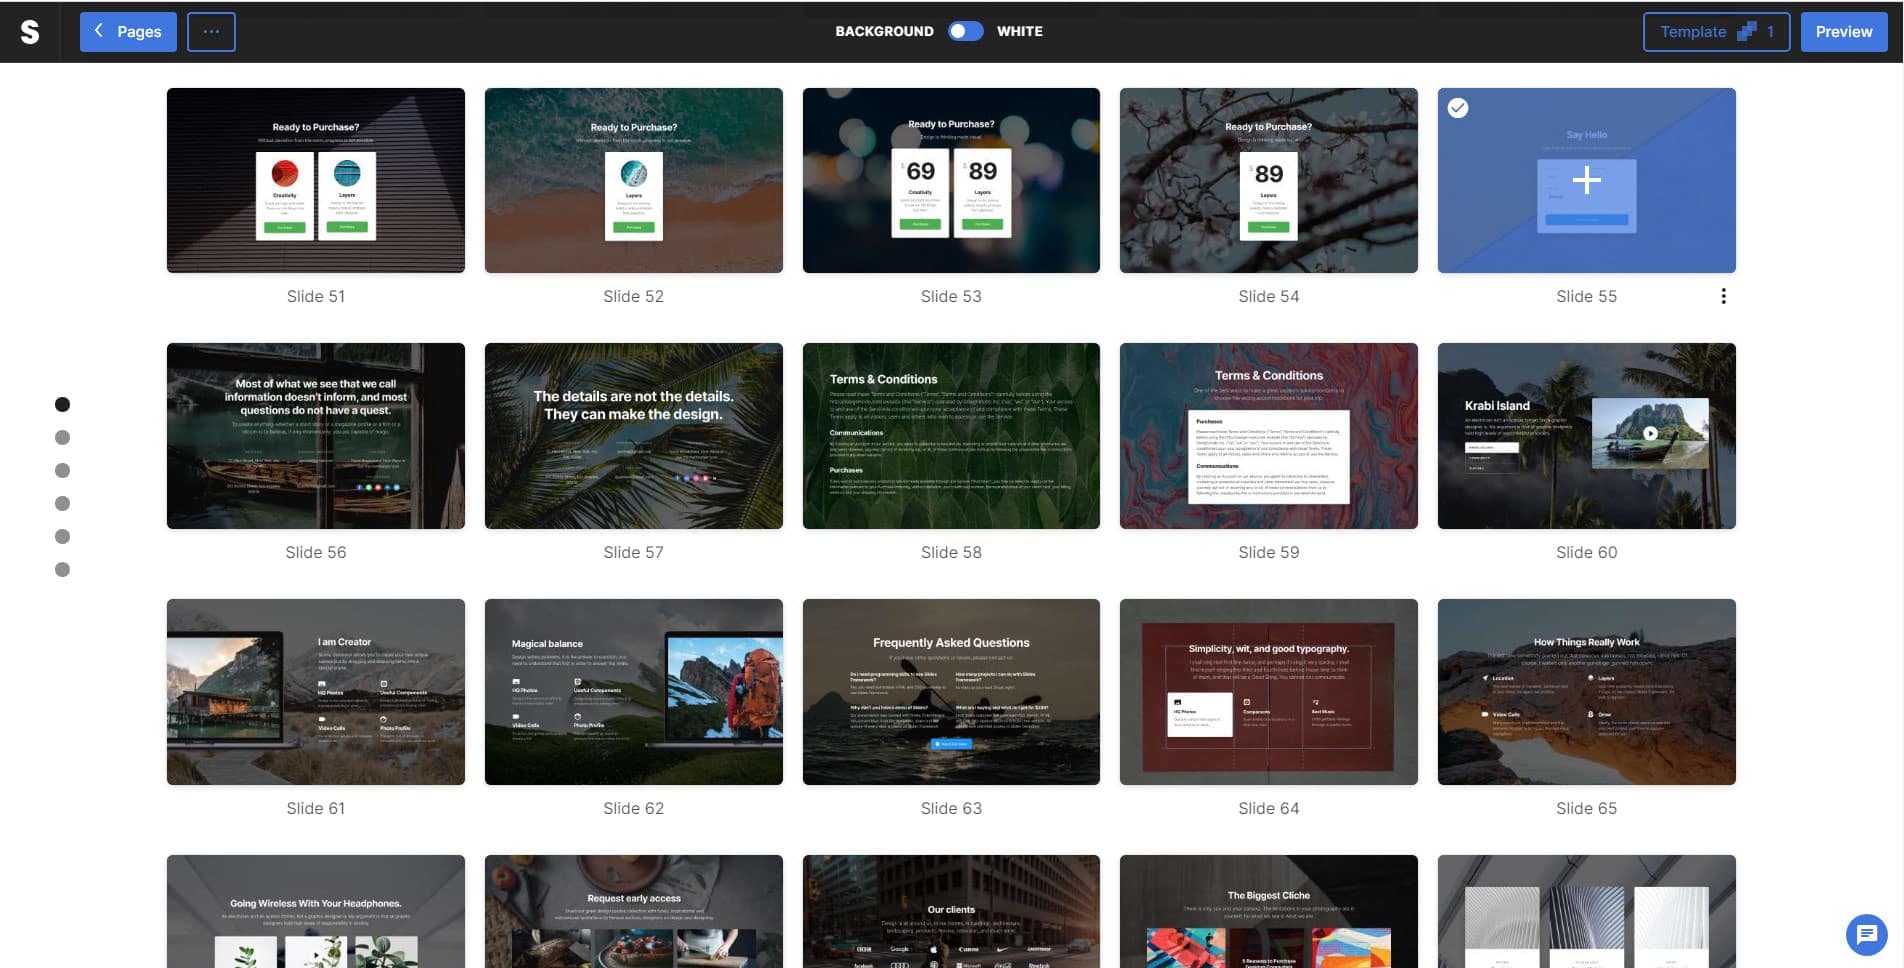
Since we want to work on a contact form simply scroll down on the slides page and select “Slide 55” as seen in the image below.
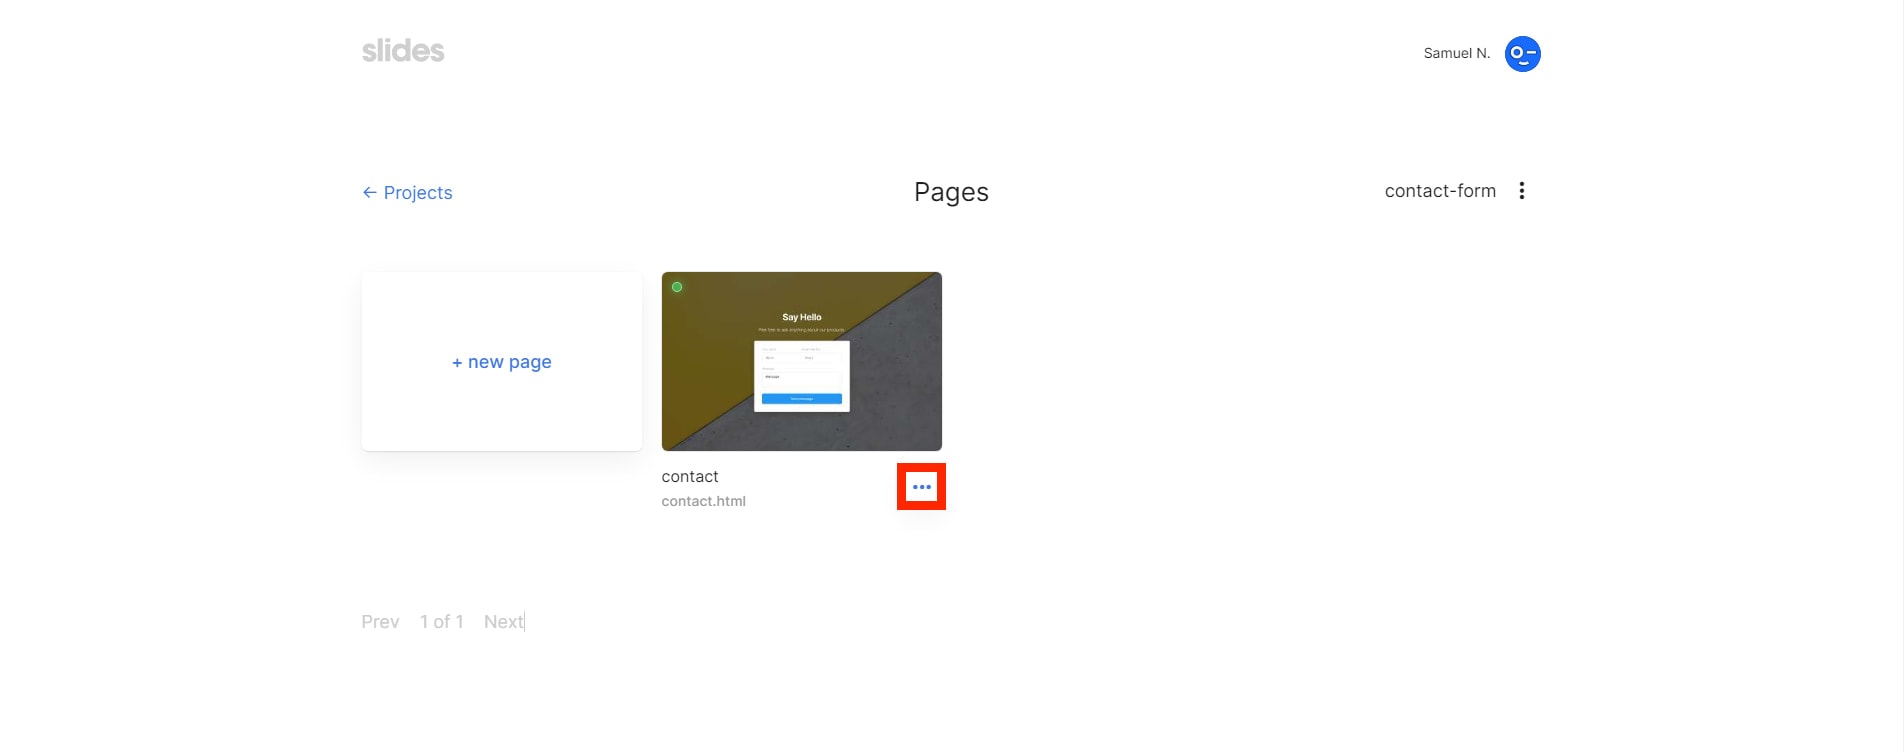
Next, to download this contact form template, head on to the Pages dashboard by clicking on the “Pages” button on the upper left corner of the screen.

From here, we will see the contact form template that we’ve added. To download this, simply click on the three vertical dots icon at the lower part of the contact page and select “Download” as seen in the image below.
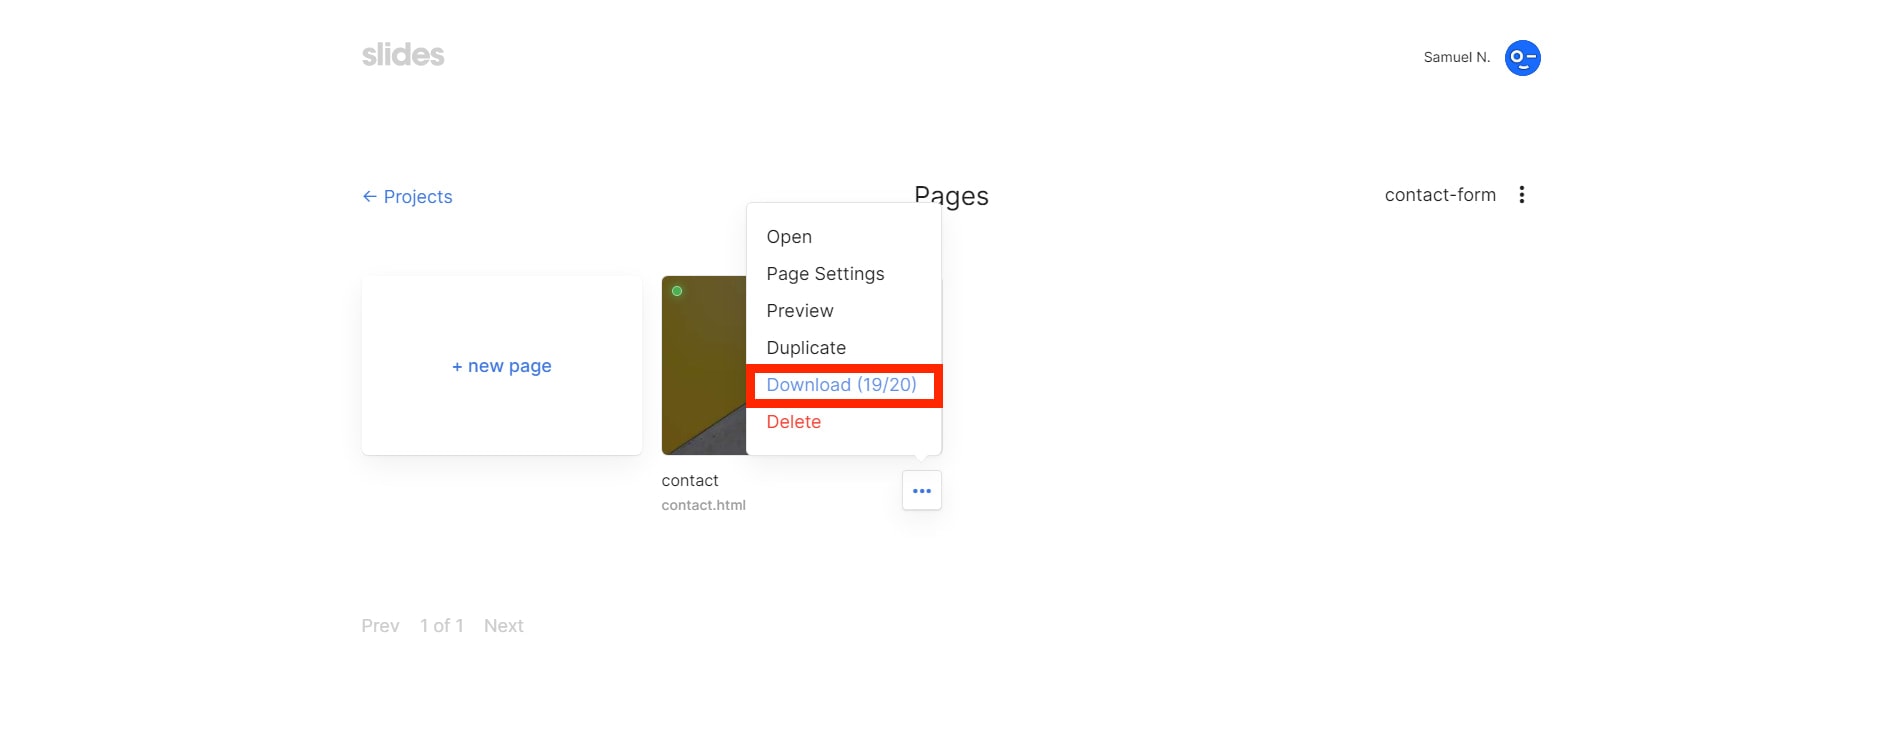
A new modal will then pop-up which will let us download the page template in zipped format by clicking on the “Download” button.
Uploading and editing code on Static.app
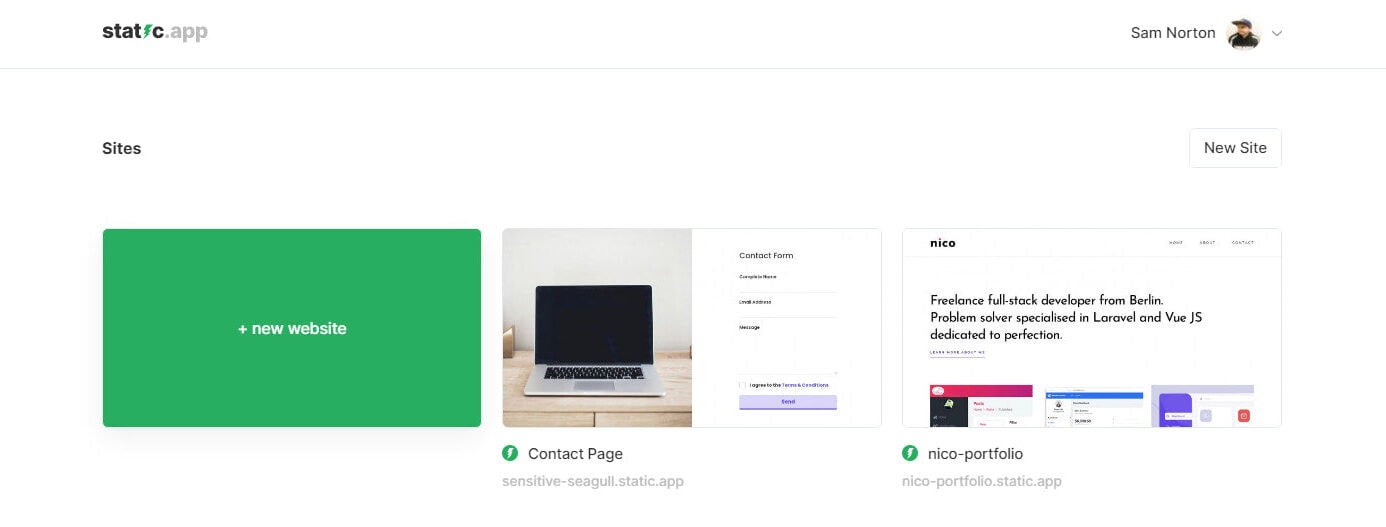
Now that we have the downloaded version of our contact page, let’s head to Static.app and upload our website. After logging in to our account, click on the “New Website” box and it will redirect us to the upload page as seen in the images below.
From here, we need to drag and drop our zipped version of the slides contact page that we downloaded.

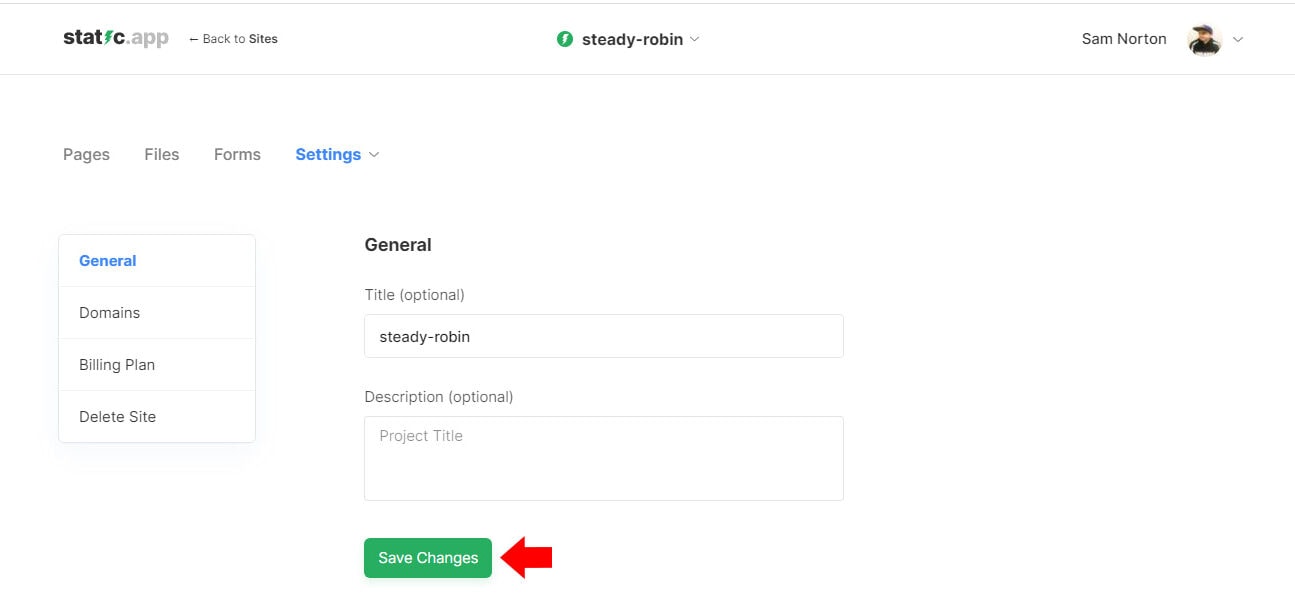
Once the website is uploaded, we can name the website to our preferred name, description, and sub-domain. For the sake of the example, we will leave the setup for both the name of the website and the sub-domain to its default auto-generated setup and simply click on the “Save Changes” button as seen in the image below.
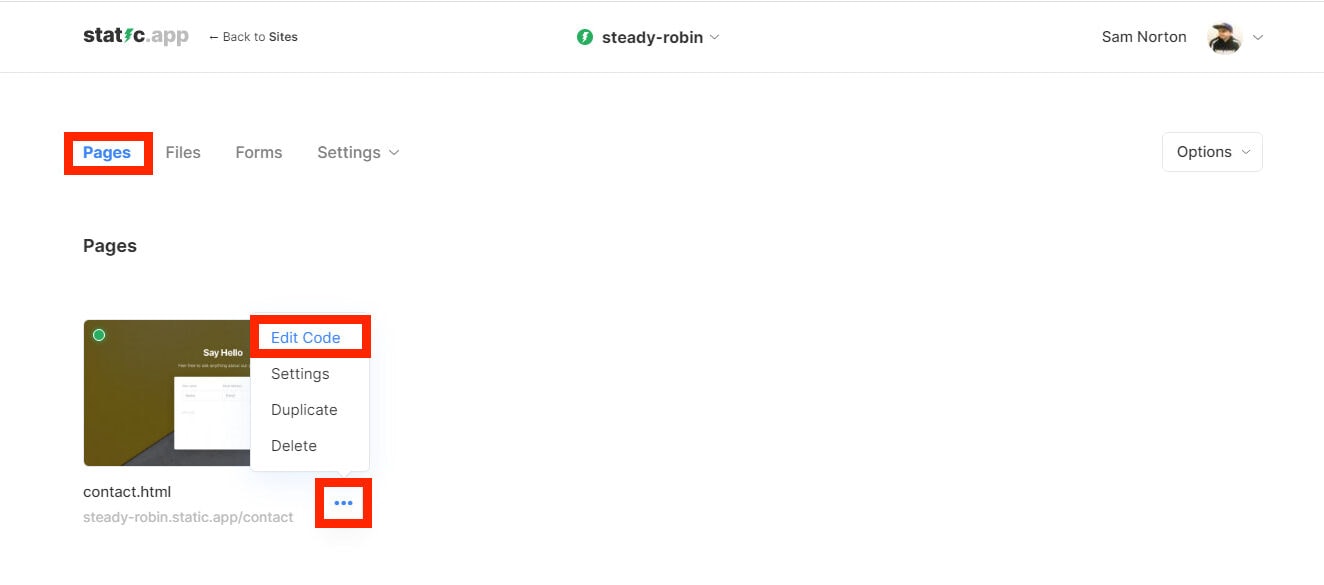
Next, we need to edit the code of the slides contact page so head on to the Pages dashboard and click on the three vertical dots icons. Afterward, click on the “Edit Code” and it will redirect you to the code editor.
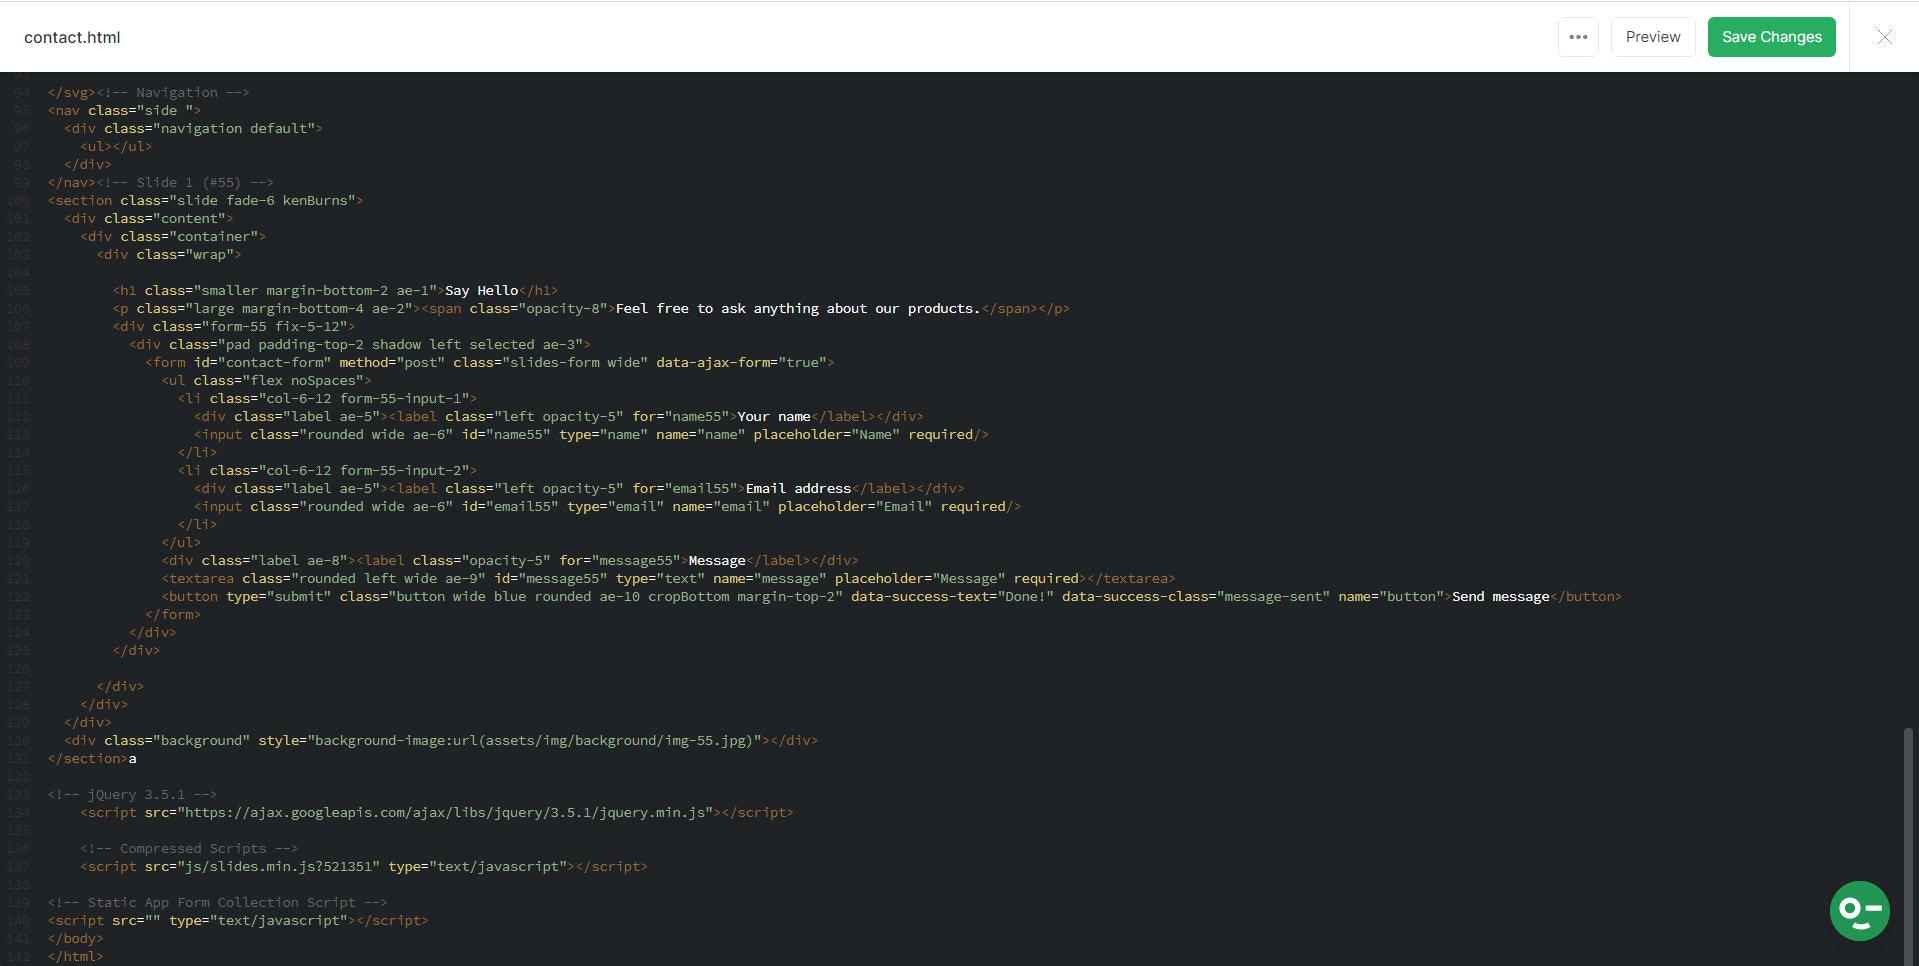
In order to make our slides contact page work, we need to put the static-form static-form-id=”contact_form” attributes inside our <form> tag and then click on the “Save Changes” button. The static-form attribute allows you to collect any data from forms. While static-form-id=”contact_form” will create a new database called “contact_form” where all of our data submissions will be stored.
The <form> tag should look like this:
<form static-form static-form-id=”contact_form” id=”contact-form” method=”post” class=”slides-form wide” data-ajax-form=”true”>
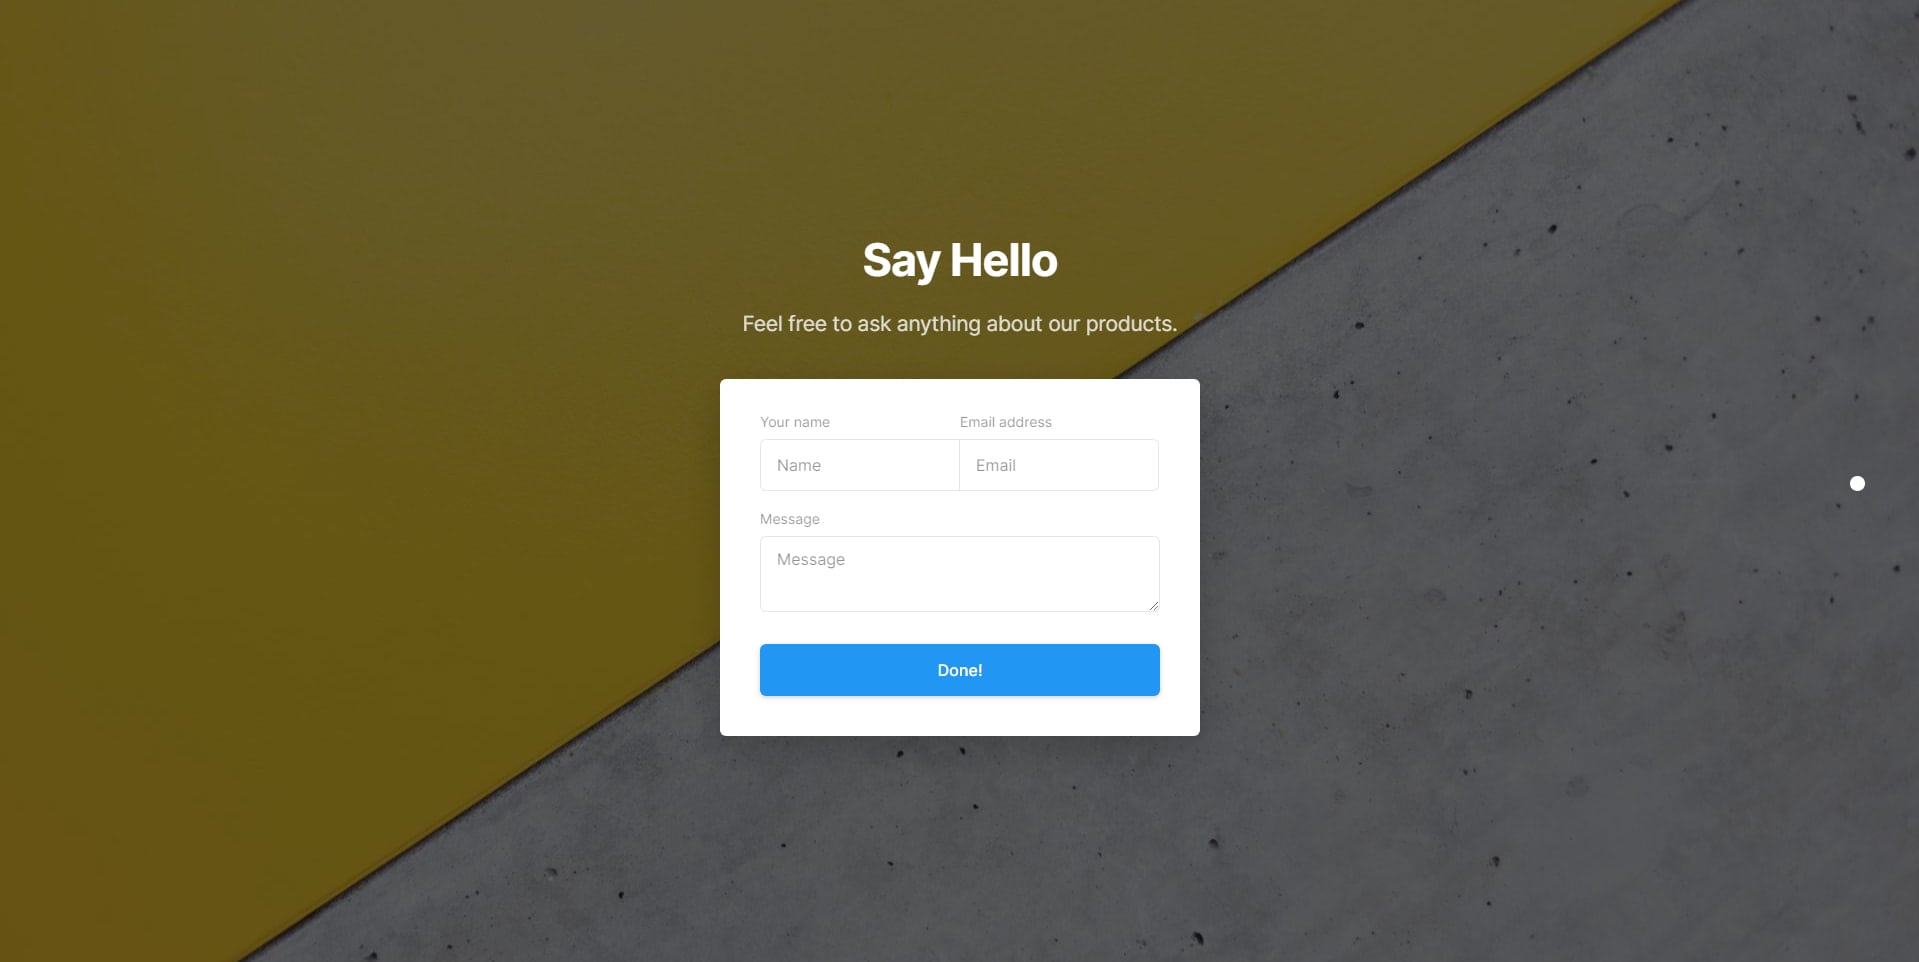
Finally, if we visit our contact page link via yourdomainame.static.app/contact which is the sub-domain we set up for this website, we will see the same output as the image below.
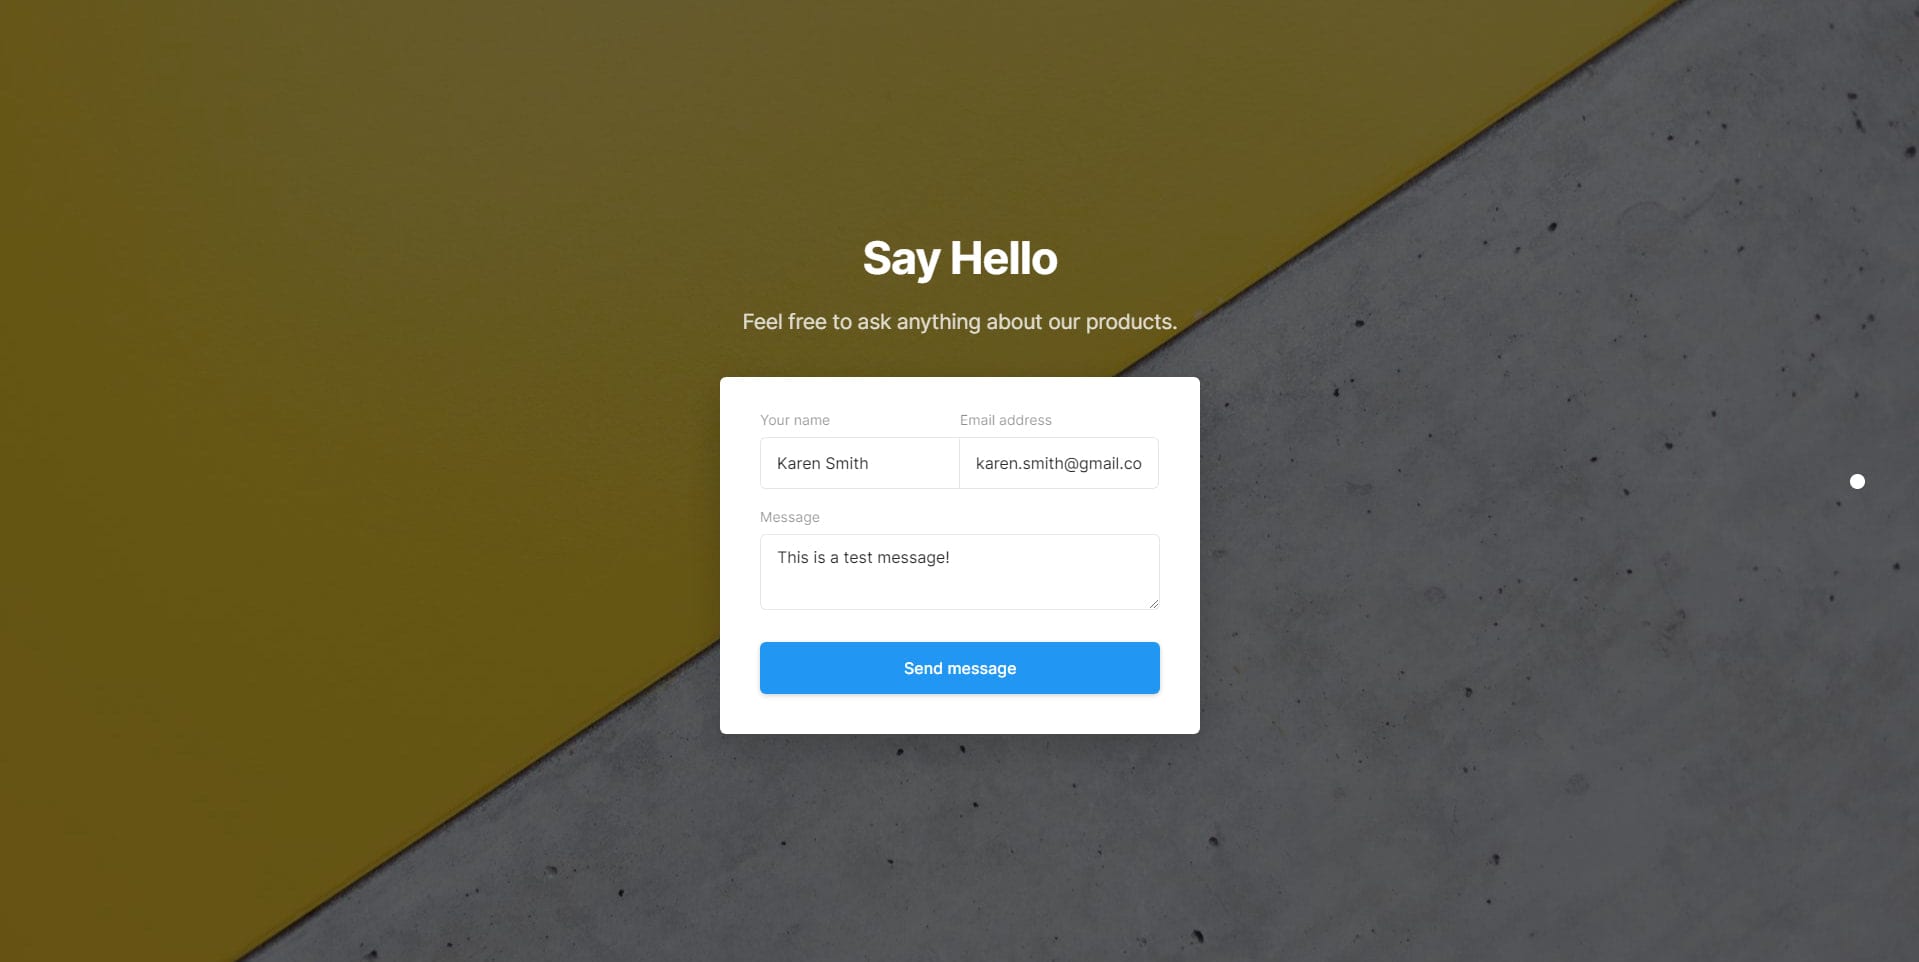
Now it’s time to test our slides’ contact page form. Let’s fill up some information on the contact form and click on the “Send Message” button. Once the form is submitted, the button text will change from “Send Message” to “Done” as seen in the images below.
Managing contact form submissions
Now to check the form submissions for this form, click on the “Forms” link on the top menu and you will see the list of form databases that you have on your website.
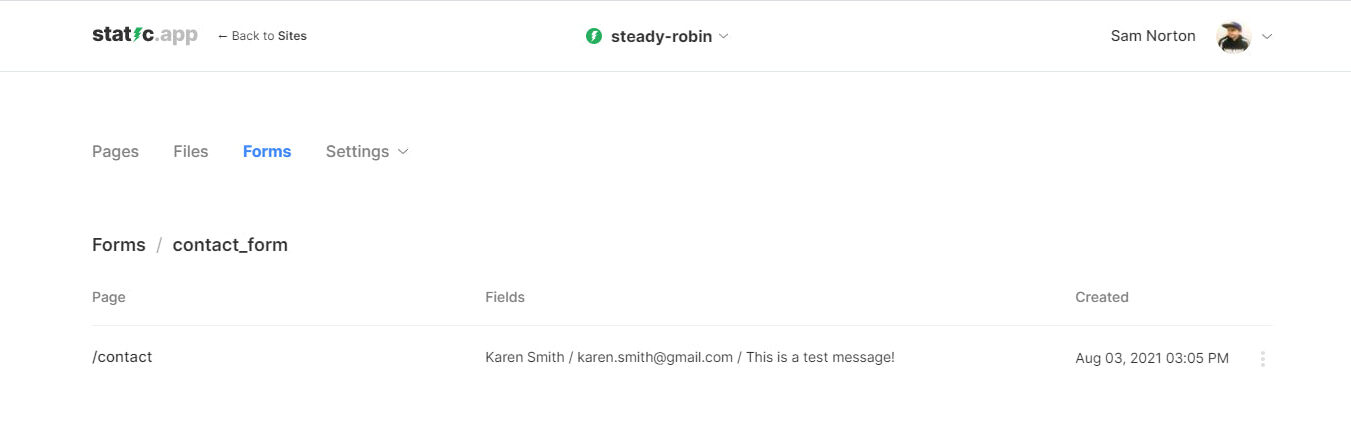
If you will remember, we named our database “contact_form” when we set it up on our <form> tag above. So if you go and click on the “contact_form” link, it will list all of your form submissions for this database as seen in the image below.
In order to check the contents of each form submission, simply click on the item you want to check and a modal with the form submission information will pop up.
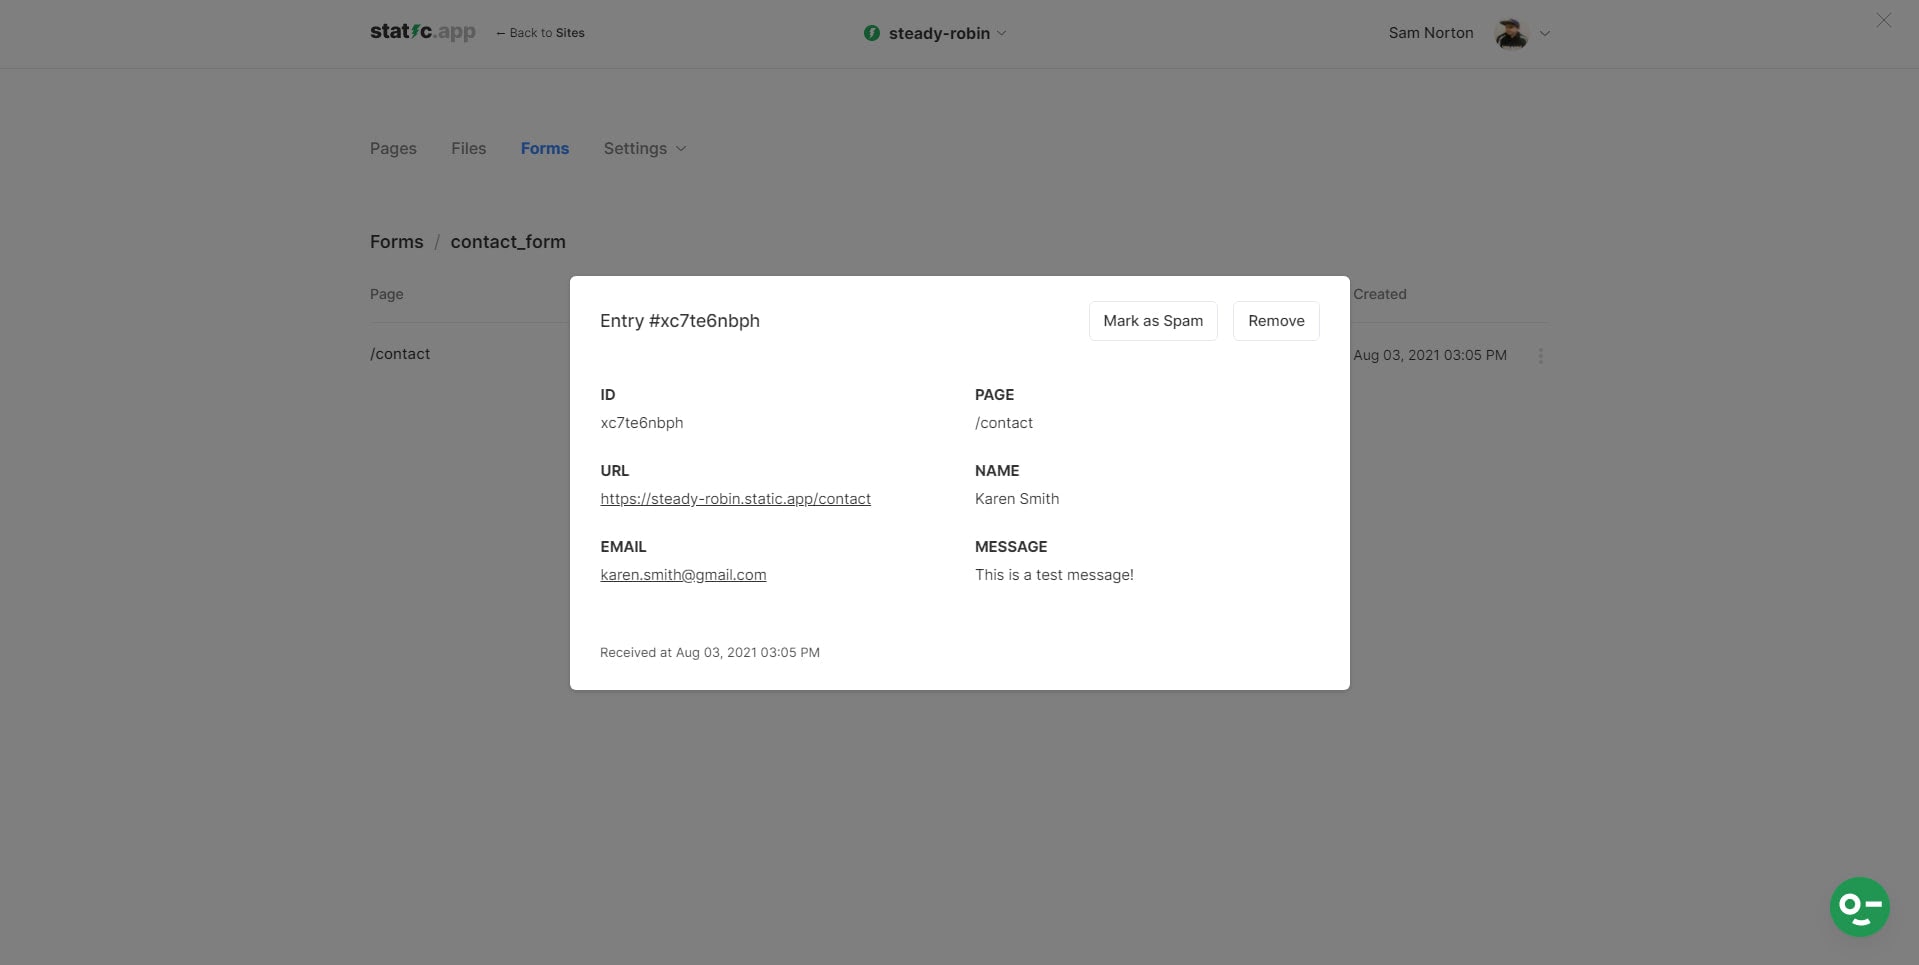
Clicking on the three vertical dots on the right corner of the item you want to view followed by clicking the “View Entry” link will have the same output as seen in the image below.
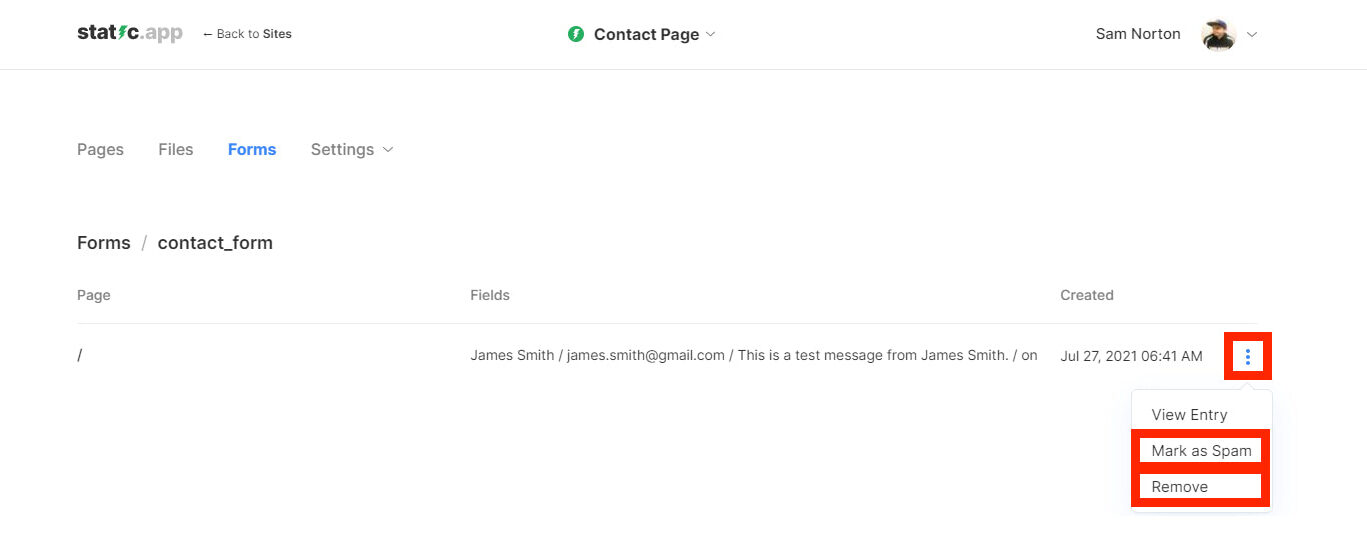
Additionally, you can also delete an item or mark an item as spam by clicking on the “Mark as Spam” or “Remove” link.
Wrapping up
Slides make it easy for us to generate forms and pages with beautifully coded awesome designs. You can quickly create your own UI design in just a matter of seconds. At the top of it all, you can customize it according to your liking.
On the other hand, Static.app simplifies the management of form submissions using the static-form feature.
Combining these two together will make your contact page creation effortless. You don’t even have to deal with external SMTP services and technologies or even to learn hardcore programming in order to have a properly working contact form.