How to Create an Upload Form using jQuery, CSS3, HTML5 and PHP
Difficulty: Advanced
Estimated Completion Time: 1 hour
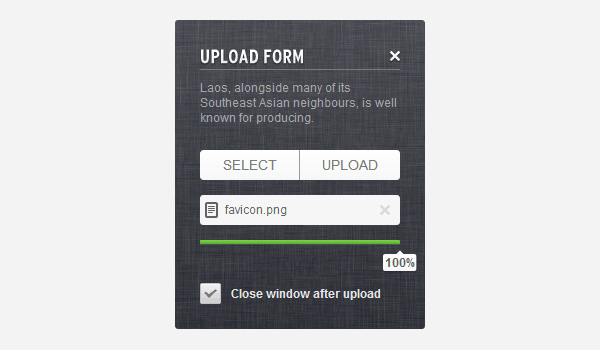
In this tutorial we will code an Upload Form from Impressionist UI. We will code it using the Plupload API. Plupload allows you to upload files using HTML5 Gears, Silverlight, Flash, BrowserPlus or normal forms, providing some unique features such as upload progress, image resizing and chunked uploads. This way we are able to create a very powerful upload form compatible with all browsers. So let’s get started.
Step 1 – Files Structure
The file structure is very simple. First you need to download the “Plupload API” and the “jQuery UI Progressbar”. Then create all the necessary folders and add the files mentioned bellow.
- css – Add here the .css files.
- img – Add here the images.
- js – Add here the scripts.
- uploads – Here will be saved the uploaded files.
-css
	-style.css
-img
	-images files here
-js
	-jquery-progressbar.min.js
	-plupload.full.js
	-plupload.flash.swf
	-plupload.silverlight.xap
-uploads
	-uploaded files goes here
-index.html
-upload.php
Step 2 – HTML Markup
Create a <div> with the class “upload-form” and id “uploader”. Then we need to add the heading, the close button, the text paragraph, the select and upload buttons, the <div> were we will add the selected files, the progress bar and the close after upload checkbox.
<div class="upload-form" id="uploader">

    <!-- Form Heading -->
    <h1 class="replace-text">Upload Form</h1>
    <a href="#" class="close" title="Close Window"><img src="img/close-button.png" alt="Close"></a>

    <p>Laos, alongside many of its Southeast Asian neighbours, is well known for producing.</p>

    <!-- Select & Upload Button -->
    <div>
        <a class="button" id="pickfiles" href="#">Select</a>
        <a class="button" id="uploadfiles" href="#">Upload</a>
    </div>

    <!-- File List -->
    <div id="filelist" class="cb"></div>

    <!-- Progress Bar -->
    <div id="progressbar"></div>

    <!-- Close After Upload -->
    <div id="closeAfter">
        <span class="checkbox">
            <input type="checkbox" name="checkbox" id="checkbox">
            <label for="checkbox">Close window after upload</label>
        </span>
    </div>

</div>

Step 3 – Adding the Script Files
Next think that we will do is adding the JS scripts that we will use on our upload form. So we will start by adding the jQuery API, I’ve used the one hosted by Google CDN if you want you can download and host it on your own server. Next you need to add the “plupload.full.js” and the “jquery-progressbar.min.js” file. Add all this scripts to the <head> of you page.
With Postcards Email Builder you can create and edit email templates online without any coding skills! Includes more than 100 components to help you create custom emails templates faster than ever before.
Free Email BuilderFree Email Templates
<!DOCTYPE html>
<html lang="en">
<head>
    <meta charset="utf-8">
    <title>Upload Form Tutorial - by Valeriu Timbuc for Design Modo</title>

    <!-- Stylesheets -->
    <link rel="stylesheet" href="css/style.css" media="screen">

    <!-- Scripts -->
    <script src="https://ajax.googleapis.com/ajax/libs/jquery/1.7.2/jquery.min.js"></script>
    <script src="js/plupload.full.js"></script>
    <script src="js/jquery-progressbar.min.js"></script>
</head>
<body>
    <!-- Your body content goes here -->
</body>
</html>
Step 4 – Upload Form Configuration
In this step we will add the upload form functionality. Without this code it will not work. I’ve explained what does each piece of code with inline comments. Make sure you read them. If you have any question you can post on the comments. For more configuration setting you can read the Plupload Documentation.
<script>
	// Upload Form
	$(function() {
		// Settings ////////////////////////////////////////////////
		var uploader = new plupload.Uploader({
			runtimes: 'html5,flash,silverlight', // Set runtimes, here it will use HTML5, if not supported will use flash, etc.
			browse_button: 'pickfiles', // The id on the select files button
			multi_selection: false, // Allow to select one file each time
			container: 'uploader', // The id of the upload form container
			max_file_size: '100kb', // Maximum file size allowed
			url: 'upload.php', // The url to the upload.php file
			flash_swf_url: 'js/plupload.flash.swf', // The url to the flash file
			silverlight_xap_url: 'js/plupload.silverlight.xap', // The url to the silverlight file
			filters: [{title: "Image files", extensions: "jpg,gif,png"}] // Filter the files that will be showed on the select files window
		});

		// Start Upload ////////////////////////////////////////////
		// When the button with the id "#uploadfiles" is clicked the upload will start
		$('#uploadfiles').click(function(e) {
			uploader.start();
			e.preventDefault();
		});

		uploader.init(); // Initializes the Uploader instance and adds internal event listeners.

		// Selected Files //////////////////////////////////////////
		// When the user selects a file it will append one div with the class "addedFile" and a unique id to the "#filelist" div.
		// This appended div will contain the file name and a remove button
		uploader.bind('FilesAdded', function(up, files) {
			$.each(files, function(i, file) {
				$('#filelist').append('<div class="addedFile" id="' + file.id + '">' + file.name + '<a href="#" id="' + file.id + '" class="removeFile"></a></div>');
			});
			up.refresh(); // Reposition Flash/Silverlight
		});

		// Error Alert /////////////////////////////////////////////
		// If an error occurs an alert window will popup with the error code and error message.
		// Ex: when a user adds a file with a not allowed extension
		uploader.bind('Error', function(up, err) {
			alert("Error: " + err.code + ", Message: " + err.message + (err.file ? ", File: " + err.file.name : ""));
			up.refresh(); // Reposition Flash/Silverlight
		});

		// Remove file button //////////////////////////////////////
		// On click remove the file from the queue
		$(document).on('click', 'a.removeFile', function(e) {
			uploader.removeFile(uploader.getFile(this.id));
			$('#' + this.id).remove();
			e.preventDefault();
		});

		// Progress bar ////////////////////////////////////////////
		// Add the progress bar when the upload starts
		// Append the tooltip with the current percentage
		uploader.bind('UploadProgress', function(up, file) {
			var progressBarValue = up.total.percent;
			$('#progressbar').fadeIn().progressbar({
				value: progressBarValue
			});
			$('#progressbar .ui-progressbar-value').html('<span class="progressTooltip">' + up.total.percent + '%</span>');
		});

		// Close window after upload ///////////////////////////////
		// If checkbox is checked when the upload is complete it will close the window
		uploader.bind('UploadComplete', function() {
			if ($('.upload-form #checkbox').is(':checked')) {
				$('.upload-form').fadeOut('slow');
			}
		});

		// Close window ////////////////////////////////////////////
		// When the close button is clicked close the window
		$('.upload-form .close').on('click', function(e) {
			$('.upload-form').fadeOut('slow');
			e.preventDefault();
		});

	}); // end of the upload form configuration
</script>
Step 5 – Form Wrapper
Now we’ll start styling our form. First we’ll add some reset styles to the elements that we will be using. Then we’ll style the form container: add a background pattern and a css3 gradient on top; set the width to 200px (the total will be 250px because of the paddings); set the minimum height to 180px (the total will be 270px because of the paddings), we need to set the minimum because when we will add files to upload the box will need to be bigger; and add the rounded corners. We will also add a clear floats class to use it further.
/* Reset */
.upload-form,
.upload-form div,
.upload-form span,
.upload-form input,
.upload-form a,
.upload-form h1,
.upload-form p {
	margin: 0;
	padding: 0;
	border: none;
	outline: none;
}

/* Form Container */
.upload-form {
	position: relative;
	z-index: 100;
	cursor: default;
	width: 200px;
	min-height: 180px;
	padding: 25px 25px 65px 25px;

	-webkit-border-radius: 3px;
	-moz-border-radius: 3px;
	border-radius: 3px;

	background: url(../img/upload-bg.png);
	background: -webkit-linear-gradient(top, rgba(255,255,255,0.1) 0%, rgba(0,0,0,0.1) 100%), url(../img/upload-bg.png);
	background: -moz-linear-gradient(top, rgba(255,255,255,0.1) 0%, rgba(0,0,0,0.1) 100%), url(../img/upload-bg.png);
	background: -o-linear-gradient(top, rgba(255,255,255,0.1) 0%, rgba(0,0,0,0.1) 100%), url(../img/upload-bg.png);
	background: -ms-linear-gradient(top, rgba(255,255,255,0.1) 0%, rgba(0,0,0,0.1) 100%), url(../img/upload-bg.png);
	background: linear-gradient(top, rgba(255,255,255,0.1) 0%, rgba(0,0,0,0.1) 100%), url(../img/upload-bg.png);
}

/* Clear Floats */
.upload-form .cb { clear: both; }
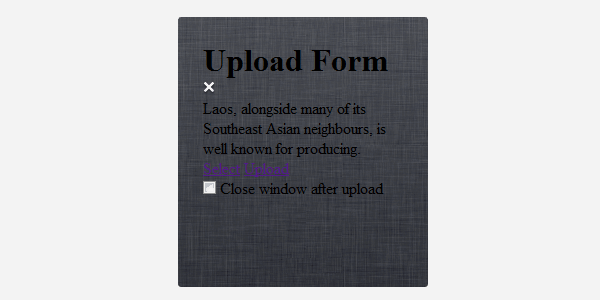
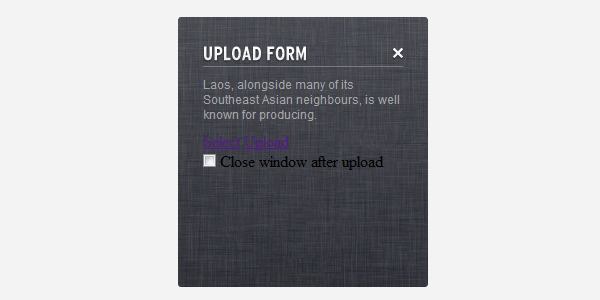
To style the title we will set the font, the size, the color, etc. In this form I’ve added an image for the heading, so I’ve created a new class “replace-text” to replace the text with the image, basically we are hiding the text using the text-indent property and adding the image as a background. For the close button we will set the width and height and position it on the form container. To finish we will add some basic typography styles to the text paragraph.
/* Form Title */
.upload-form h1 {
	font-family: 'Trebuchet MS', sans-serif;
	font-weight: bold;
	text-transform: uppercase;
	font-size: 18px;
	color: #f6f6f6;
	text-shadow: 0px 1px 1px rgba(0,0,0, .65);
	padding-bottom: 2px;
	border-bottom: 1px solid #7a7b80;
}

/* Replace Title with Image */
.upload-form h1.replace-text {
	display: block;
	width: 100%;
	height: 17px;
	padding-bottom: 7px;
	text-indent: -9999px;
	background: url(../img/title.png) no-repeat left center;
}

/* Close Button */
.upload-form .close {
	position: absolute;
	display: block;
	width: 12px;
	height: 12px;
	top: 28px;
	right: 24px;
}

/* Paragraph */
.upload-form p {
	padding: 10px 0;
	font-family: sans-serif;
	font-size: 12px;
	color: #a4a5a8;
}
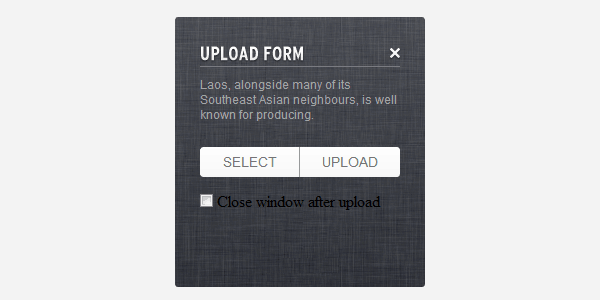
Let’s style the buttons. We’ll start by adding the styles for both of them (css3 gradients, font, size and color, etc.). Then we will style the select button: set the width to 99px; make the left corners rounded; add a right border. For the upload button we will set the width to 100px and make the right corners rounded.
/* Select &amp;amp; Upload Buttons */
.upload-form .button {
display: inline-block;
height: 30px;
margin: 15px 0;
font-family: sans-serif;
font-size: 14px;
color: #777;
text-decoration: none;
text-transform: uppercase;
text-align: center;
line-height: 30px;
background: #ffffff;
background: -webkit-linear-gradient(top, #ffffff 0%, #f6f6f6 100%);
background: -moz-linear-gradient(top, #ffffff 0%, #f6f6f6 100%);
background: -o-linear-gradient(top, #ffffff 0%, #f6f6f6 100%);
background: -ms-linear-gradient(top, #ffffff 0%, #f6f6f6 100%);
background: linear-gradient(top, #ffffff 0%, #f6f6f6 100%);
}
.upload-form .button:hover {
background: #f2f2f2;
background: -webkit-linear-gradient(top, #f2f2f2 0%, #eaeaea 100%);
background: -moz-linear-gradient(top, #f2f2f2 0%, #eaeaea 100%);
background: -o-linear-gradient(top, #f2f2f2 0%, #eaeaea 100%);
background: -ms-linear-gradient(top, #f2f2f2 0%, #eaeaea 100%);
background: linear-gradient(top, #f2f2f2 0%, #eaeaea 100%);
}
.upload-form #pickfiles {
width: 99px;
float: left;
border-right: 1px solid #999;
-webkit-border-radius: 3px 0 0 3px;
-moz-border-radius: 3px 0 0 3px;
border-radius: 3px 0 0 3px;
}
.upload-form #uploadfiles {
width: 100px;
float: right;
-webkit-border-radius: 0 3px 3px 0;
-moz-border-radius: 0 3px 3px 0;
border-radius: 0 3px 3px 0;
}
Step 8 – Selected Files
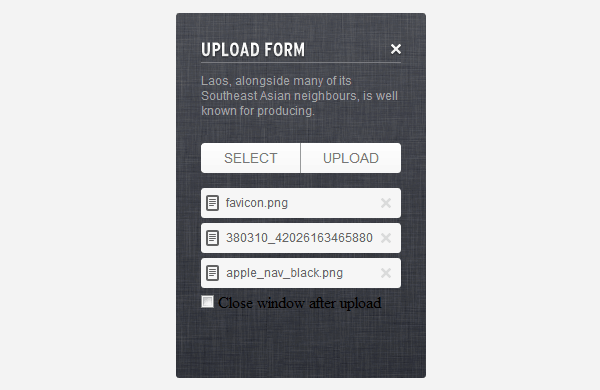
In this step we will style the selected files that were added to the upload queue. We will give some basics styles to it (background, typography, size, etc.). Then we need to style the “remove file from queue button”, the styles are also basic (width, height, background, etc.).
With Startup App and Slides App you can build unlimited websites using the online website editor which includes ready-made designed and coded elements, templates and themes.
Try Startup App Try Slides AppOther Products
/* Added Files */
.upload-form .addedFile {
	position: relative;
	display: block;
	overflow: hidden;
	word-break: break-all;
	margin-bottom: 5px;
	padding: 0 0 0 25px;
	height: 30px;

	font-family: sans-serif;
	font-size: 12px;
	line-height: 30px;
	color: #646464;

	background: #f6f6f6 url(../img/file.png) no-repeat 5px center;

	-webkit-border-radius: 3px;
	-moz-border-radius: 3px;
	border-radius: 3px;
}

/* Remove File Button */
.upload-form a.removeFile {
	position: absolute;
	display: block;
	width: 10px;
	height: 10px;
	top: 10px;
	right: 10px;
	background: url(../img/remove-file.png);
}
Step 9 – Upload Progress Bar
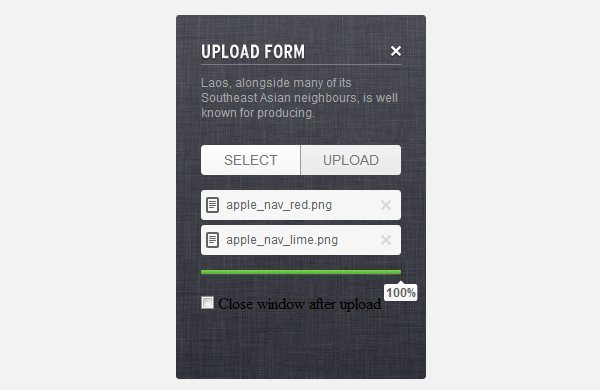
Now it’s time to style our upload progress bar. As we are using the jQuery UI progress bar we need to use the classes generated by the UI in order to style it. We will start by giving a 4px height and 1px border radius. Then we will add a default background color and some shadows. After that we need to style the uploaded progress using a green css3 gradient. To finish we will style the tooltip that will show the uploaded percentage.
/* Progress Bar */
.upload-form .ui-progressbar,
.upload-form .ui-progressbar-value {
	position: relative;
	height: 4px;

	-webkit-border-radius: 1px;
	-moz-border-radius: 1px;
	border-radius: 1px;
}

.upload-form .ui-progressbar {
	cursor: pointer;
	margin: 15px 0 20px 0;
	background: #242424;

	-webkit-box-shadow: 0px 1px 0px rgba(255,255,255, .1);
	-moz-box-shadow: 0px 1px 0px rgba(255,255,255, .1);
	box-shadow: 0px 1px 0px rgba(255,255,255, .1);
}

.upload-form .ui-progressbar-value {
	background: #82d344;
	background: -webkit-linear-gradient(top, #82d344 0%, #51af34 100%);
	background: -moz-linear-gradient(top, #82d344 0%, #51af34 100%);
	background: -o-linear-gradient(top, #82d344 0%, #51af34 100%);
	background: -ms-linear-gradient(top, #82d344 0%, #51af34 100%);
	background: linear-gradient(top, #82d344 0%, #51af34 100%);
}

.upload-form .ui-progressbar-value span.progressTooltip {
	position: absolute;
	display: block;
	width: 36px;
	height: 14px;
	padding: 5px 0 4px 0;
	top: 10px;
	right: -18px;

	font-family: sans-serif;
	font-weight: bold;
	line-height: 14px;
	text-align: center;
	font-size: 12px;
	color: #646464;

	background: transparent url(../img/tooltip.png) no-repeat;
}
Step 10 – CheckBox
As we can’t style checkboxes, the easiest way that I’ve found to style theme using only CSS it’s by replacing the checkbox input with a span tag. This will work this way: first we will hide the checkbox input and style the span tag like a checkbox and then we will update the checkbox using jQuery. So when we will click on the span tag jQuery will update the checkbox input to selected, and when we will click again the span tag jQuery will remove the “checked” from the checkbox input.
As some users may have the JavaScript disabled we need to add a fallback. To do that we will add with jQuery a “js” class to the body tag. So if the JavaScript will be enabled on the page load it will add a “js” class to the body and if the JavaScript is disabled the class will not be added. So only the users with JavaScript enabled will have the custom styled checkbox.
/* Close Checkbox */
.upload-form #closeAfter {
	position: absolute;
	bottom: 25px;
	left: 25px;
}

.js .upload-form span.checkbox input[type=checkbox] {
	position: fixed;
	left: -99px;
}

.upload-form span.checkbox {
	position: relative;
	margin-top: 15px;
	float: left;
}

.js .upload-form span.checkbox {
	width: 21px;
	height: 21px;
	cursor: pointer;
	background: url(../img/checkbox.png) no-repeat 0 -21px;
}

.js .upload-form span.checked { background-position: 0 0; }

.upload-form span.checkbox label {
	position: absolute;
	top: 3px;
	left: 31px;
	font-family: sans-serif;
	font-weight: bold;
	font-size: 12px;
	color: #e4e4e4;
	white-space: nowrap;
}
All the styles that have the “js” class at the beginning will only be applied if JavaScript is enabled.

Step 11 – Checkbox Script
First we’ll add the “js” class to the body tag and make the checkbox “checked” by default on load. Then we will check if the checkbox is checked and if the result is false the checked class will be removed from the span and if the result is “true” the checked class will be added to the span tag. And also we will update the checked / unchecked state to the hidden checkbox.
<script>
// Check Box Styling
$(document).ready(function() {

    var checkbox = $('.upload-form span.checkbox');

    // Check if JavaScript is enabled
    $('body').addClass('js');

    // Make the checkbox checked on load
    checkbox.addClass('checked').children('input').prop('checked', true);

    // Click function
    checkbox.on('click', function() {

        if ($(this).children('input').prop('checked')) {
            $(this).children('input').prop('checked', false);
            $(this).removeClass('checked');
        } else {
            $(this).children('input').prop('checked', true);
            $(this).addClass('checked');
        }

    });

});
</script>

Step 12 – Upload.php
Open the upload.php file and comment this line $targetDir = ini_get("upload_tmp_dir") . DIRECTORY_SEPARATOR . "plupload"; and uncomment this one $targetDir = 'uploads';.
Example:
// Settings
$targetDir = ini_get("upload_tmp_dir") . DIRECTORY_SEPARATOR . "plupload";
$targetDir = 'uploads';
Conclusion
We finished this tutorial. Now you have a great upload form that you can use on your projects. If you have any questions post it on the comments section. Don’t forget to subscribe us for more tutorials and great articles.


