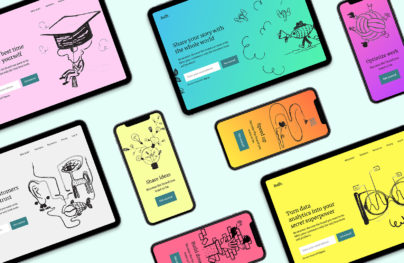
Flat UI Free – Framework and Bootstrap Theme Design
Flat UI Free is made on the basis of Twitter Bootstrap 3 in a stunning flat-style.
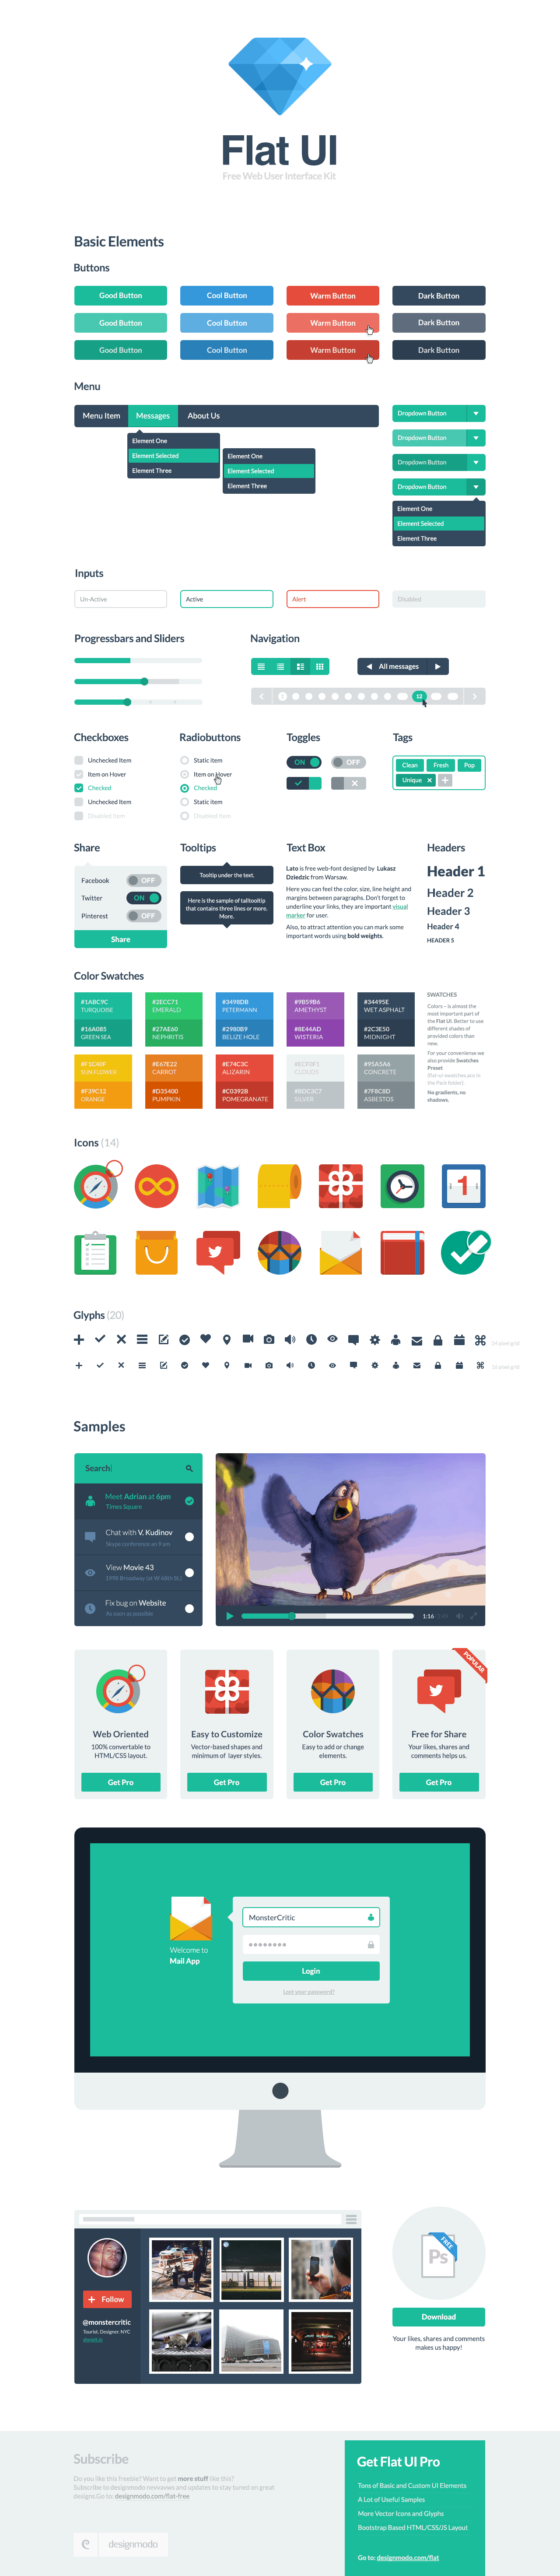
Flat UI Free contains many basic and complex components which are great for designers to have at hand: buttons, inputs, button groups, selects, checkboxes and radio-buttons, tags, menus, progress bars, sliders, navigation elements, and more.
Use the free/updated version of Bootstrap generator – Startup App.
We have considered your needs in developing the HTML version of our bootstrap theme, which contains the same elements as the PSD version and is perfect for creating great websites. With this Framework, you can spend even less time on routine work, saving that time for creativity.
Colored, stylish icons can easily be modified and used in a wide variety of projects, as they contain original layers. Glyphs are also available in PSD, HTML/CSS, and SVG formats.
Bootstrap theme design also includes color swatches – no worrying over color choices here – with 10 colors that perfectly suit each other. Flat UI Free is made using the Lato typeface.
With Postcards Email Builder you can create and edit email templates online without any coding skills! Includes more than 100 components to help you create custom emails templates faster than ever before.
Free Email BuilderFree Email TemplatesFlat UI – Free Bootstrap Theme
The Flat UI is made on the basis of Bootstrap, a comfortable and functional framework that simplifies the development of websites. The framework has been proven over the years by developers from around the world.
HTML version of Flat UI includes:
- Twitter Bootstrap 3 Framework based
- Retina Ready Images and Icons
- Custom form components
- Sleek CSS3 effects
- OOCSS approach
- Easily configurable color scheme
- New web-font and new web-font icons
PSD version of Flat UI includes:
- PSD files
- Layered (Shapes)
- Retina Ready
- Color swatches
- Glyphs – SVG format
- Free font used – Lato
Download Flat UI Free 2.2.2
Use the free/updated version of Bootstrap generator – Startup App.